VPC configuration
VPC Configuration
- In the AWS console interface, perform the following:
- Search for and select VPC
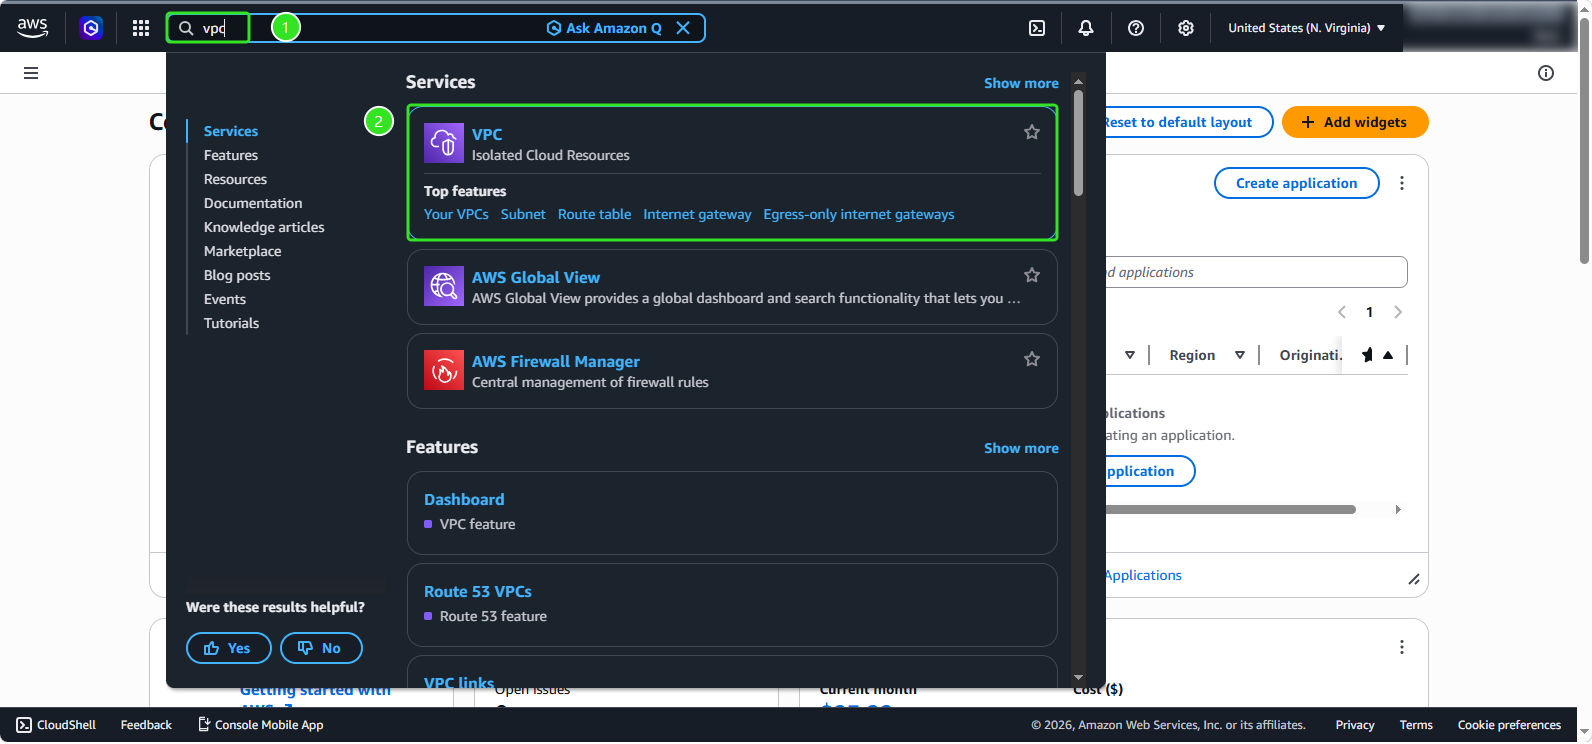
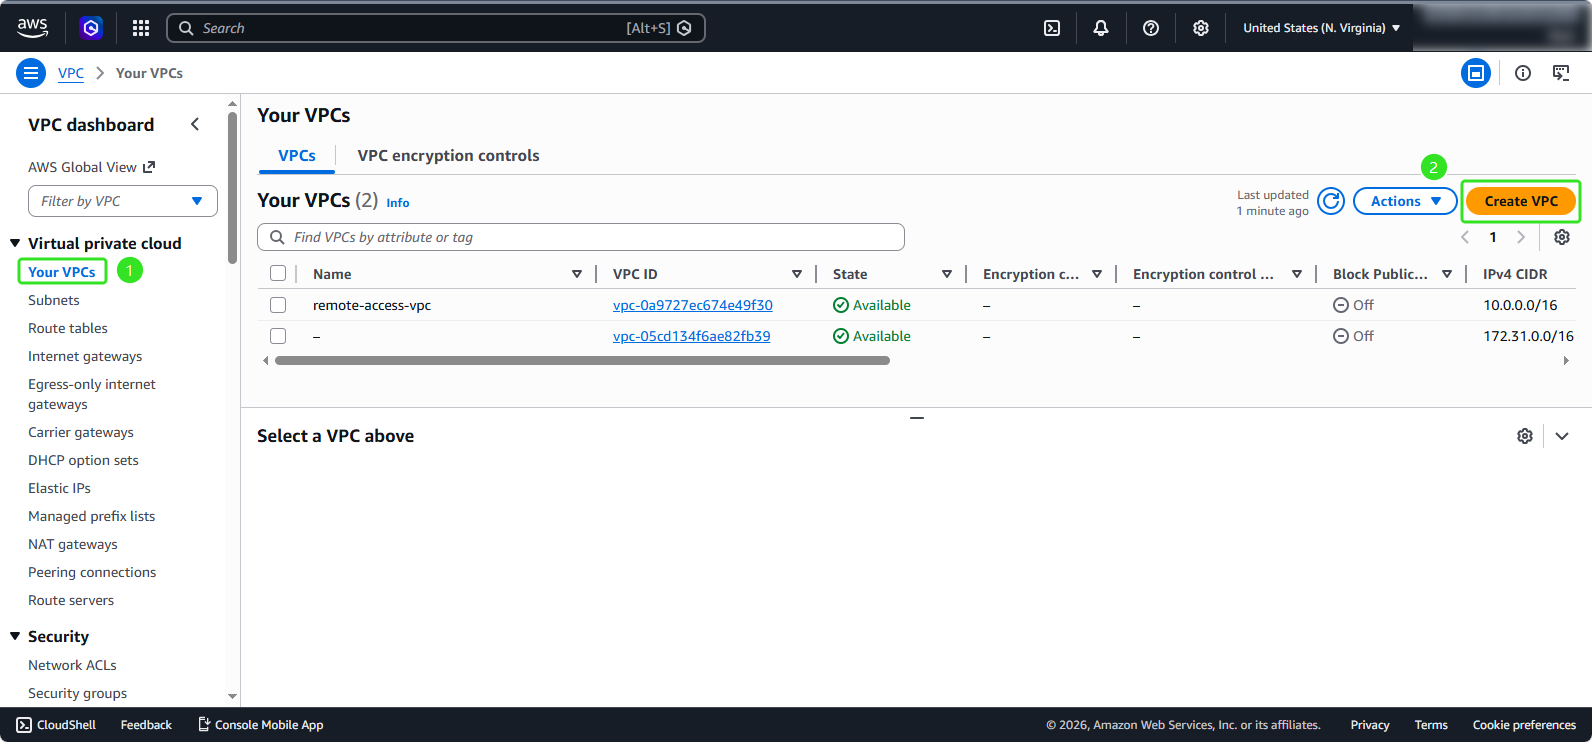
- In the VPC management interface:
- Select Your VPC
- Click on Create VPC
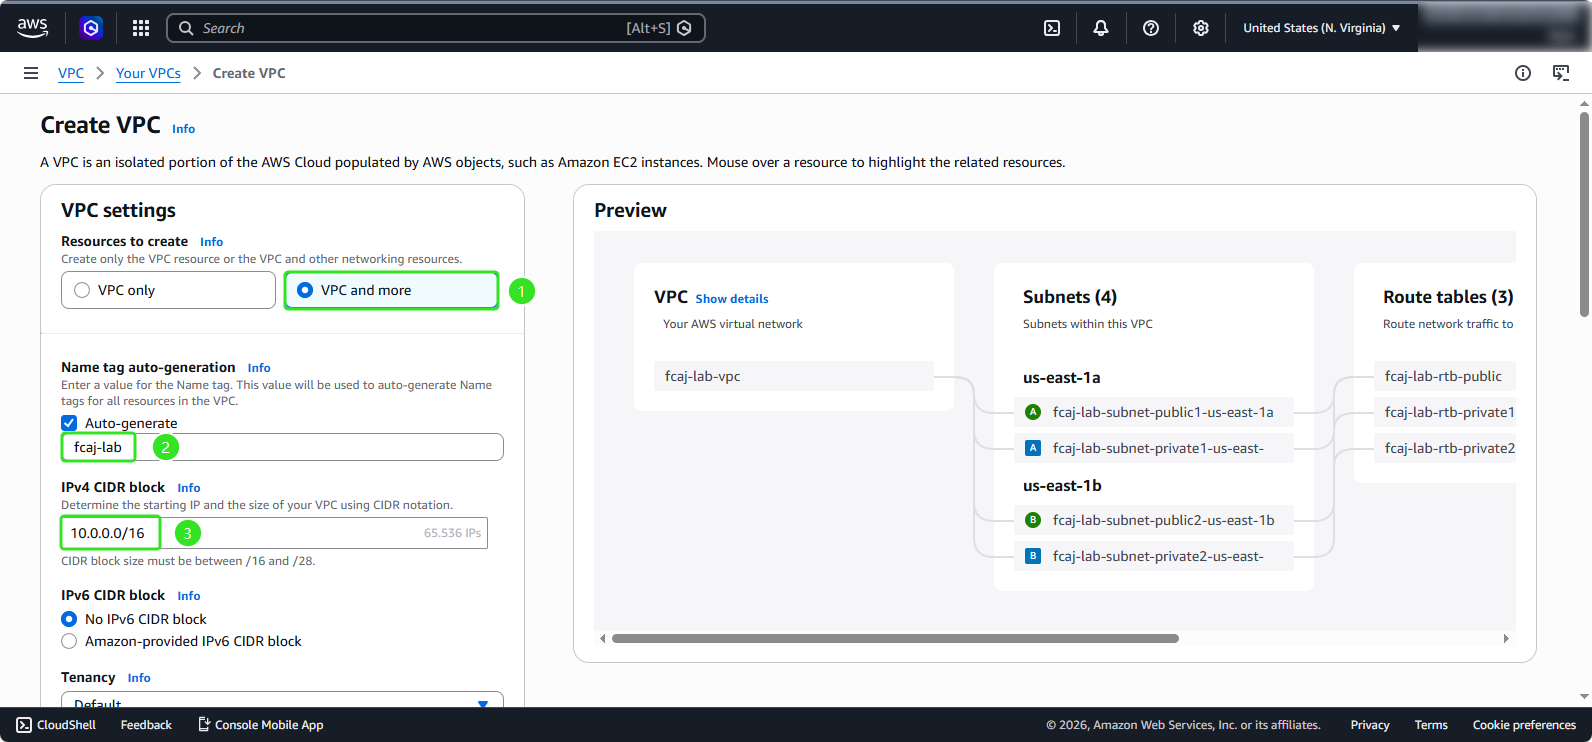
- The VPC configuration panel appears:
- Choose VPC and more
- Name it
fcaj-lab - Select CIDR block
10.0.0.0/16
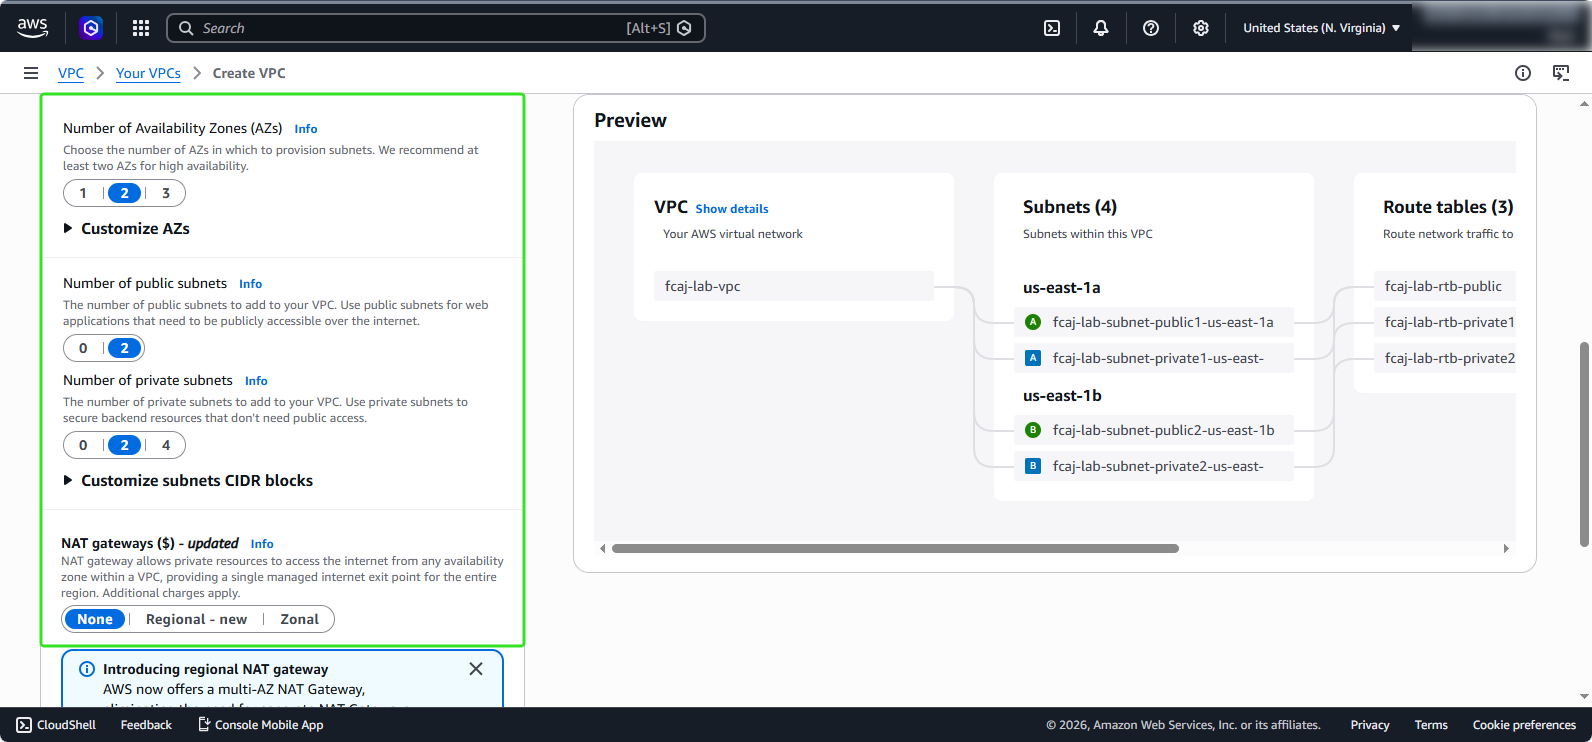
Configure the VPC architecture:
- Number of Availability Zones: 2 (for maximum resilience)
- Number of public subnets: 2 (one per AZ)
- Number of private subnets: 2 (one per AZ)
- NAT gateways: None (we’ll keep costs minimal for this lab)
- In the VPC endpoint section:
- Select None
- Click on Create VPC
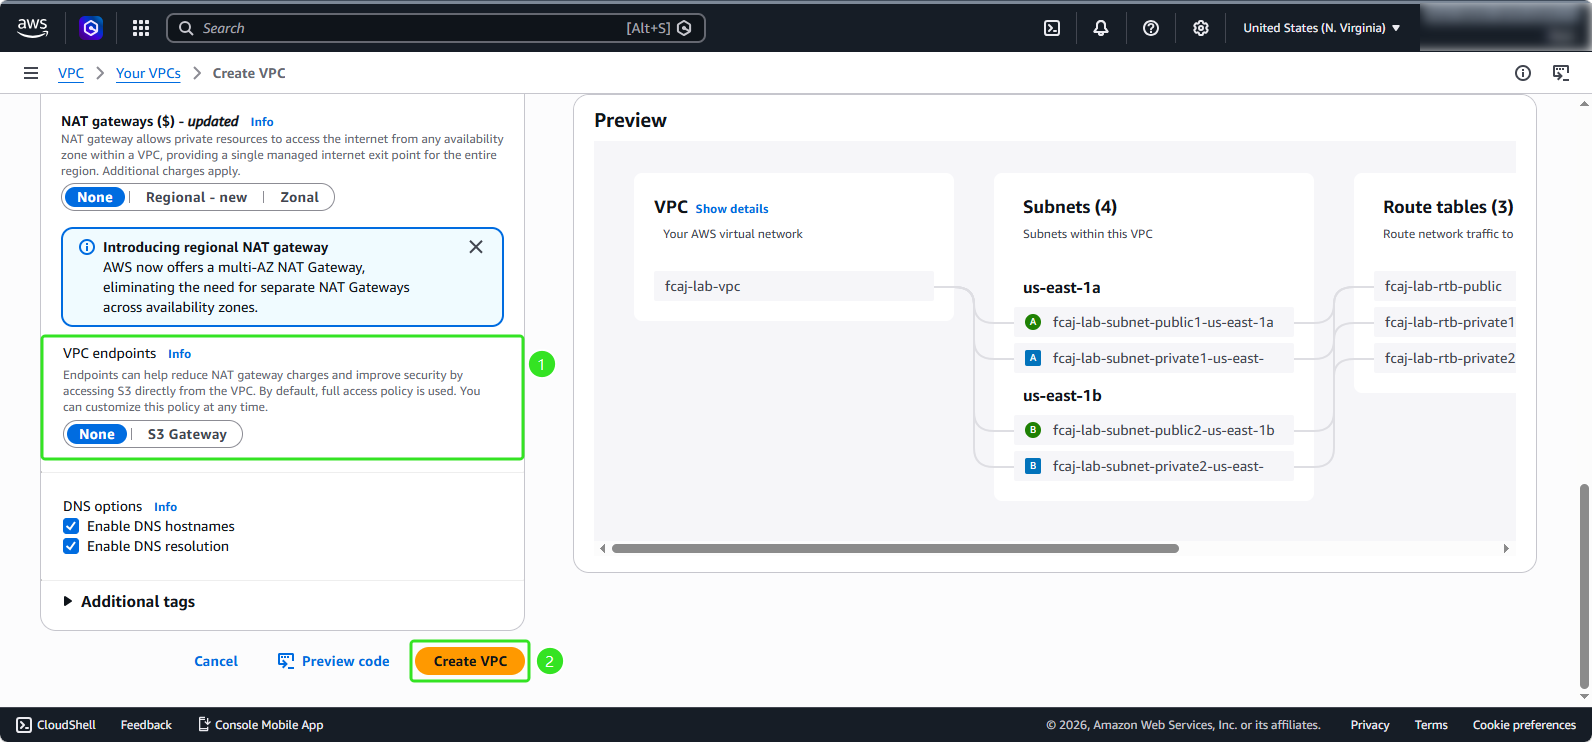
After creating the VPC, we will check the information of the newly created VPC (fcaj-lab-vpc)
Review the overview of the VPC configuration:
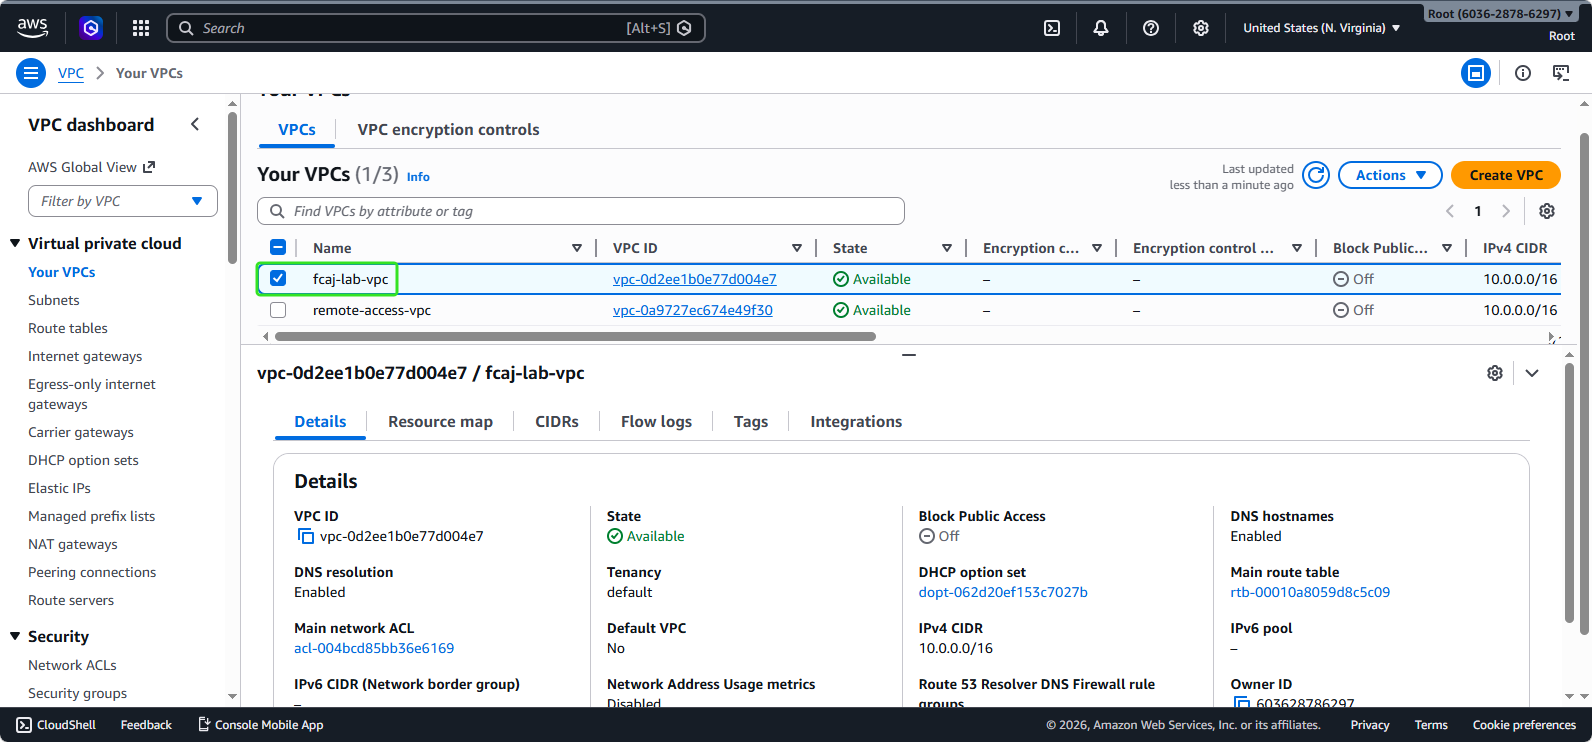
Public Subnet Configuration
ℹ️ Information: For EC2 instances in public subnets to receive public IP addresses automatically, we need to enable auto-assign public IPv4 addresses.
- In the VPC management interface, scroll down in the left sidebar:
- Select Subnet
- Select a public subnet: fcaj-lab-subnet-public1-us-east-1a
- Click Edit subnet settings
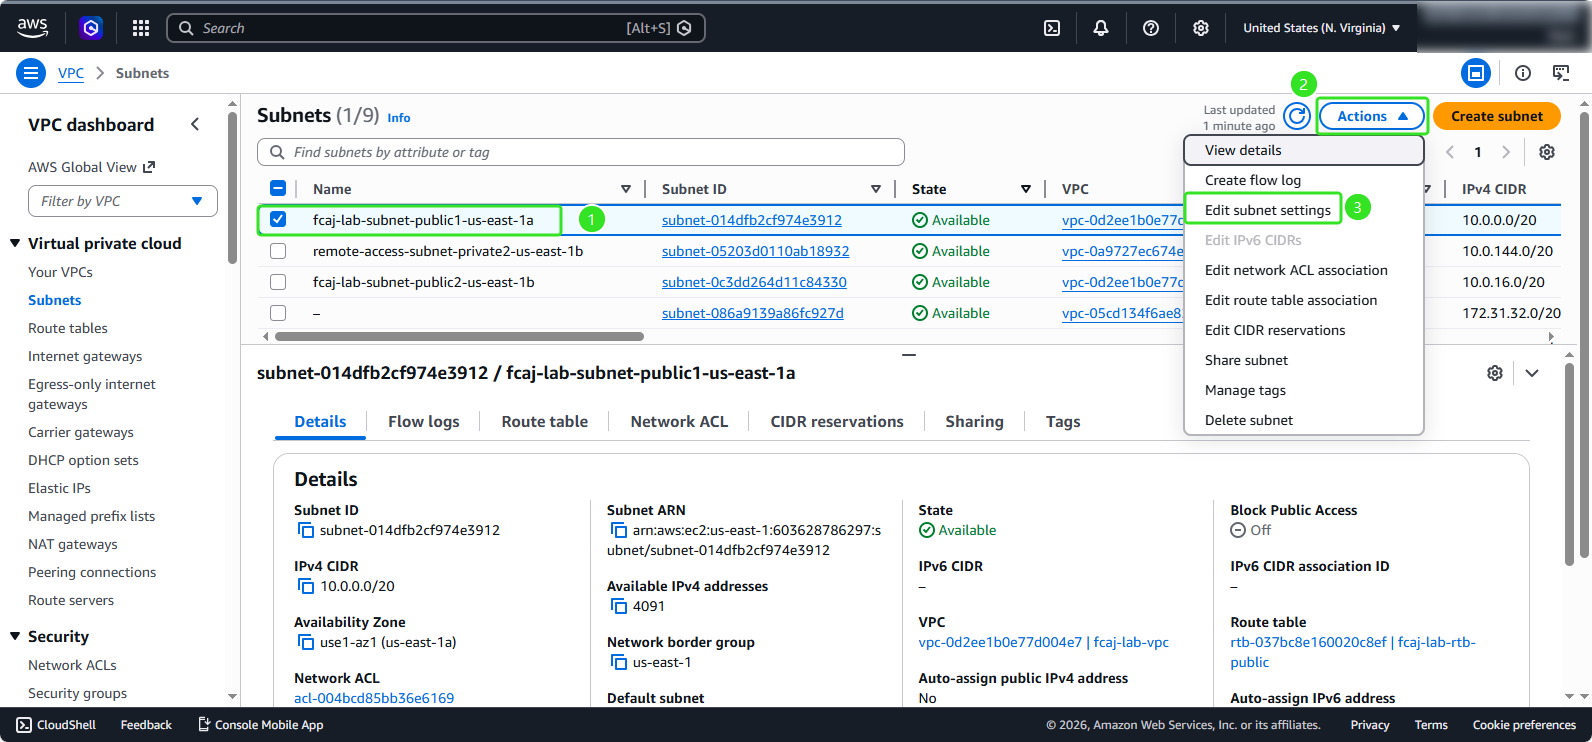
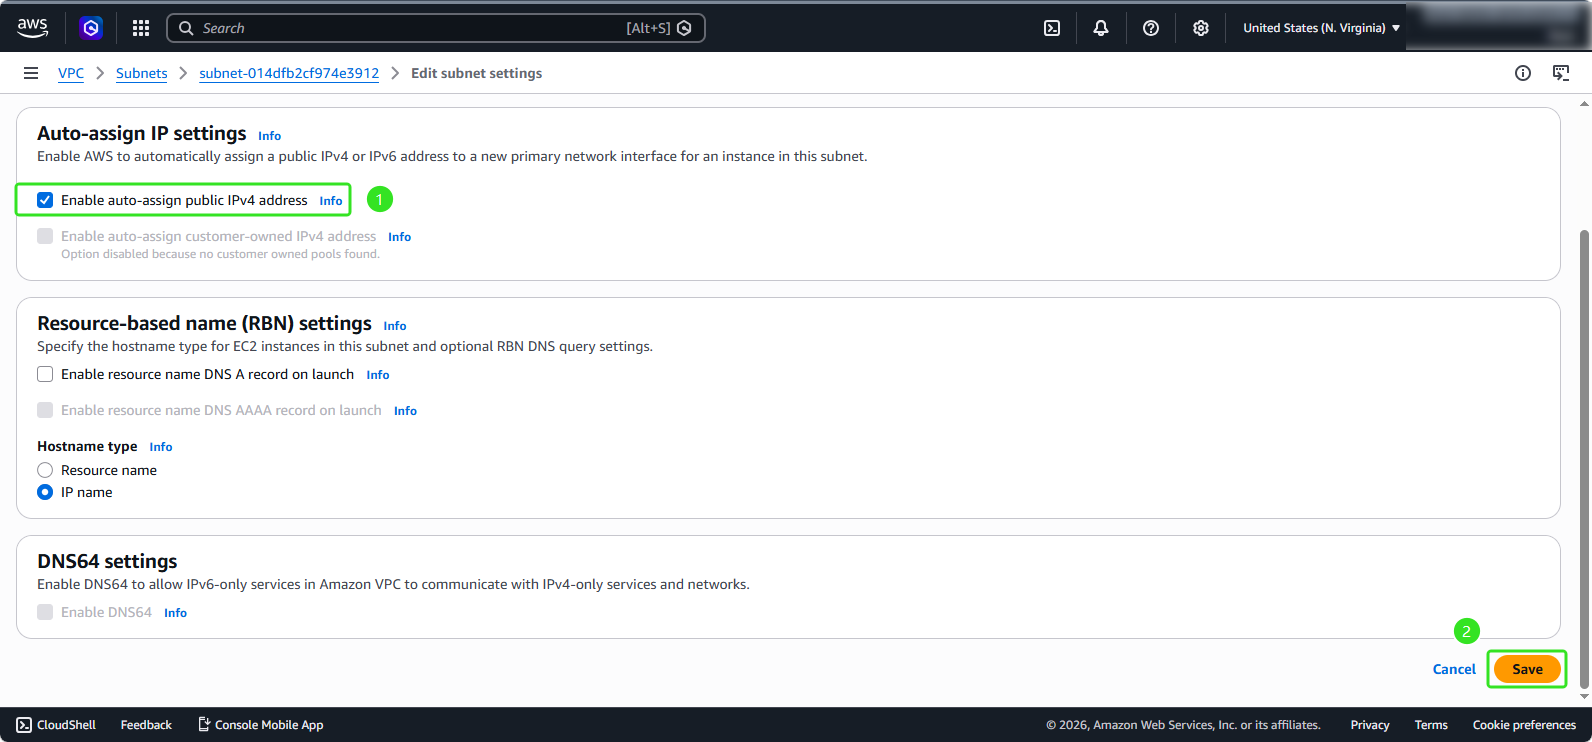
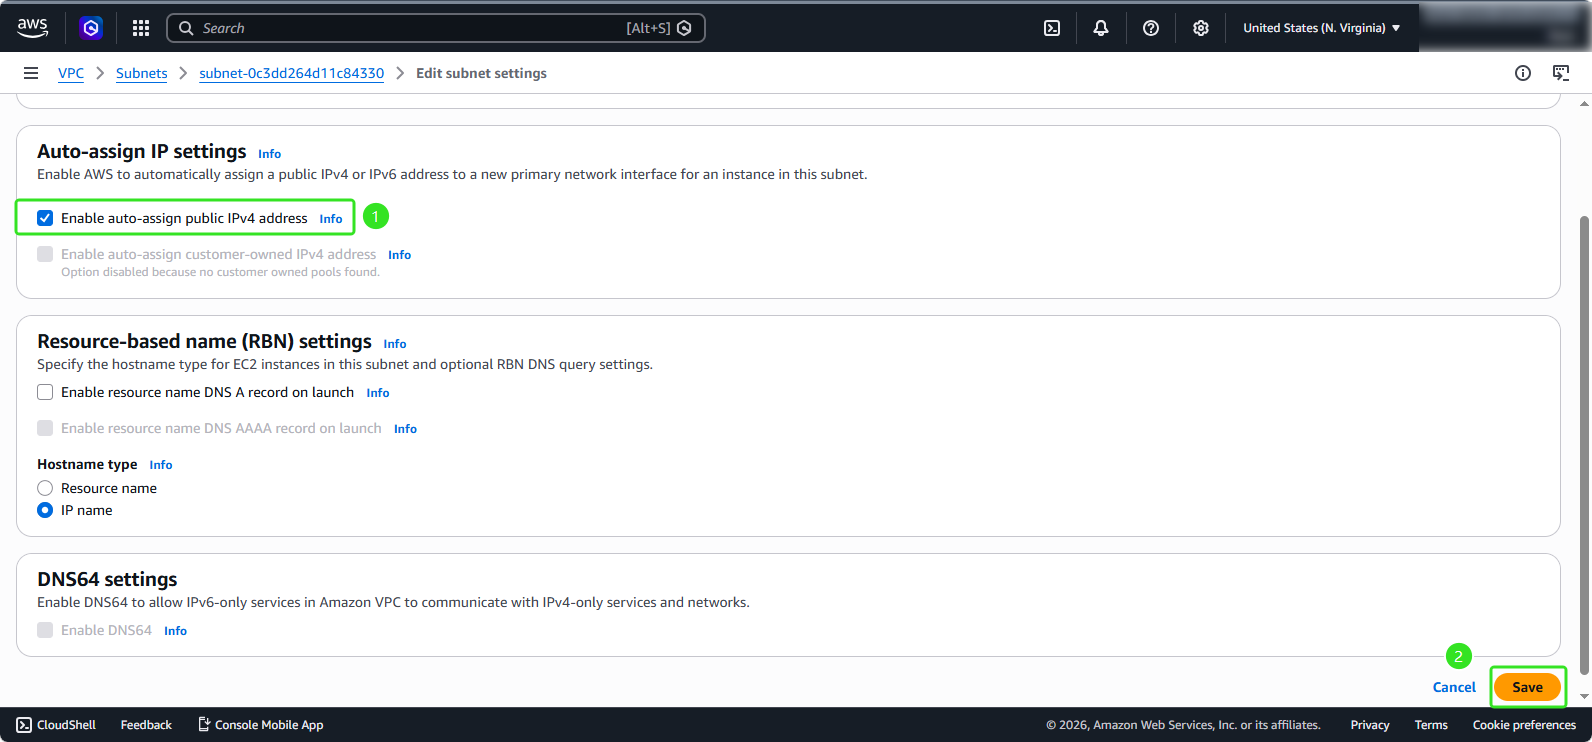
- The public subnet configuration panel appears:
- Check Enable auto-assign public IPv4 address
- Click Save
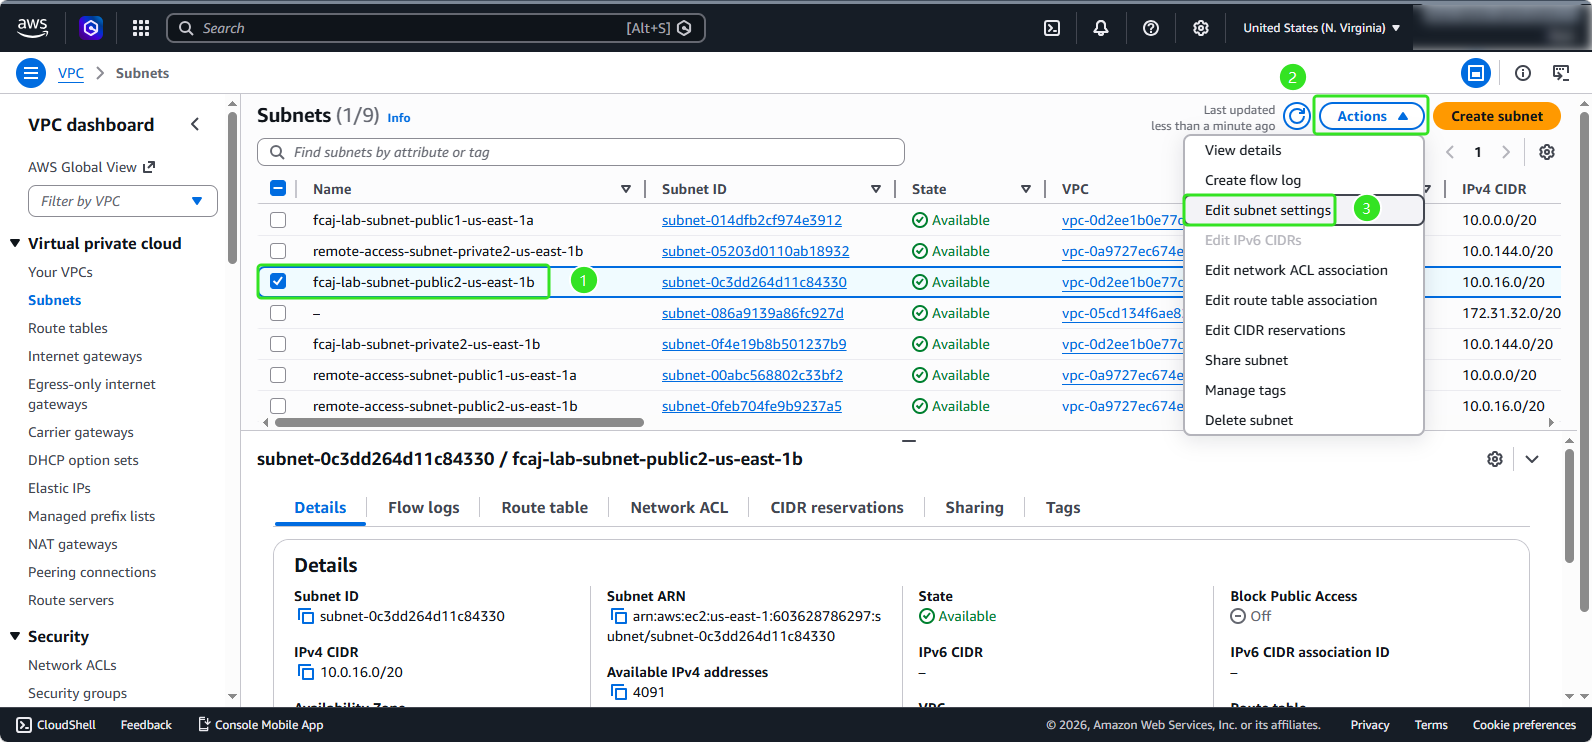
- Similarly, we will configure fcaj-lab-subnet-public-1b:
- Select fcaj-lab-subnet-public2-us-east-1b
- Click on Action
- Choose Edit subnet settings
- Check Enable auto-assign public IPv4 address. Click Save
Thus, we have configured the VPC and enabled public IPv4 for the public subnets.