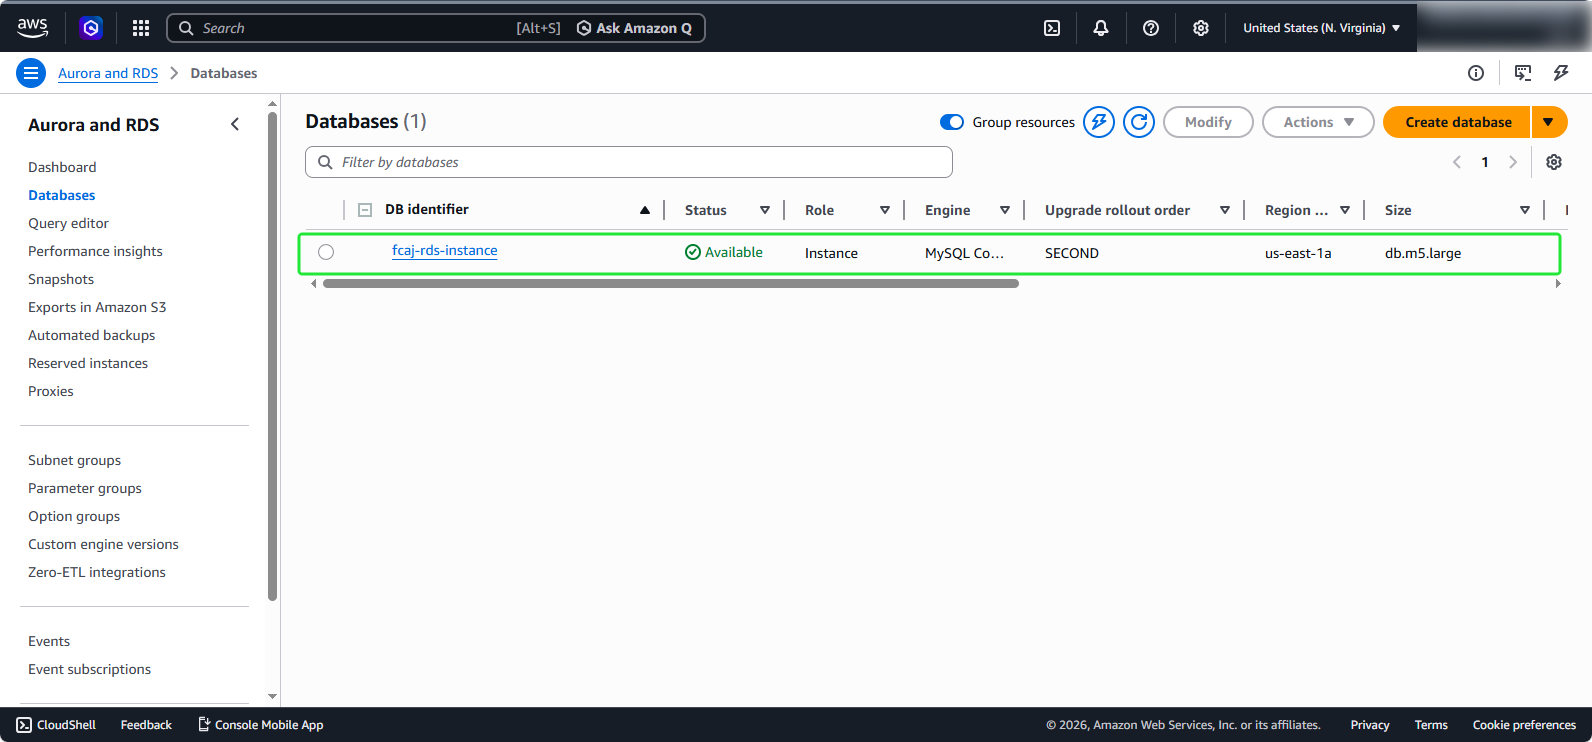
Launch RDS Instance
Create RDS Instance
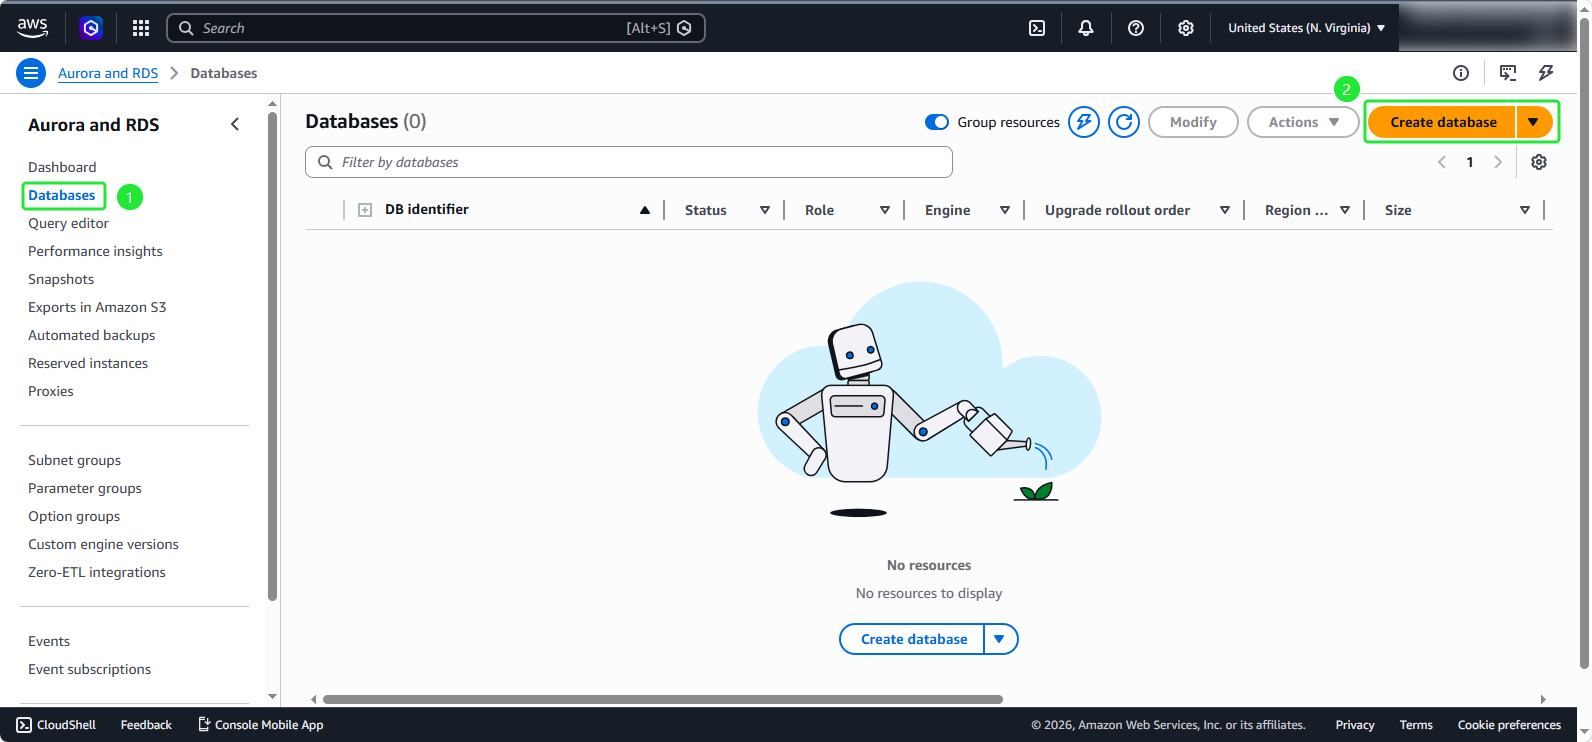
- Go to the section: Databases.
- Select: Create Database
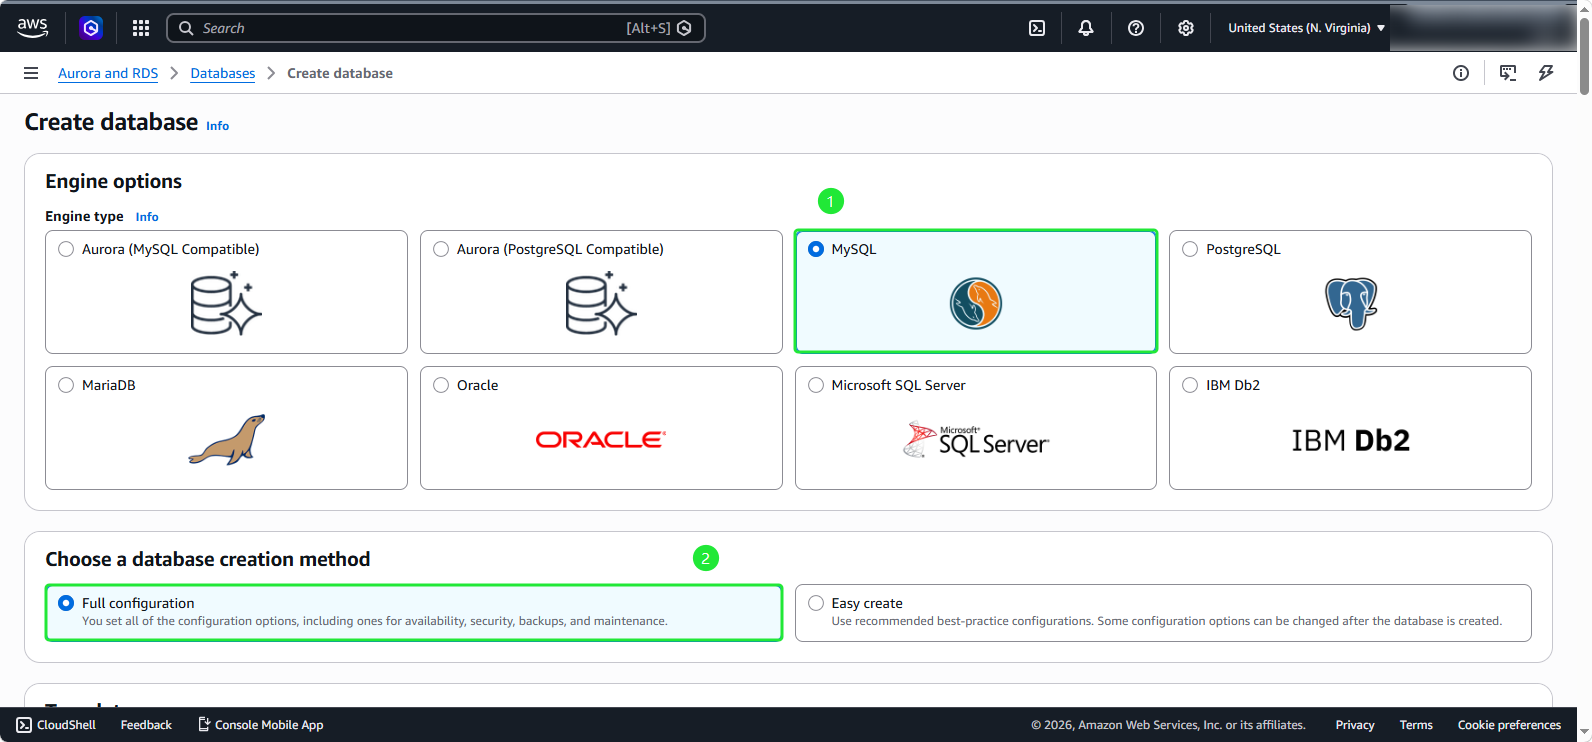
- Choose database type: MySQL
- Select create method: Full configuration
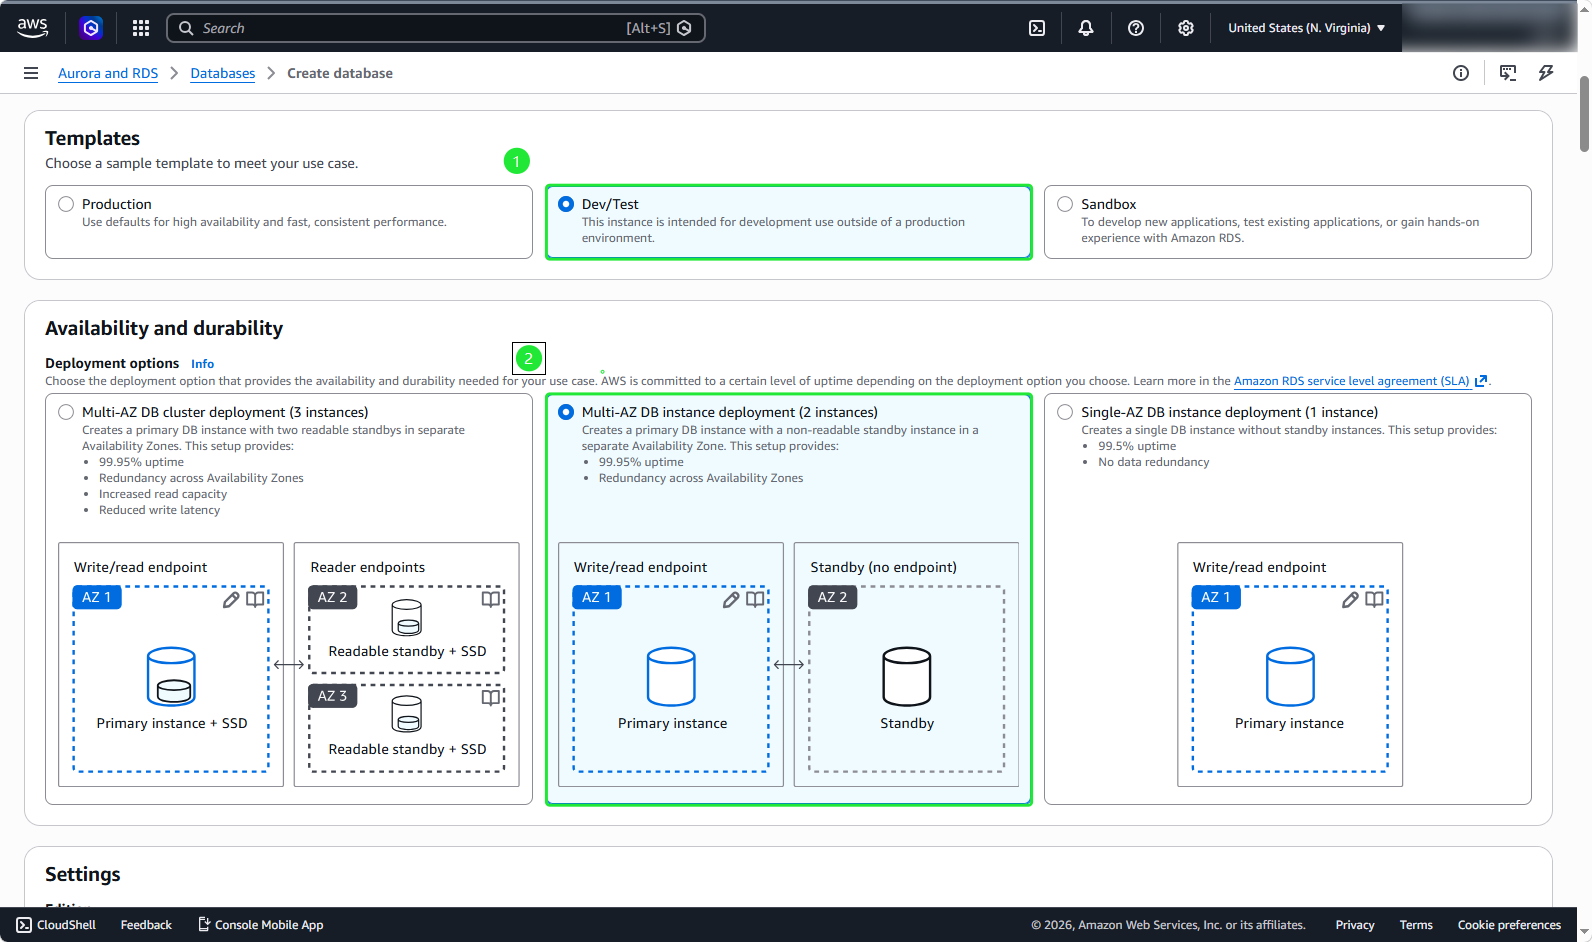
- Select the template: Dev/Test
- Choose Multi-AZ DB instance
This section can be adjusted according to your needs to optimize costs, but there are some limitations, so it’s important to research carefully.
- Configure DB instance details:
- Enter the DB instance identifier:
fcaj-rds-instance - Credentials management: Self managed
- Uncheck Auto generate password
- For Master username, enter
admin - For Master password, enter:
letmein12345
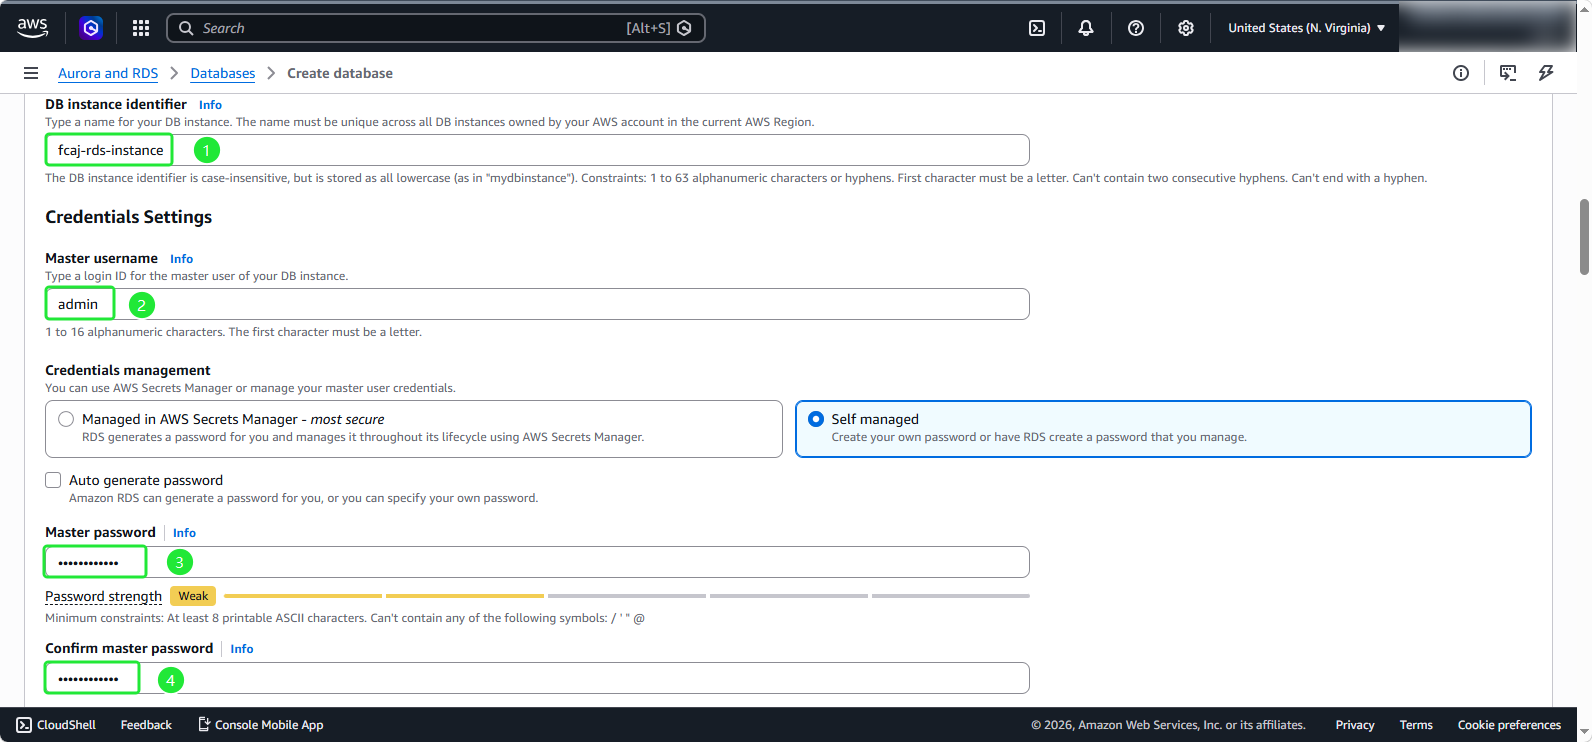
ℹ️ Important: You cannot review the master user password. If you don’t record it, you may need to change it. If you need to change the master user password after the DB Instance is available, you can modify the DB Instance to do this. For more information on modifying a DB Instance, see Modifying an Amazon RDS DB Instance.
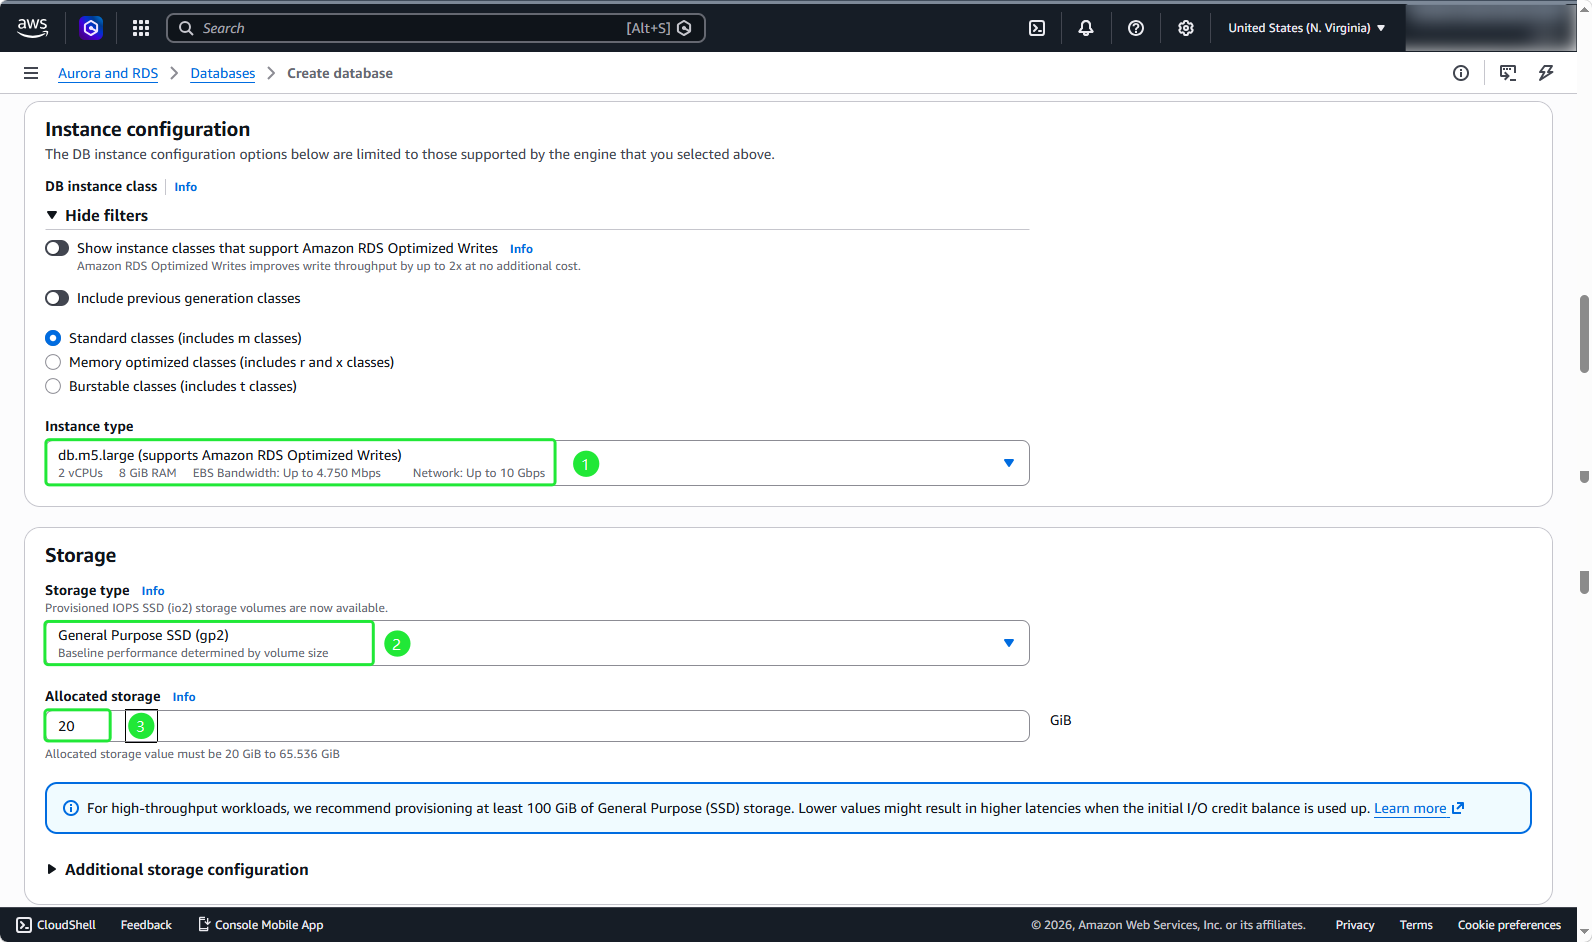
- Configure instance specifications:
- Select db.m5.large for the instance class
- Choose General Purpose SSD (gp3) for storage type
- Set Allocated storage to 20 GiB
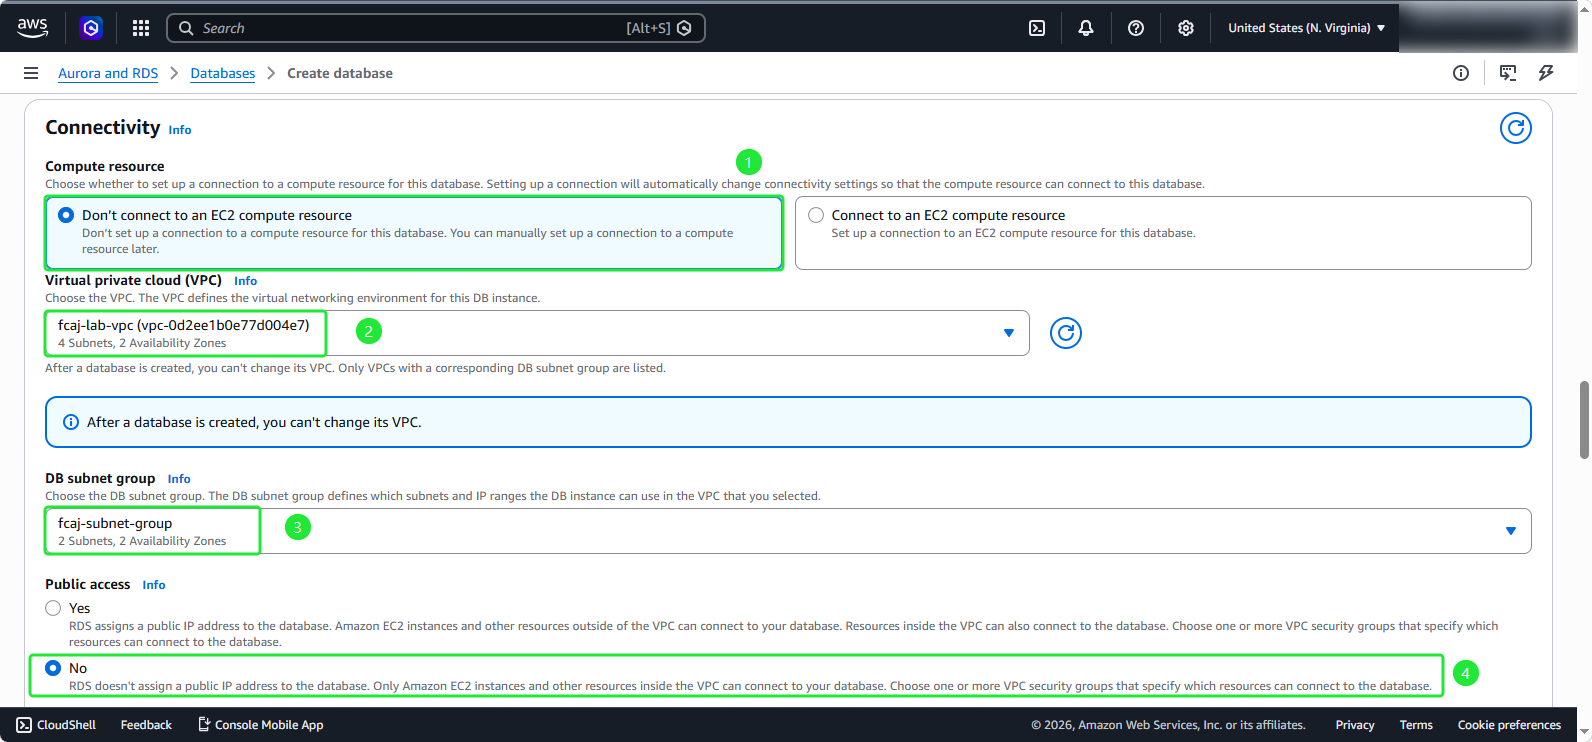
9/ Configure connectivity settings:
- Select Don’t connect to an EC2 compute resource
- For VPC, select your created VPC
- For Subnet group, choose the subnet group you created earlier
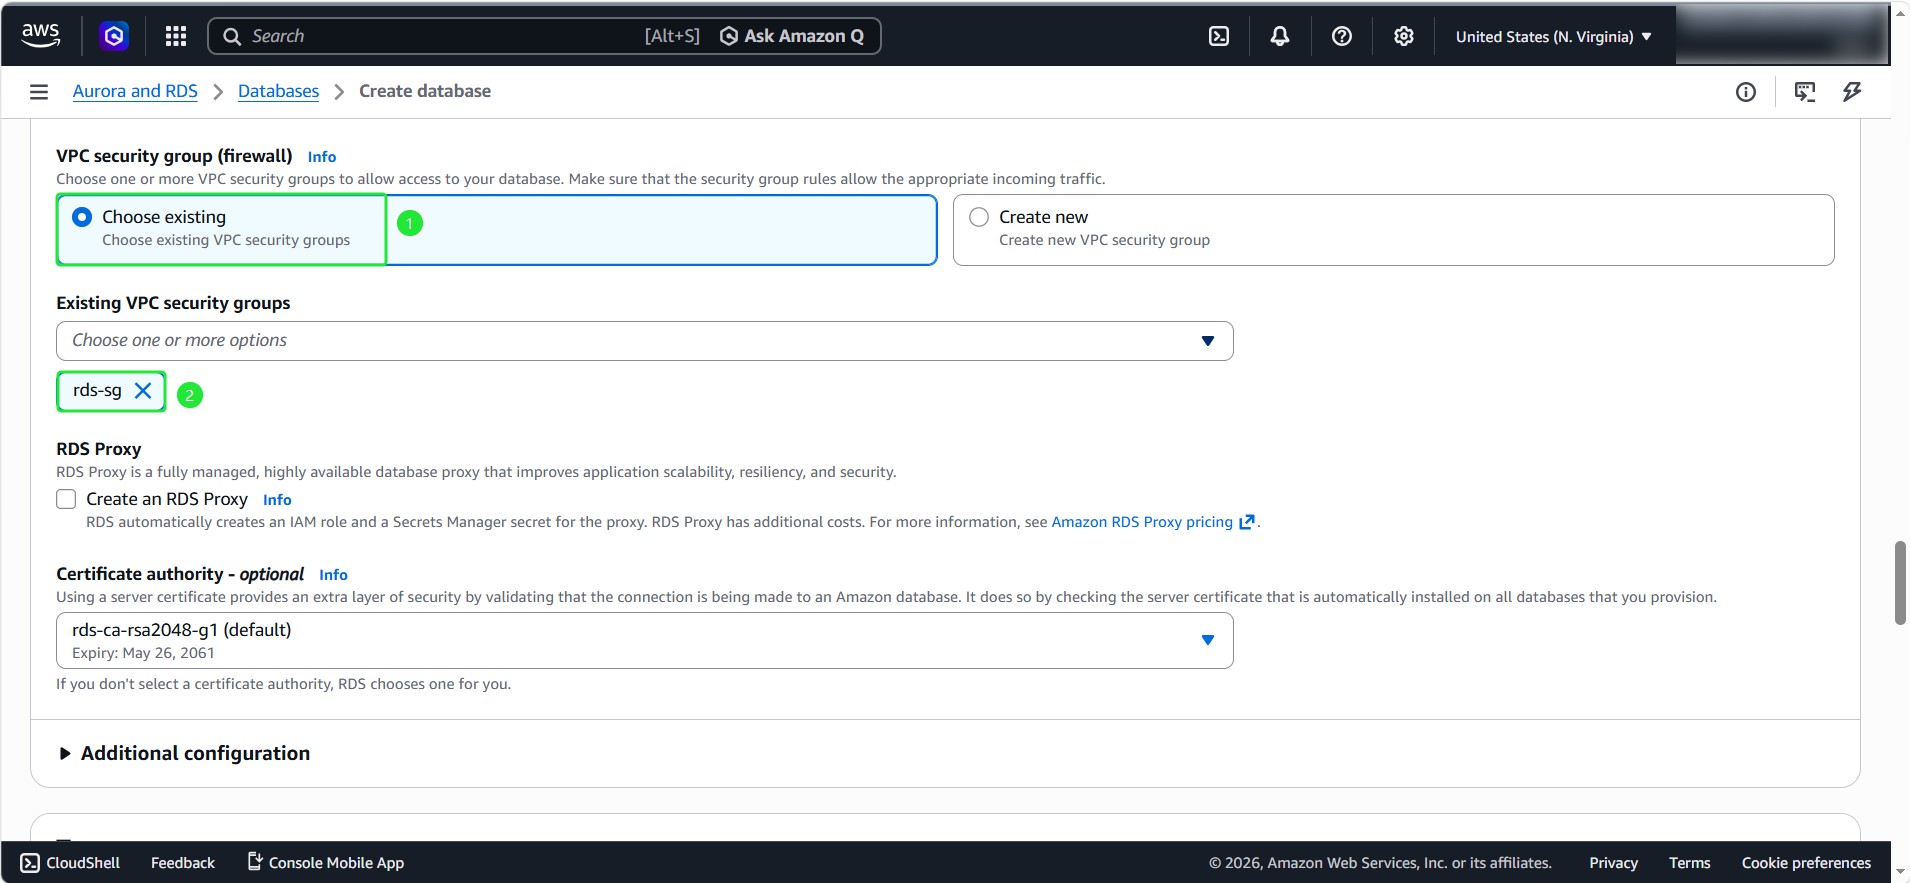
- Configure security settings:
- For Public access, select No
- For VPC security group, select Choose existing
- For Security Group, select fcaj-sg-public
Scroll down to Additional configuration section. Set the initial database name to
fcaj. Leave other settings at their default values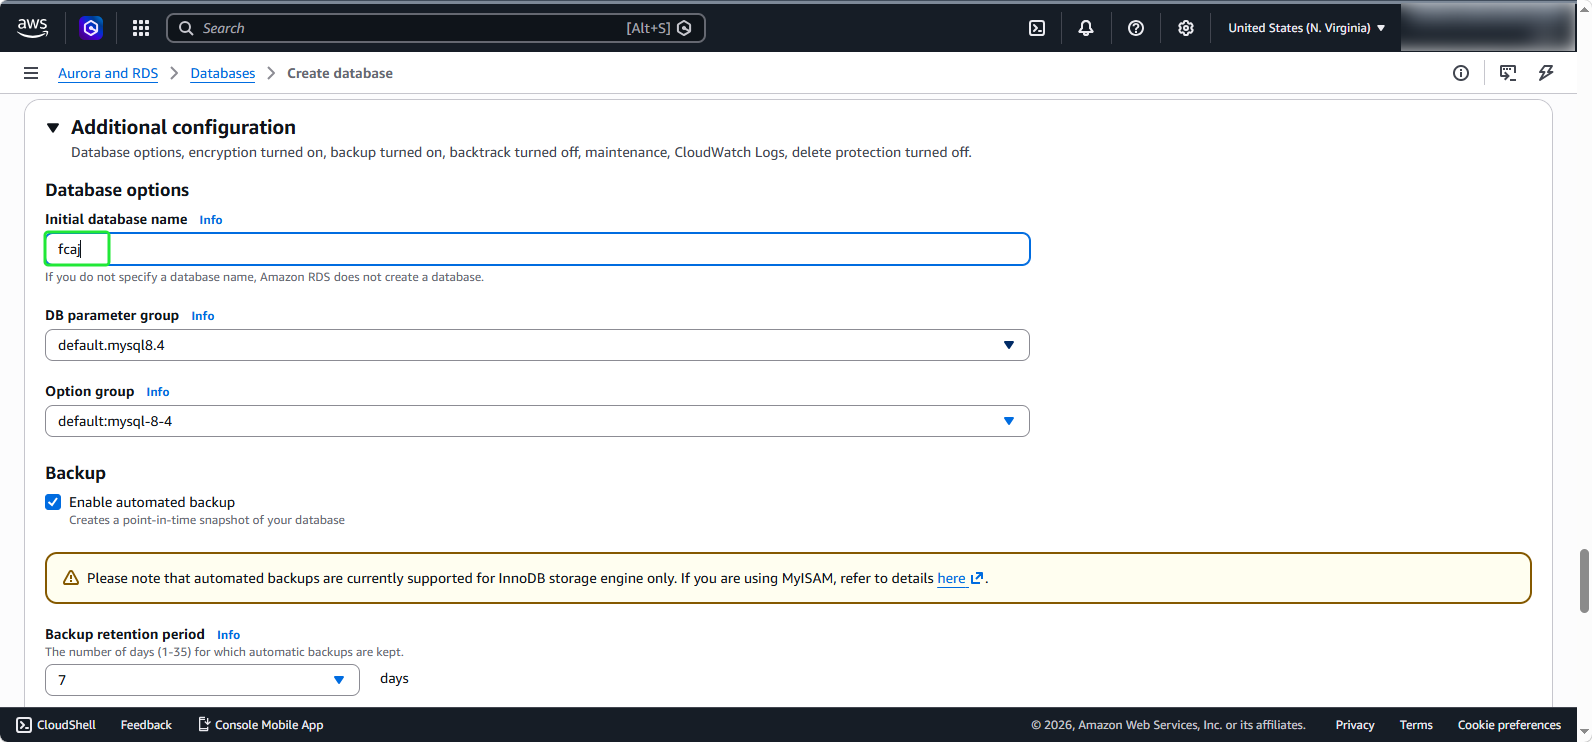
Review all configurations carefully and click Create
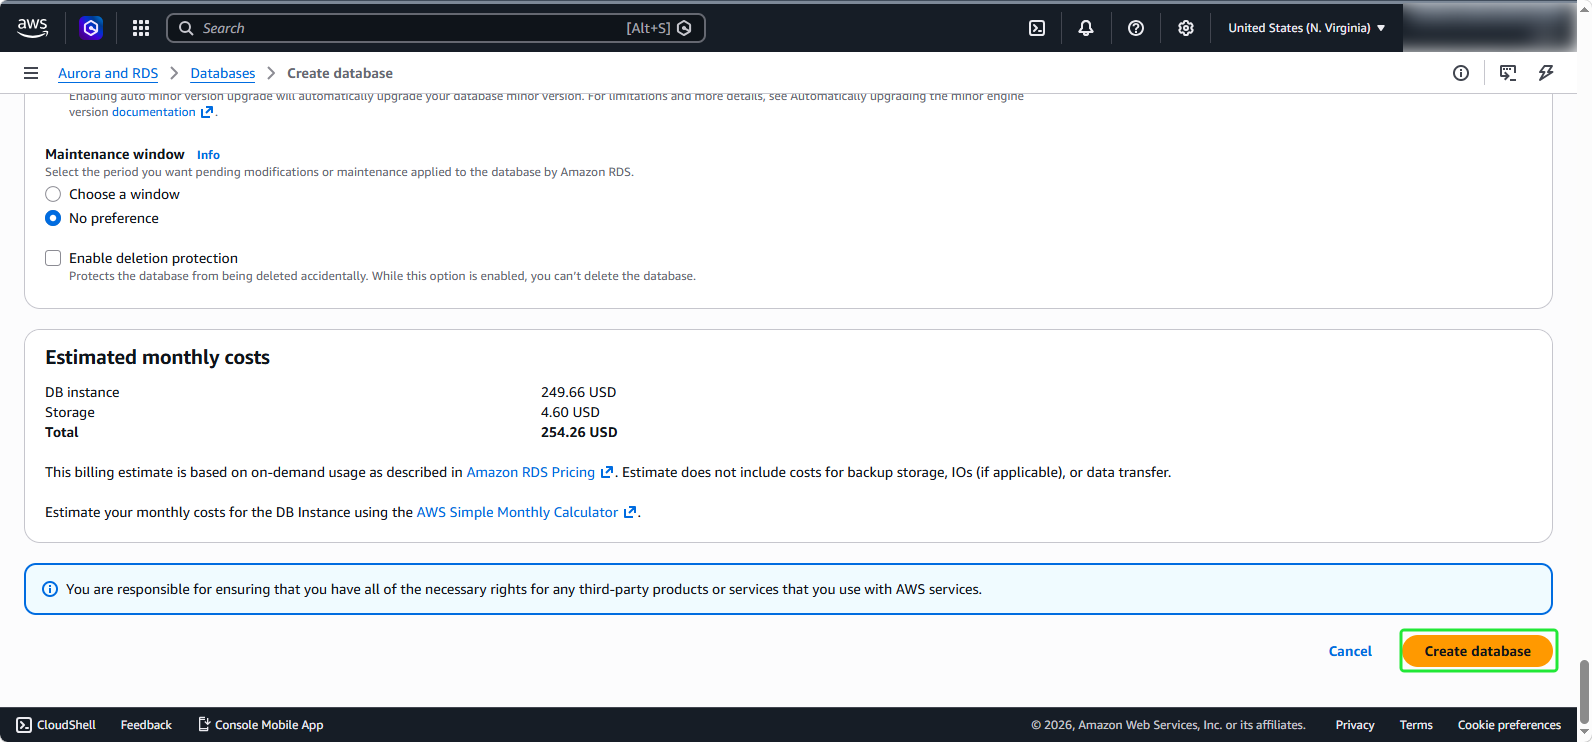
Currently when creating RDS Instance, AWS provides cost calculation information immediately when creating the instance. This helps you easily manage costs.
- Complete the creation of the DB instance, it will take about 15 minutes to become Available