Tạo IAM Roles để truy cập ECR
Cấu hình Policy
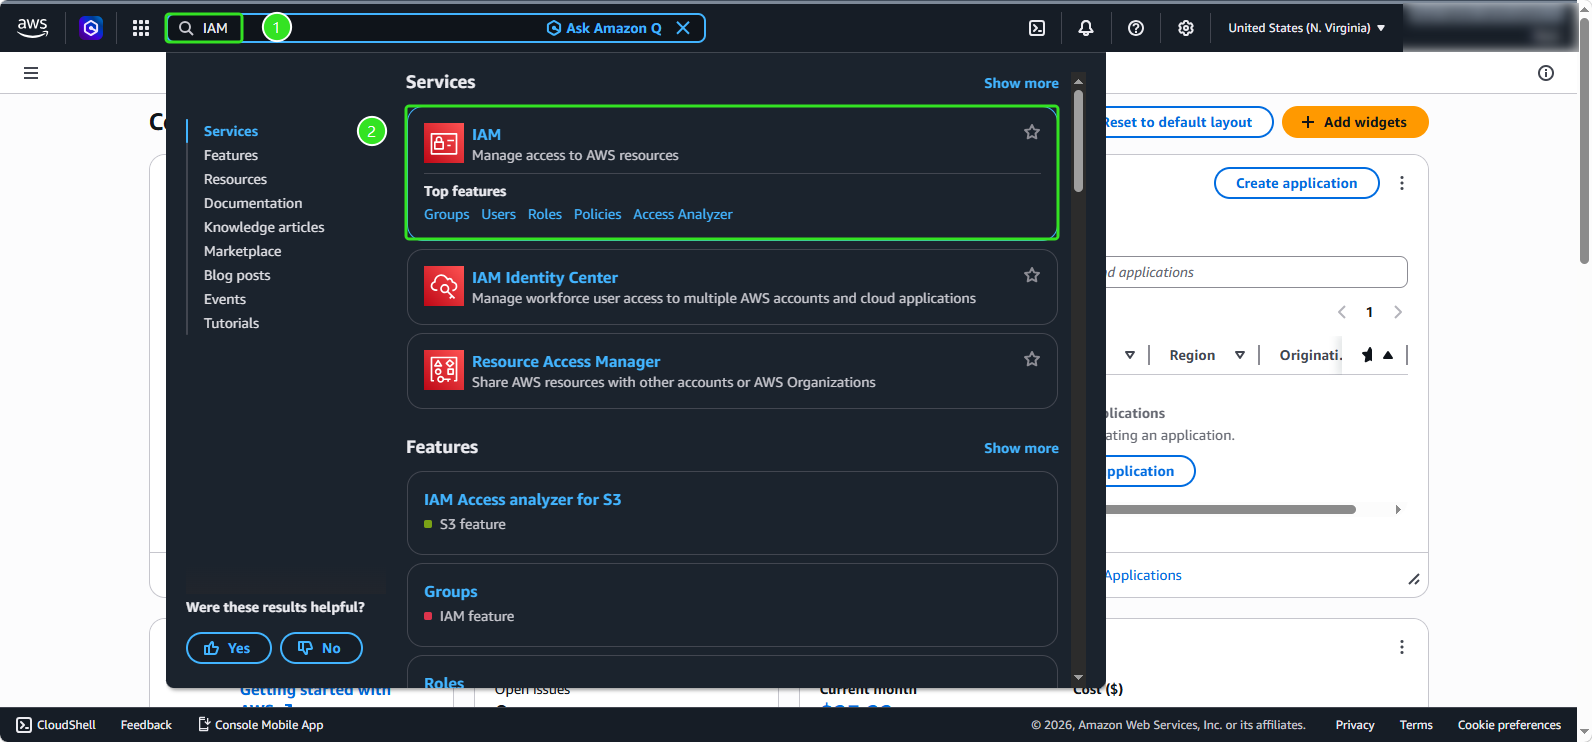
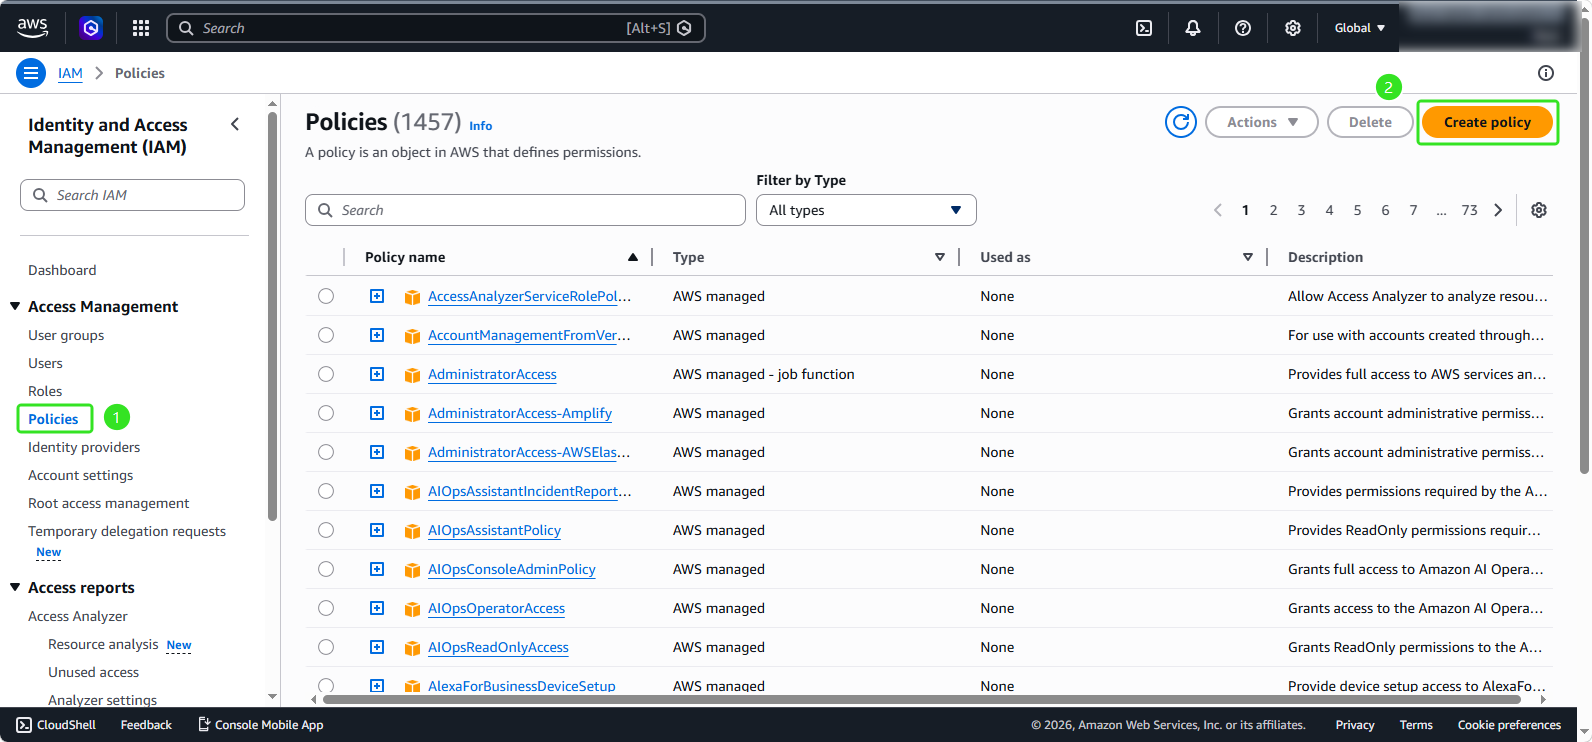
- Tại giao diện AWS Console, tìm kiếm và chọn
IAM
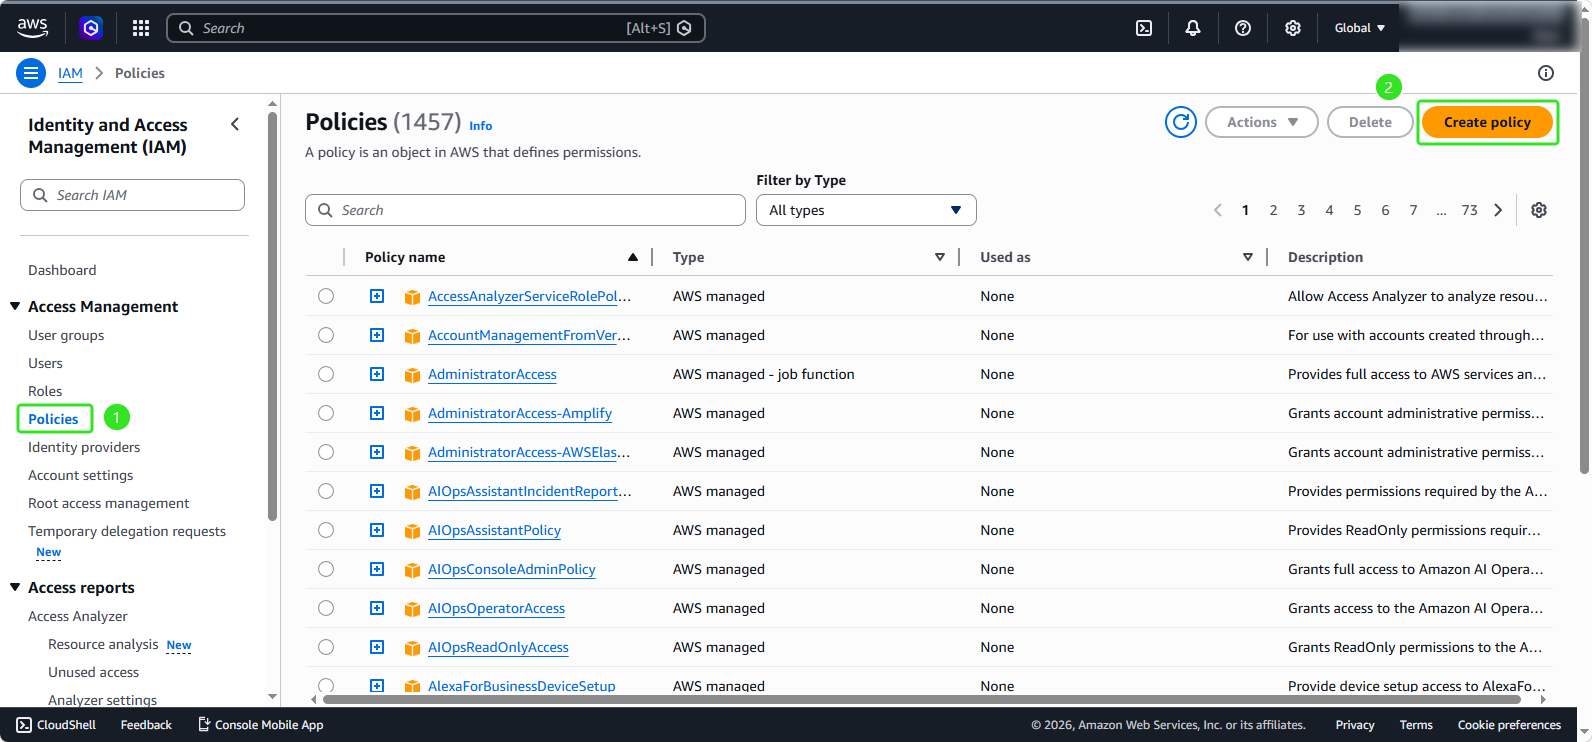
- Trong menu lựa chọn bên phải:
- Chọn Policies
- Nhấp vào Create policy
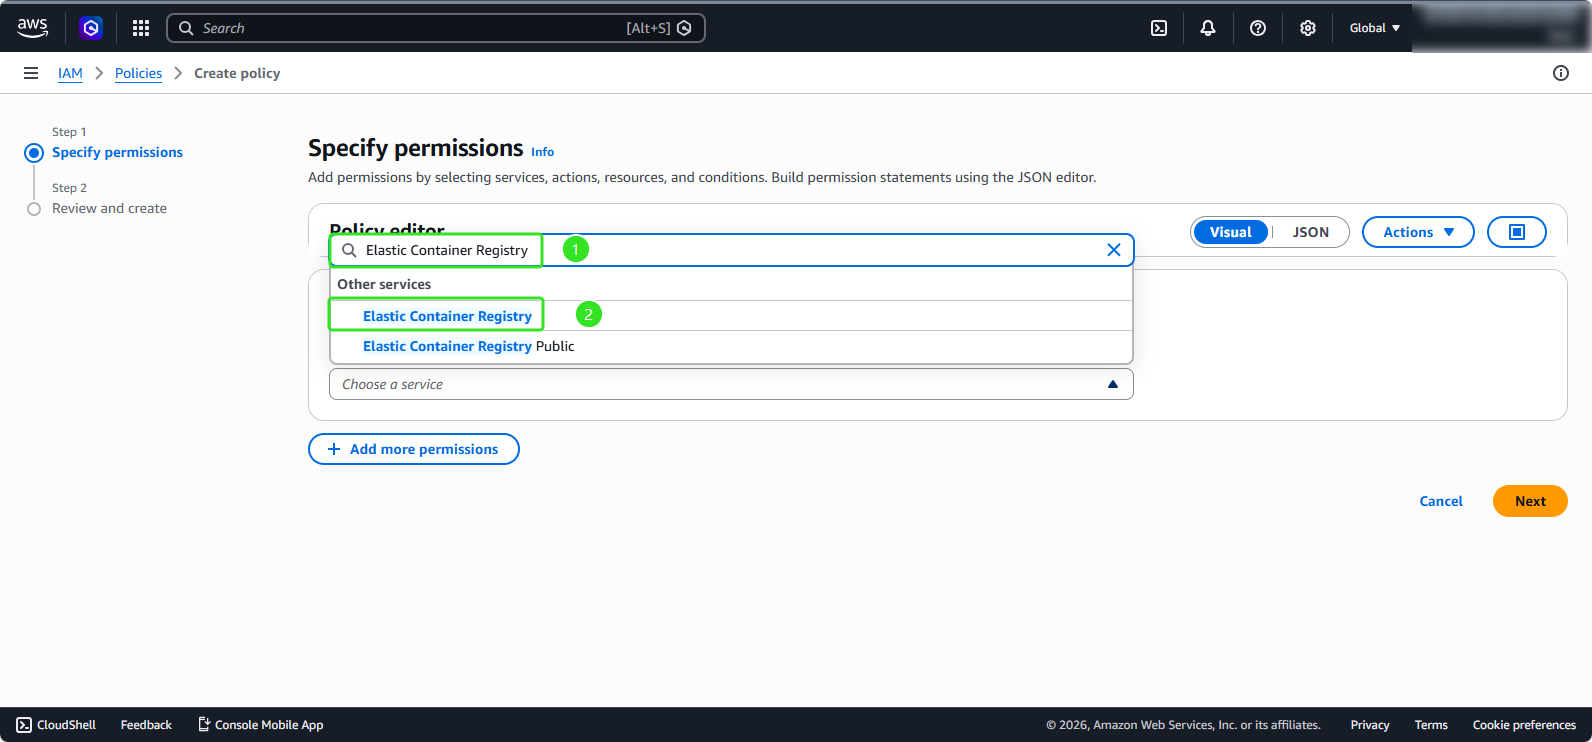
- Trong Policy Editor, tìm kiếm và chọn Elastic Container Registry
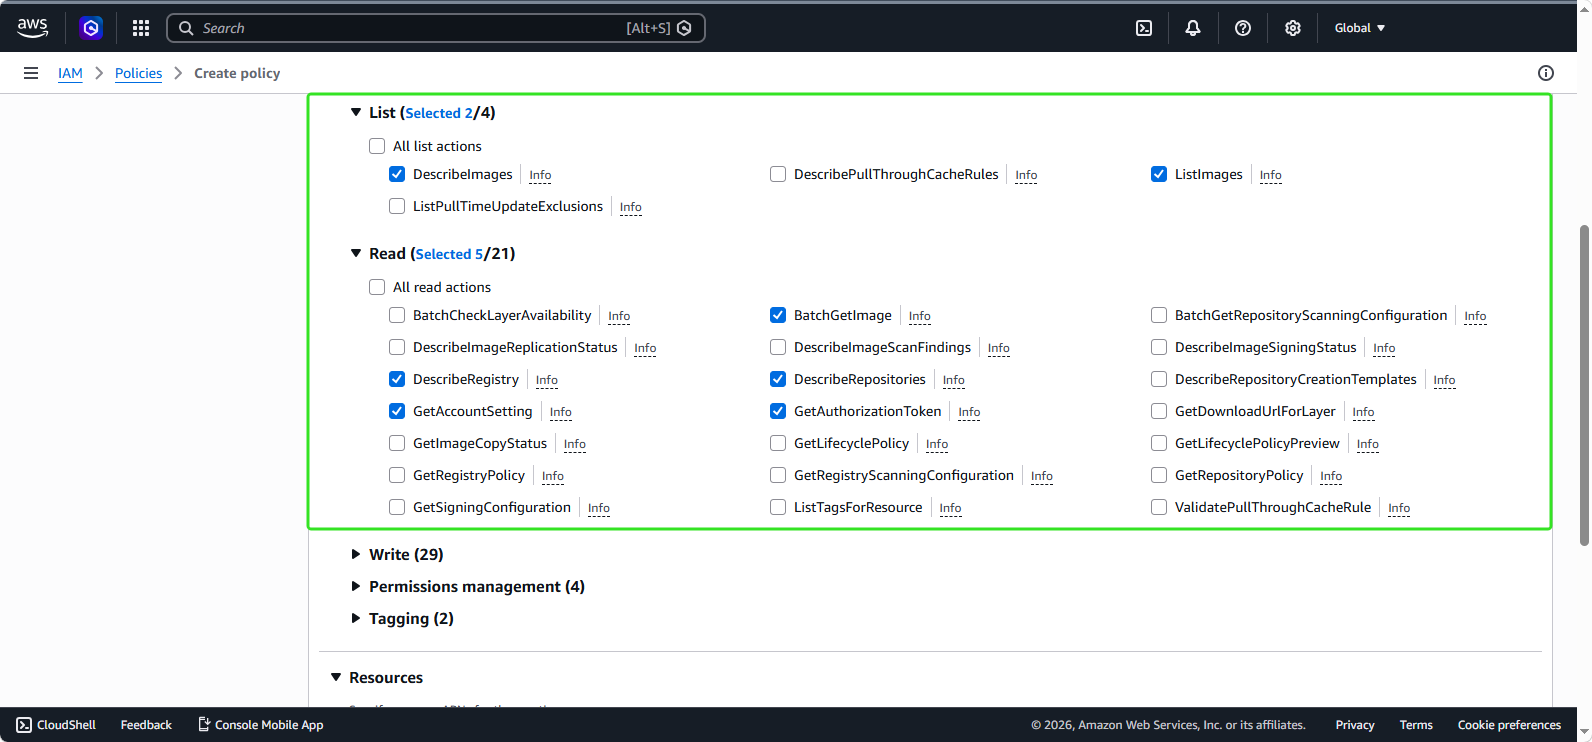
- Một bảng chọn quy tắc xuất hiện. Trong phần List:
- Chọn DescribeImage
- Chọn ListImages
- Trong phần Read:
- Chọn BatchGetImage
- Chọn DescribeRegistry
- Chọn DescribeRepositories
- Chọn GetAccountSetting
- Chọn GetAuthorizationToken
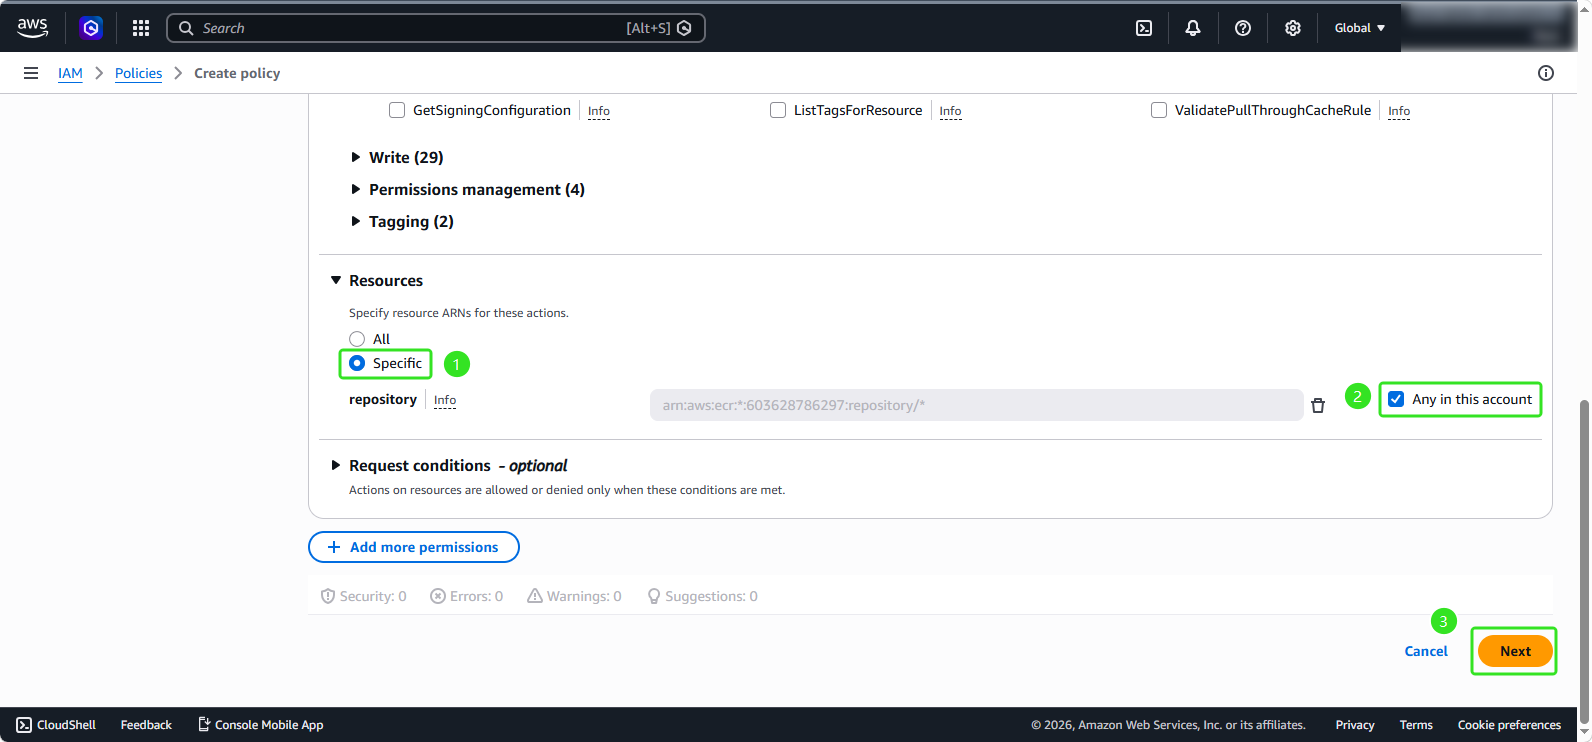
- Trong phần Resources:
- Chọn Specific
- Chọn Any in this account
- Nhấp Next
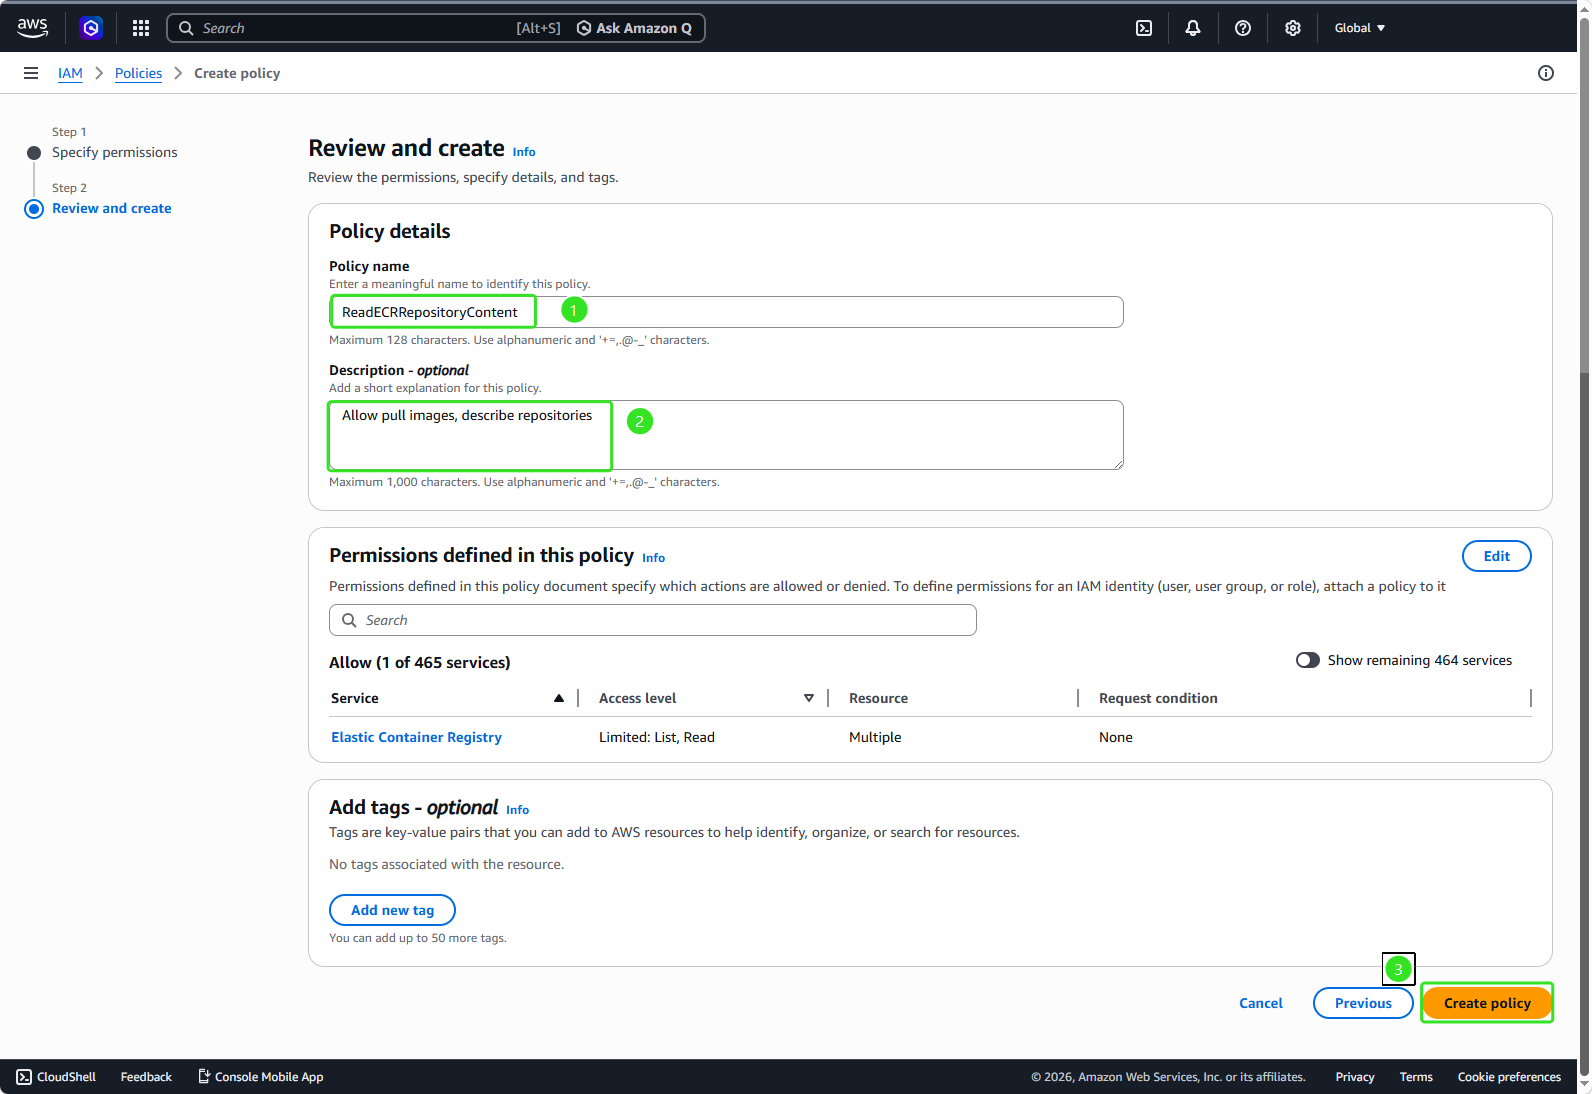
- Trong phần Chi tiết Policy:
- Policy name:
ReadECRRepositoryContent - Description:
Allow pull images, describe repositories - Nhấp Create policy
- Tương tự, chúng ta sẽ tạo thêm một policy để ghi vào ECR bằng cách nhấp Create Policy:
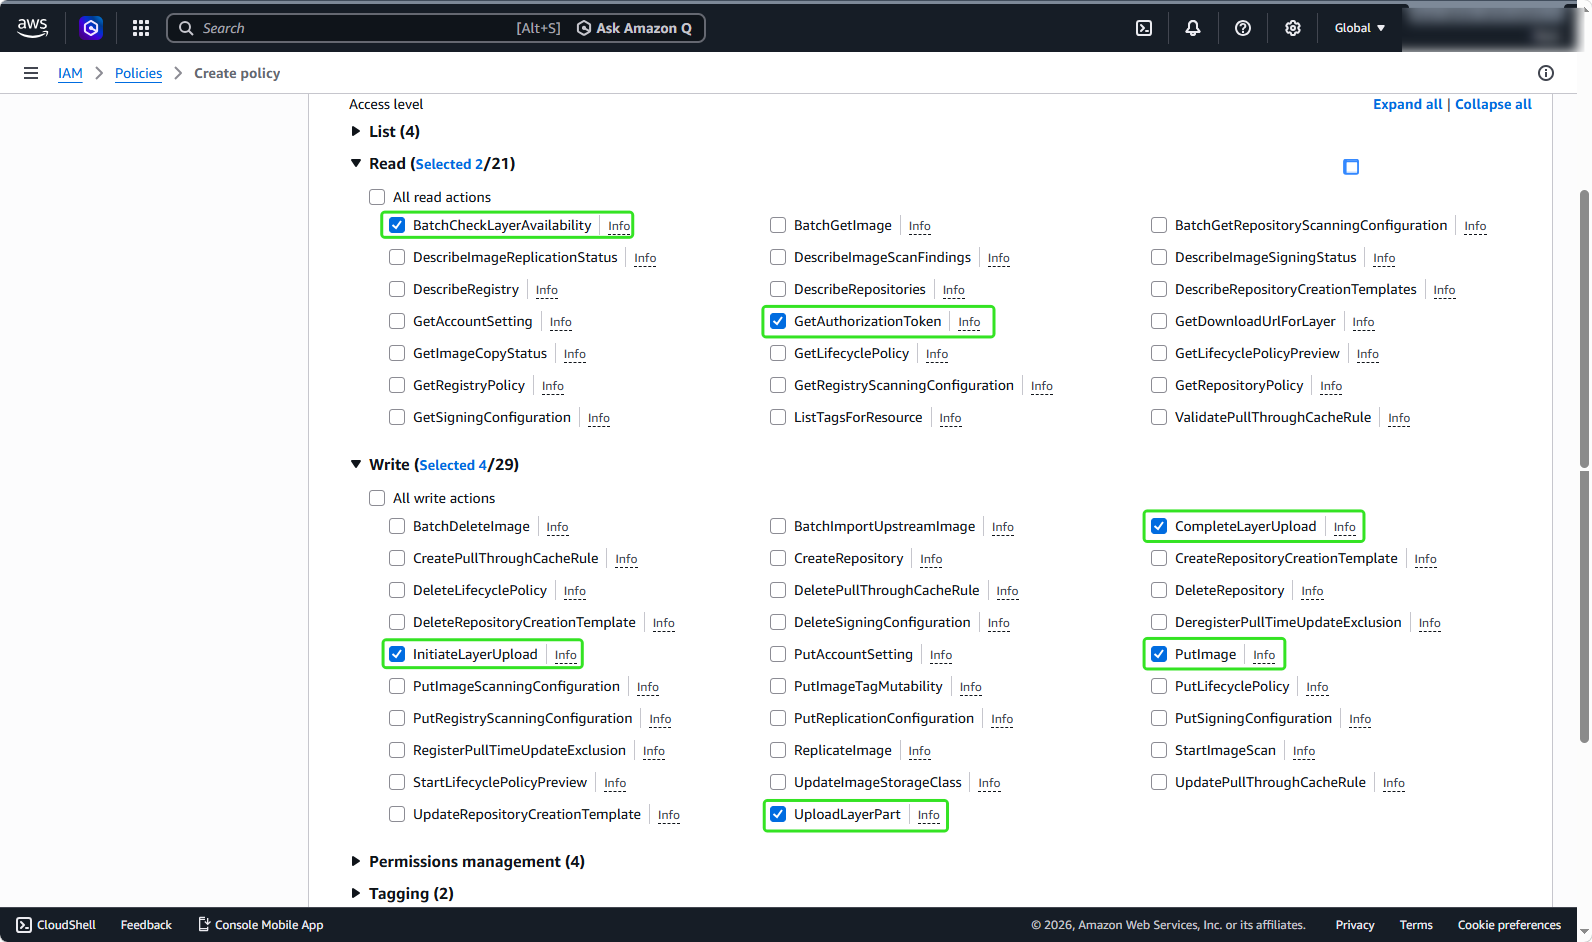
- Một bảng chọn quy tắc xuất hiện:
Trong phần Read:
- Chọn BatchCheckLayerAvailability
- Chọn GetAuthorizationToken
Trong phần Write:
- Chọn CompleteLayerUpload
- Chọn InitiateLayerUpload
- Chọn PutImage
- Chọn UploadLayerPart
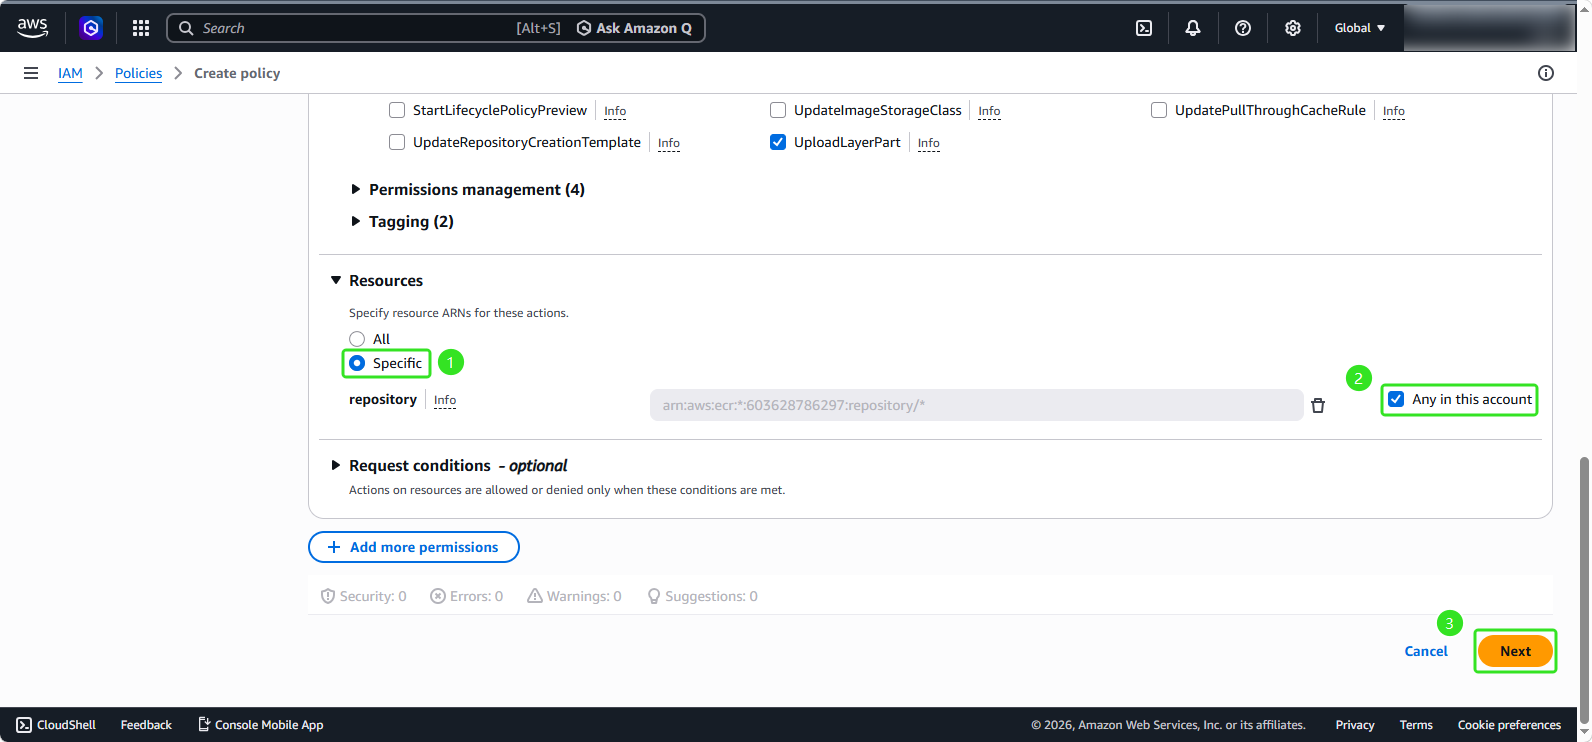
- Trong phần Resources:
- Chọn Specific
- Chọn Any in this account
- Nhấp Next
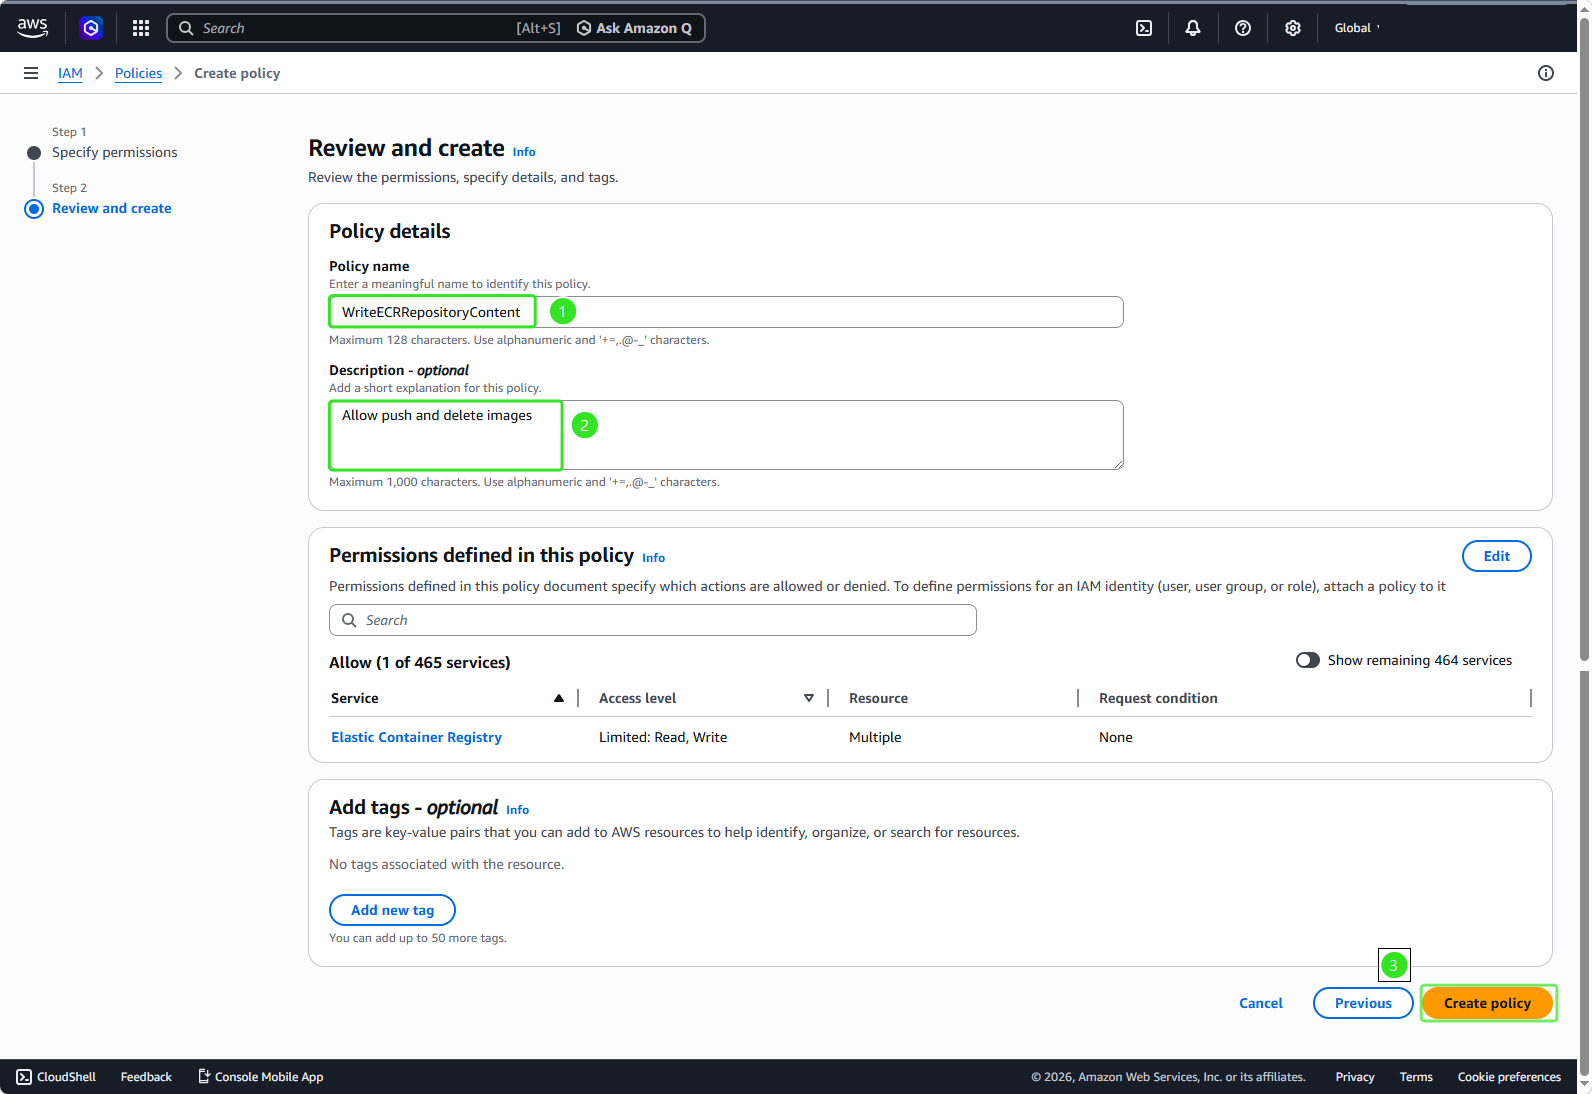
- Bảng chi tiết Policy xuất hiện:
- Policy name:
WriteECRRepositoryContent - Description:
Allow push and delete images - Nhấp Next và chọn Create policy
Tạo Role cho ECR
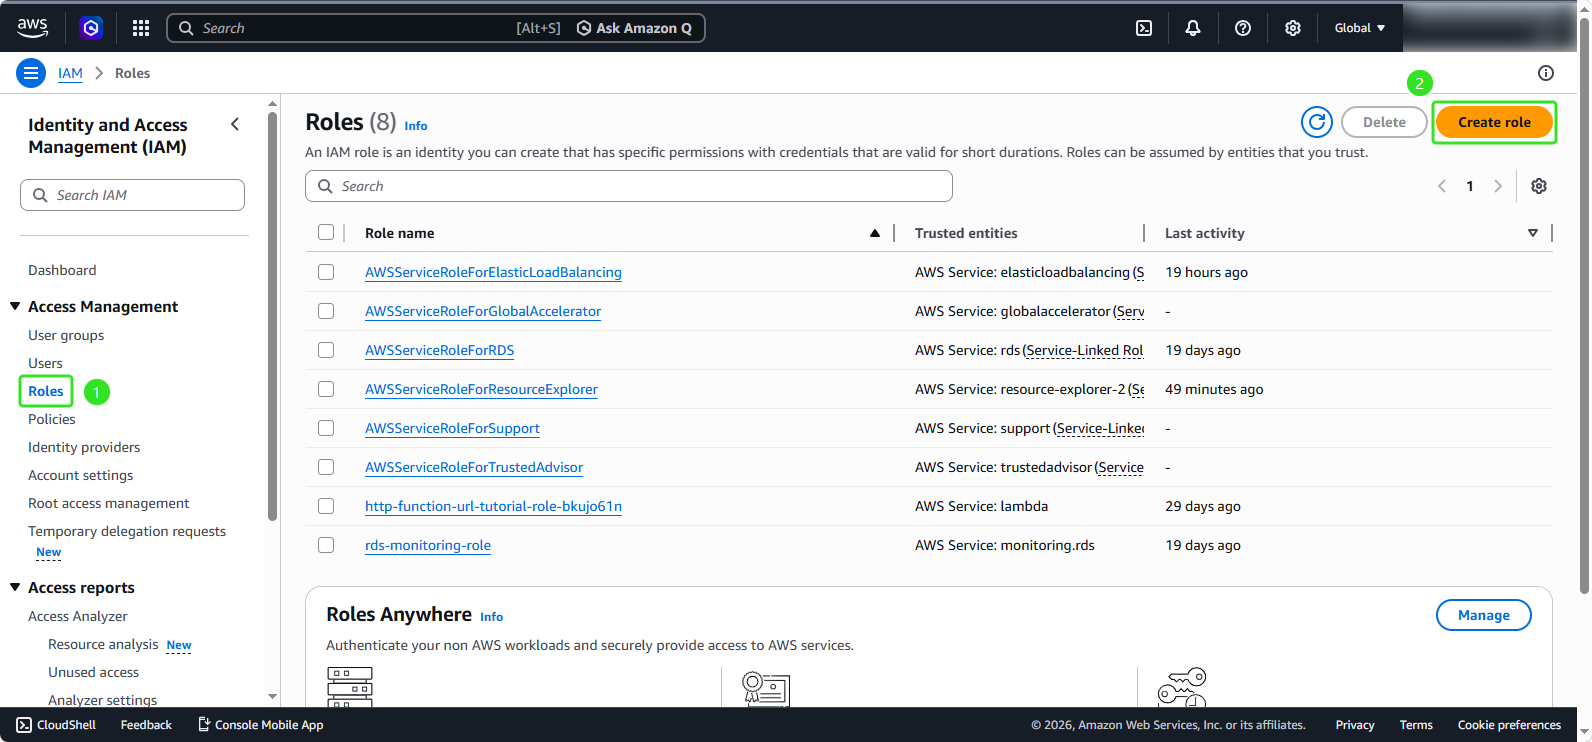
- Trong giao diện quản lý EC2:
- Chọn Roles
- Nhấp vào Create role
- Trong phần Chi tiết Role:
- Trusted entity type: AWS service
- Use case: EC2
- Nhấp Next
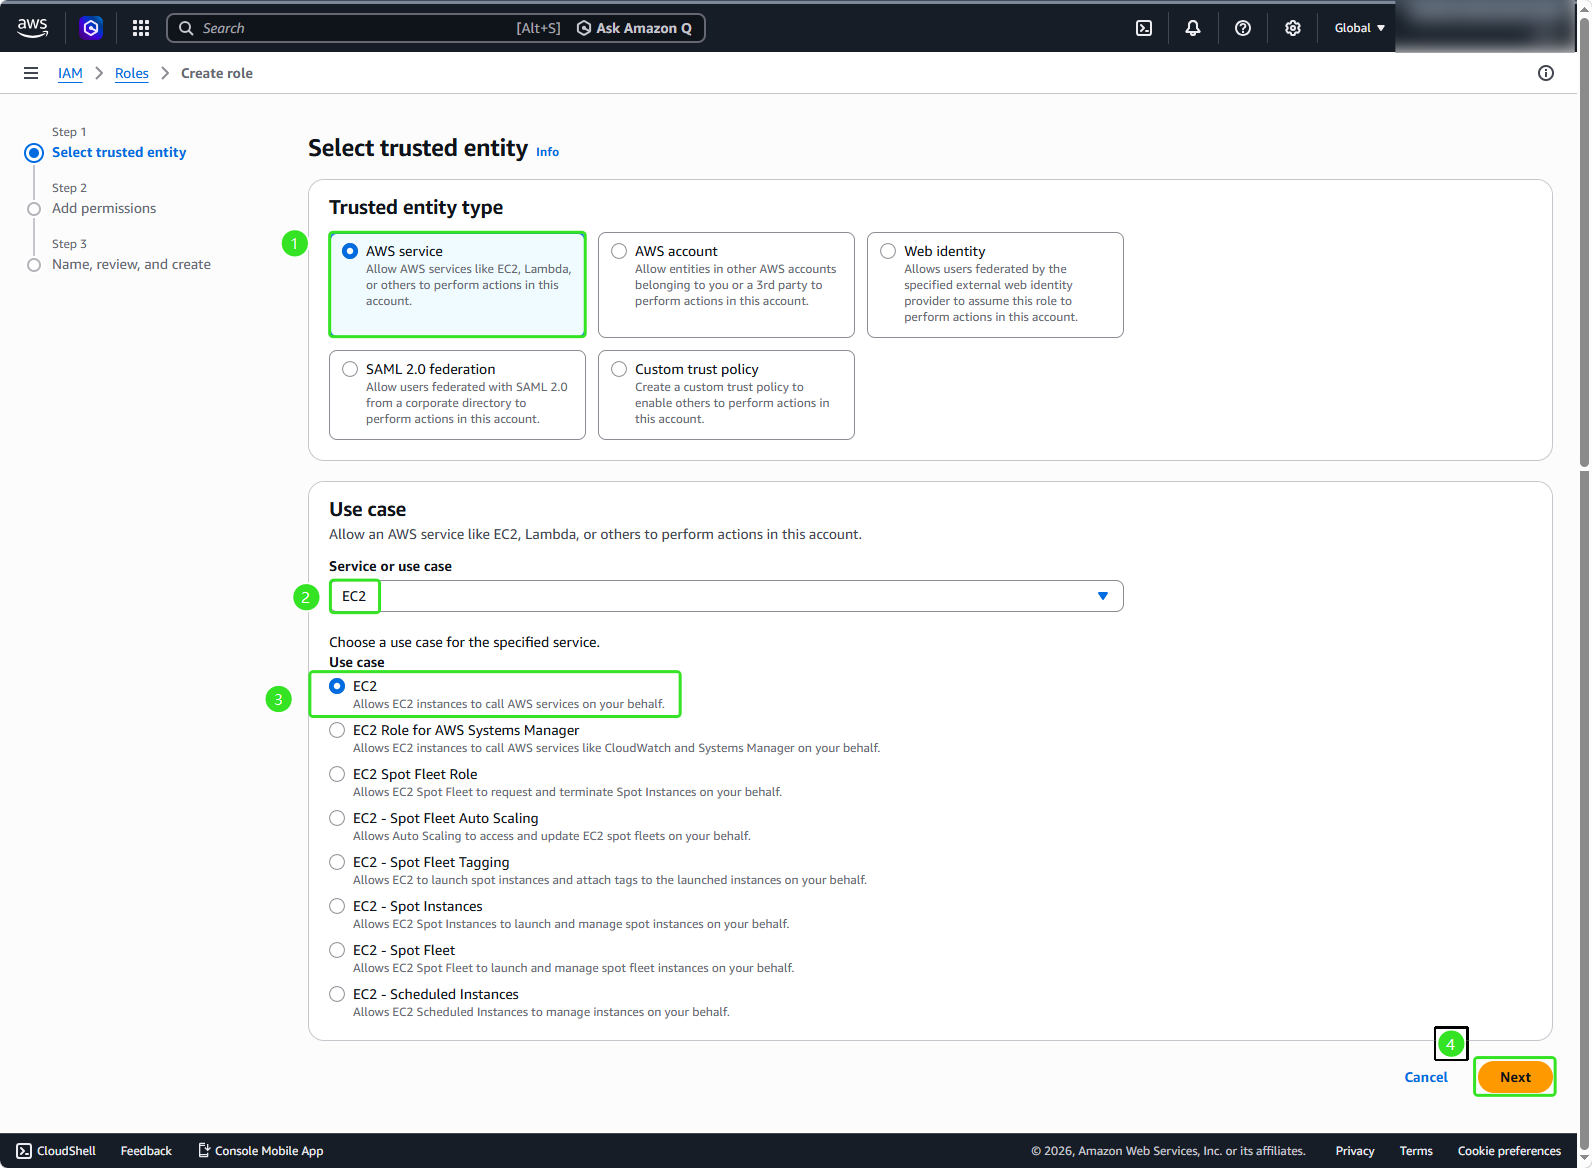
- Trong phần Permissions policies:
- Chọn hai policy chúng ta vừa tạo:
ReadECRRepositoryContentvàWriteECRRepositoryContent - Sau đó nhấp Next
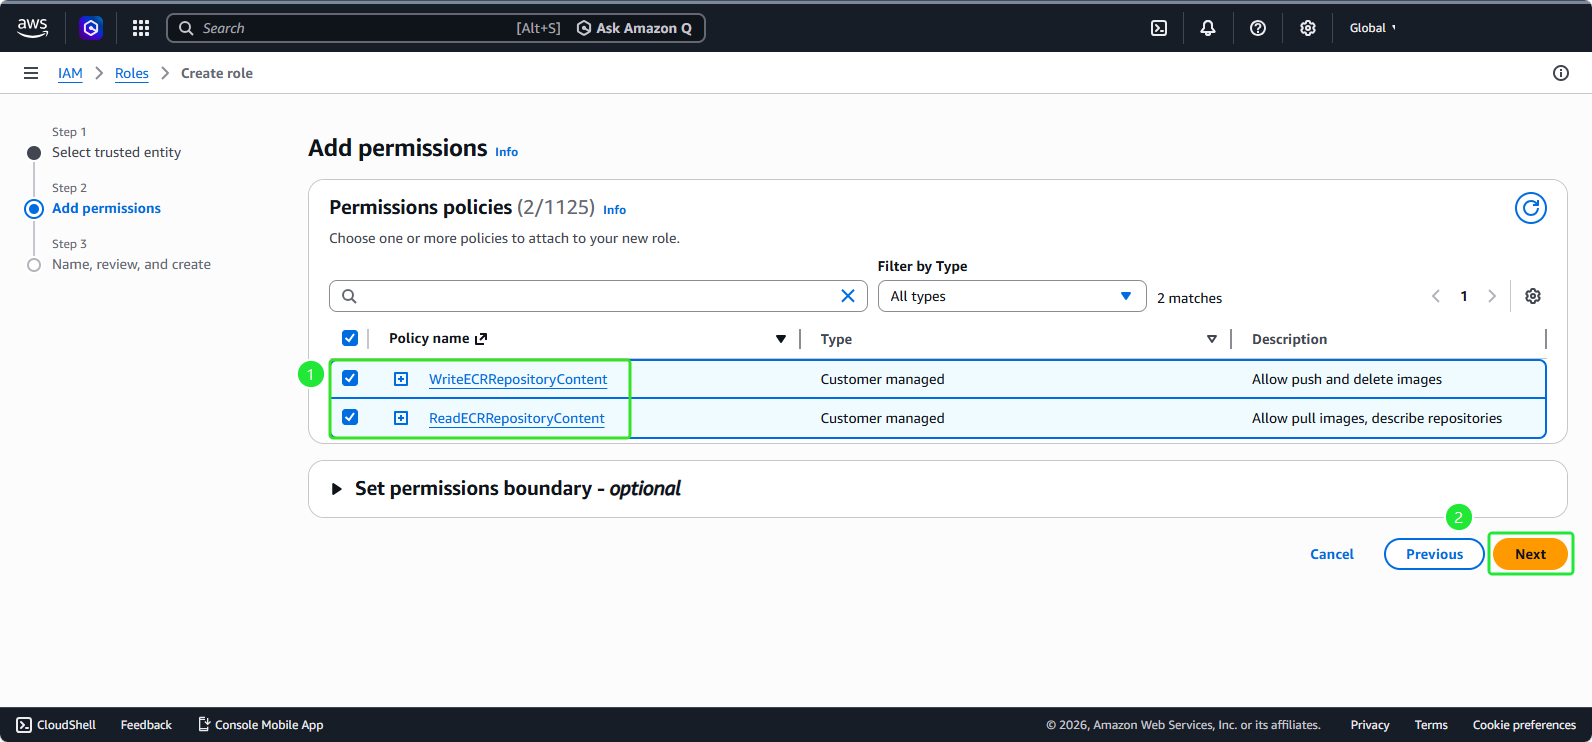
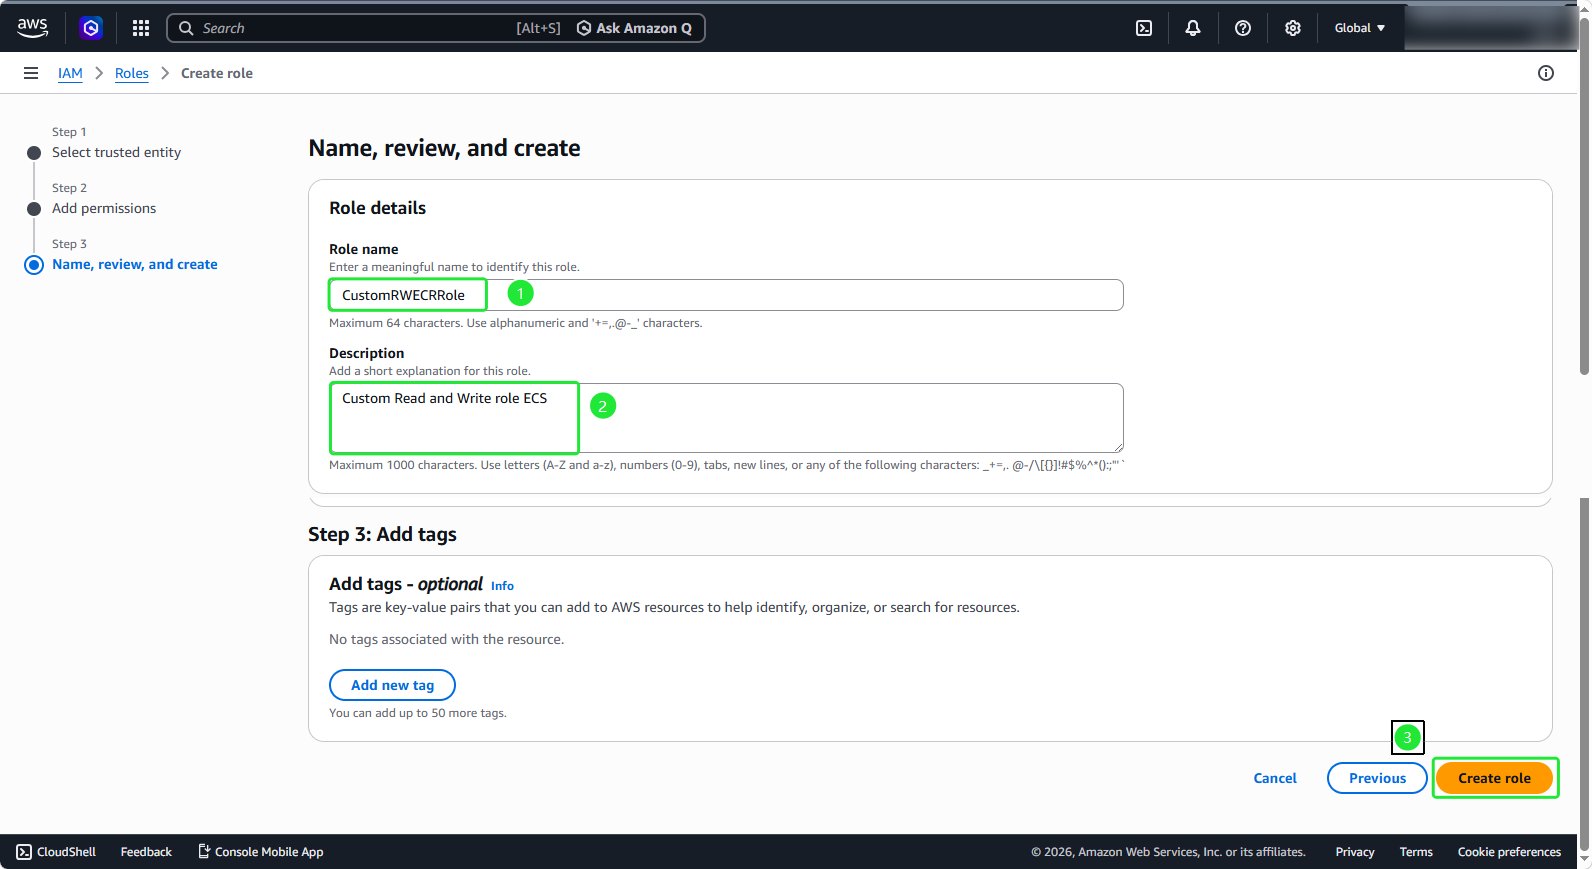
- Trong phần Chi tiết Role:
- Role name:
CustomRWECRRole - Description:
Custom Read and Write role ECS - Nhấp Create role