EC2 Instance Configuration
Launching an Amazon EC2 Instance
ℹ️ Information: Amazon Elastic Compute Cloud (Amazon EC2) provides resizable compute capacity in the AWS Cloud. Using EC2 instances eliminates the need to invest in hardware upfront, allowing you to develop and deploy applications faster.
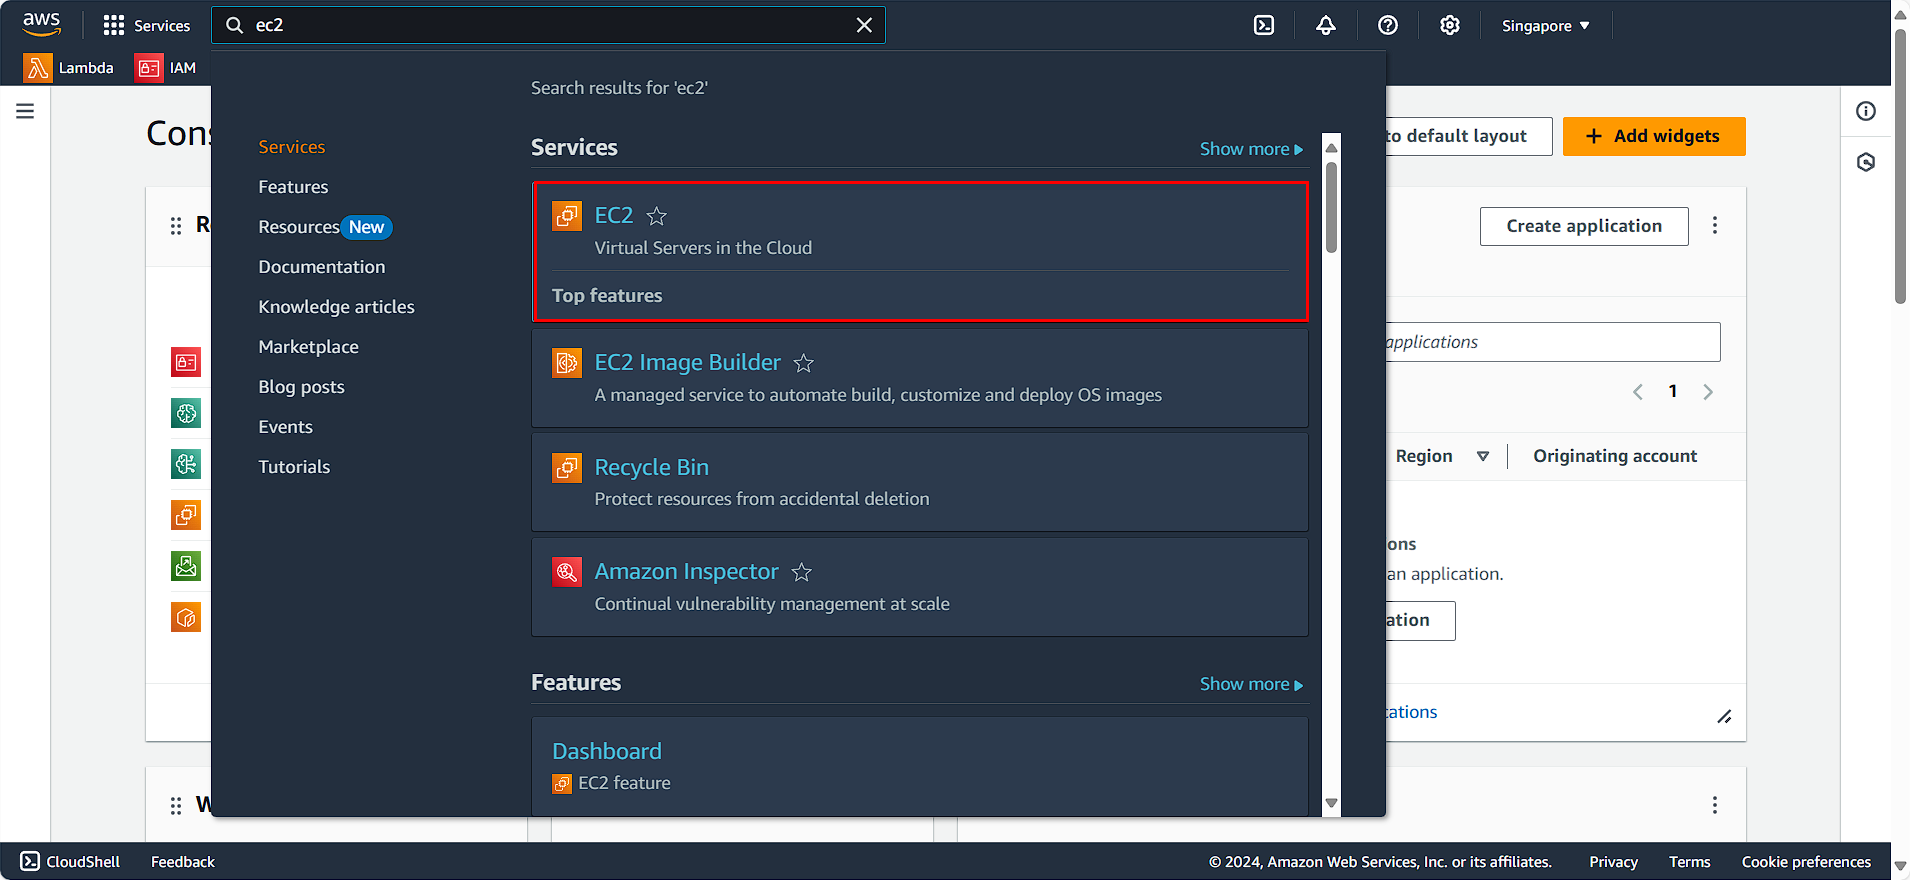
In the AWS Management Console:
- Search for and select EC2 in the search bar
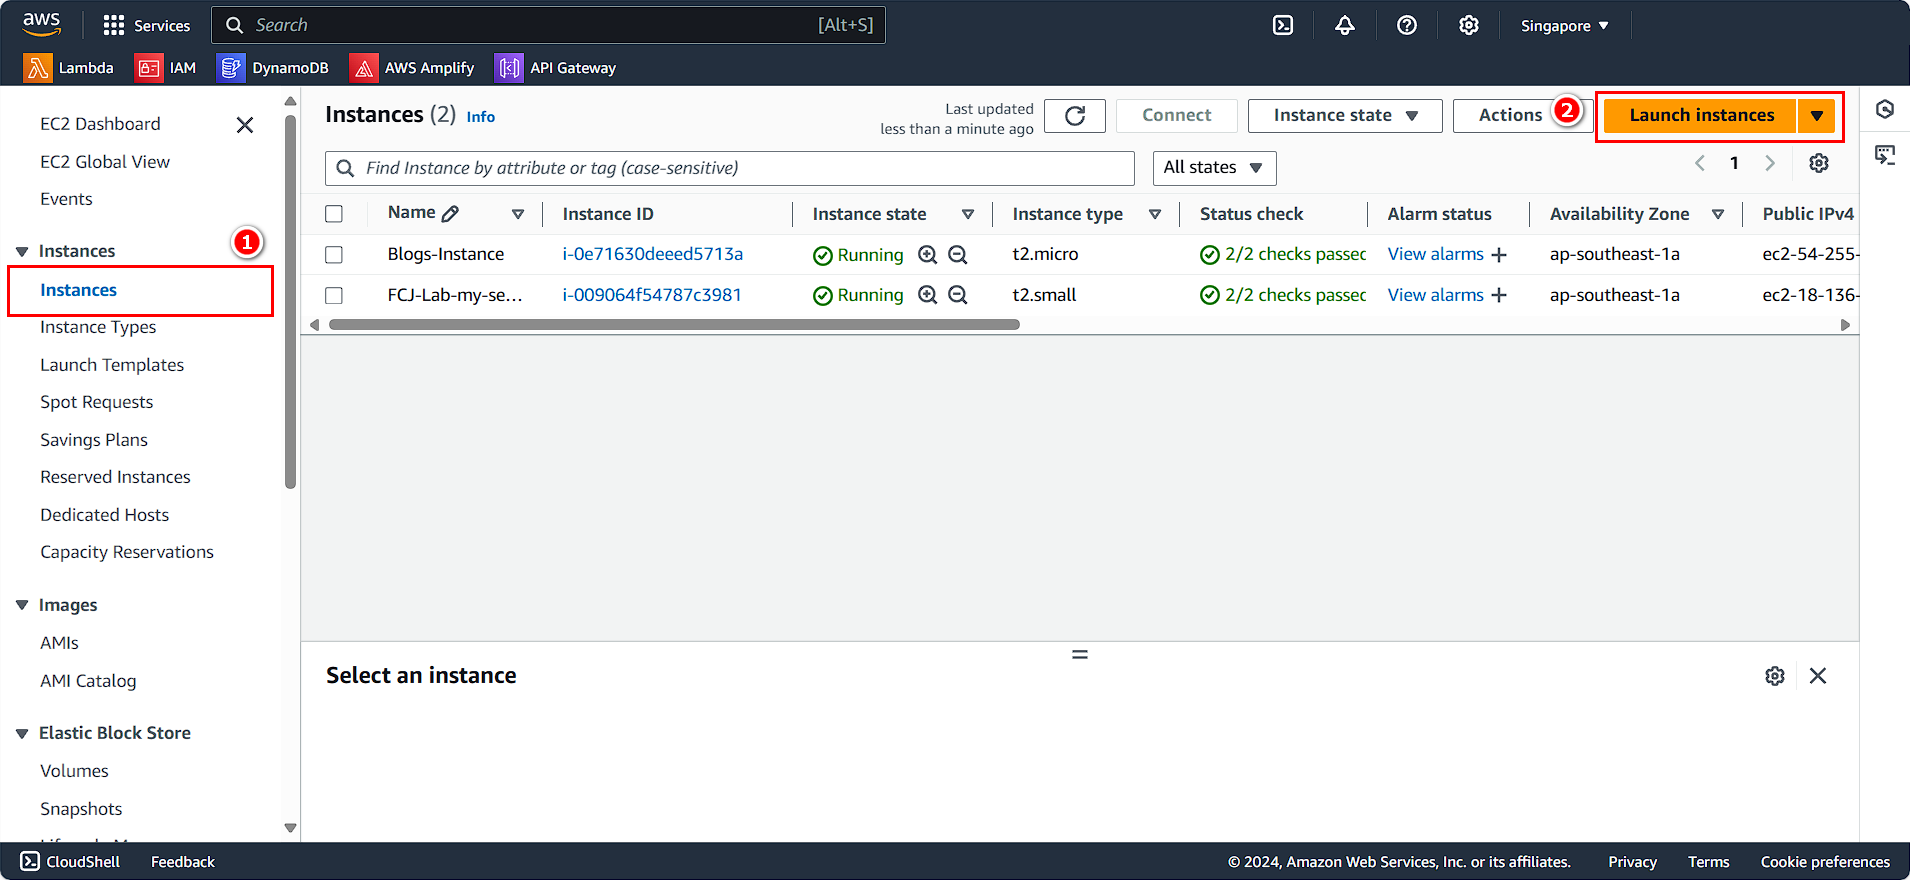
Creating Your EC2 Instance
In the EC2 dashboard:
- Select Instances from the left navigation pane
- Click on Launch Instances button
- Name your instance
FCJ-Lab-my-server
💡 Pro Tip: Use descriptive naming conventions that include environment, project, and purpose to make resource management easier as your infrastructure grows.
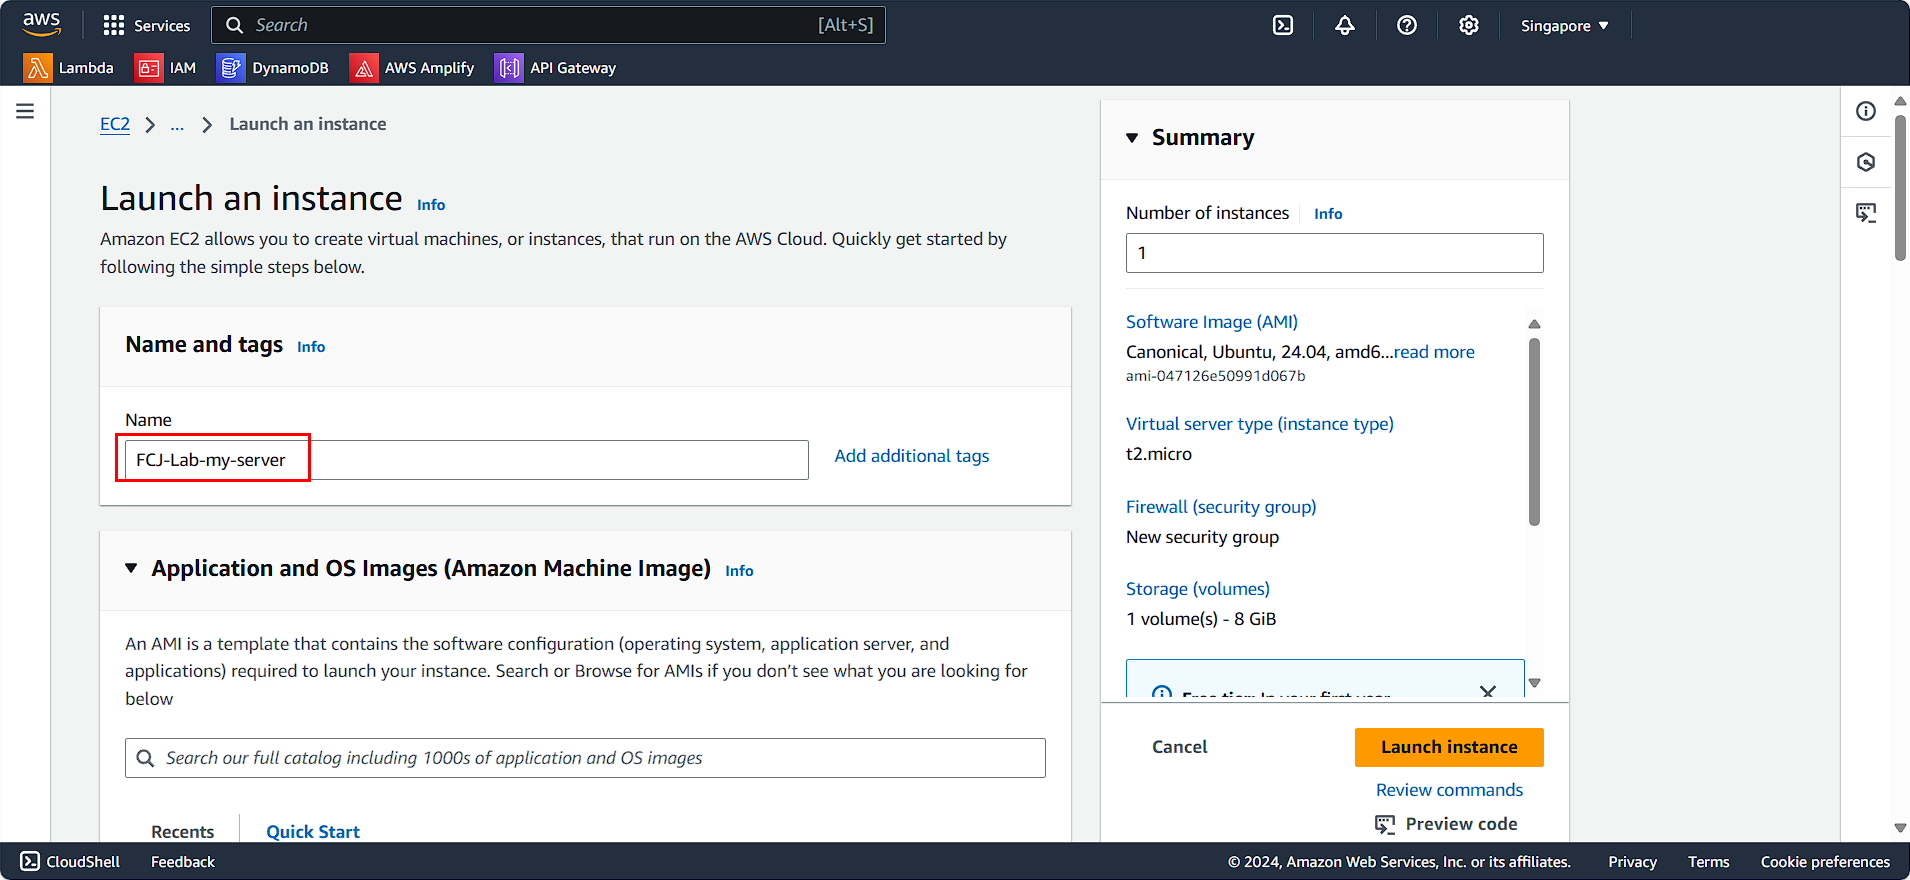
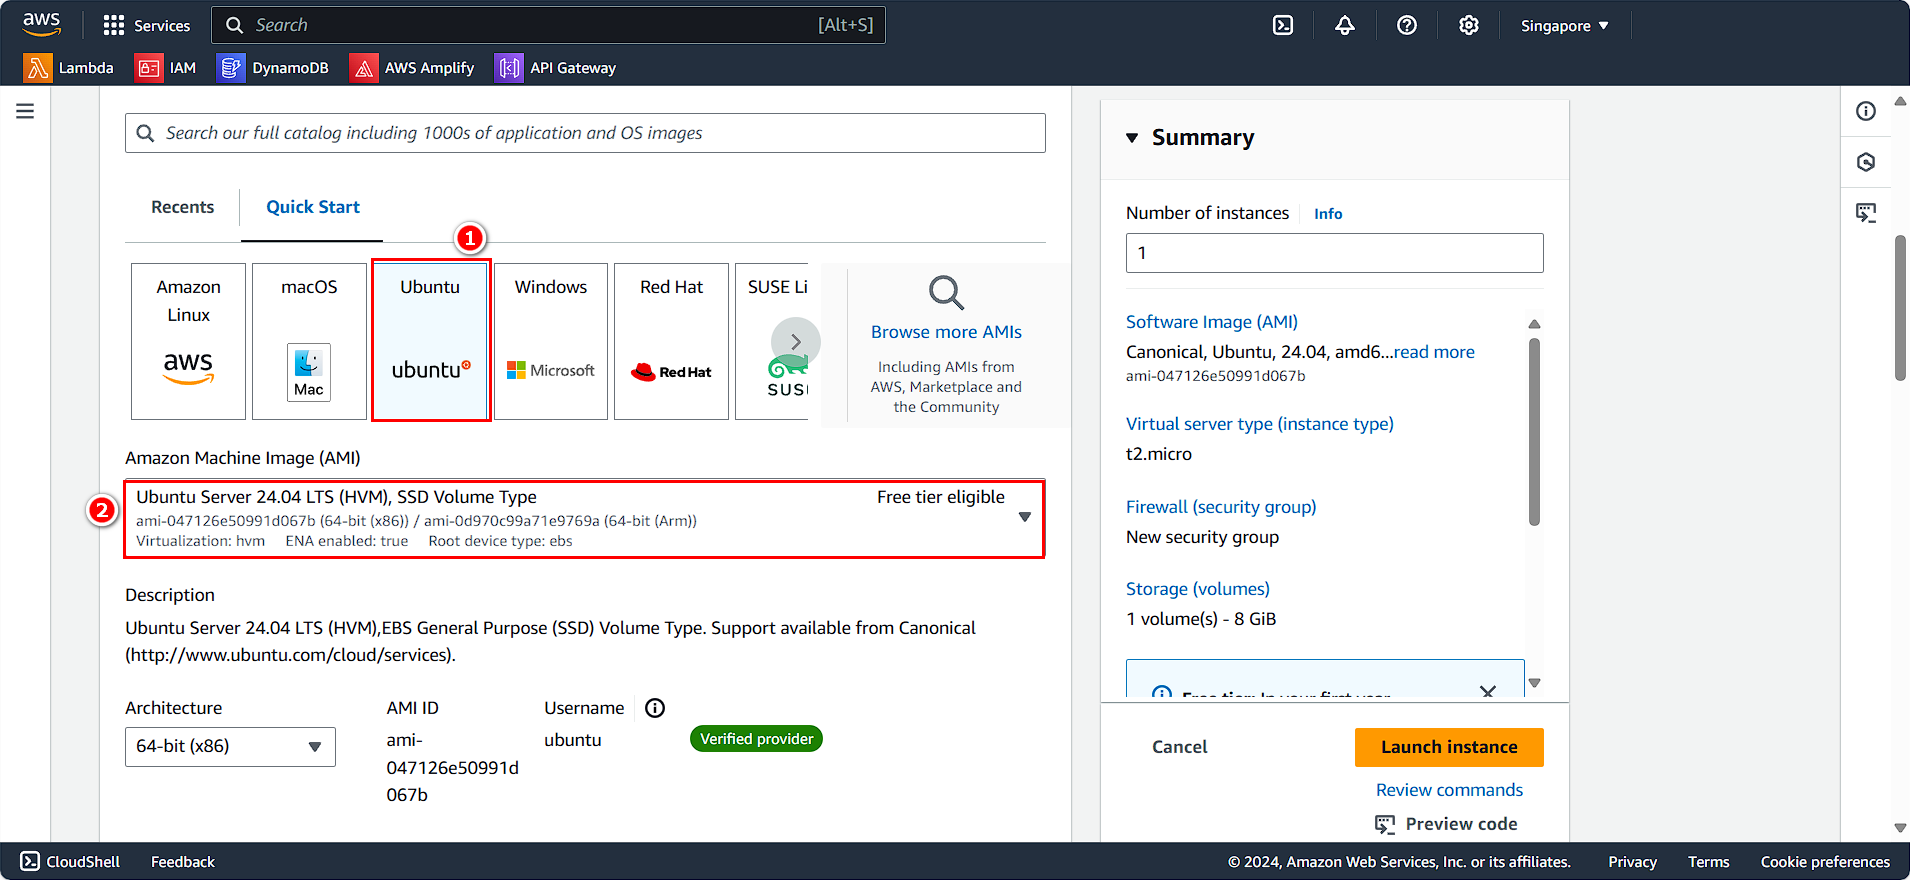
Configuring Amazon Machine Image (AMI)
- Choose the operating system Ubuntu
- Select Ubuntu Server 24.04 LTS AMI
ℹ️ Information: Ubuntu Server 24.04 LTS provides long-term support until 2029, ensuring stability and security updates for your production workloads.
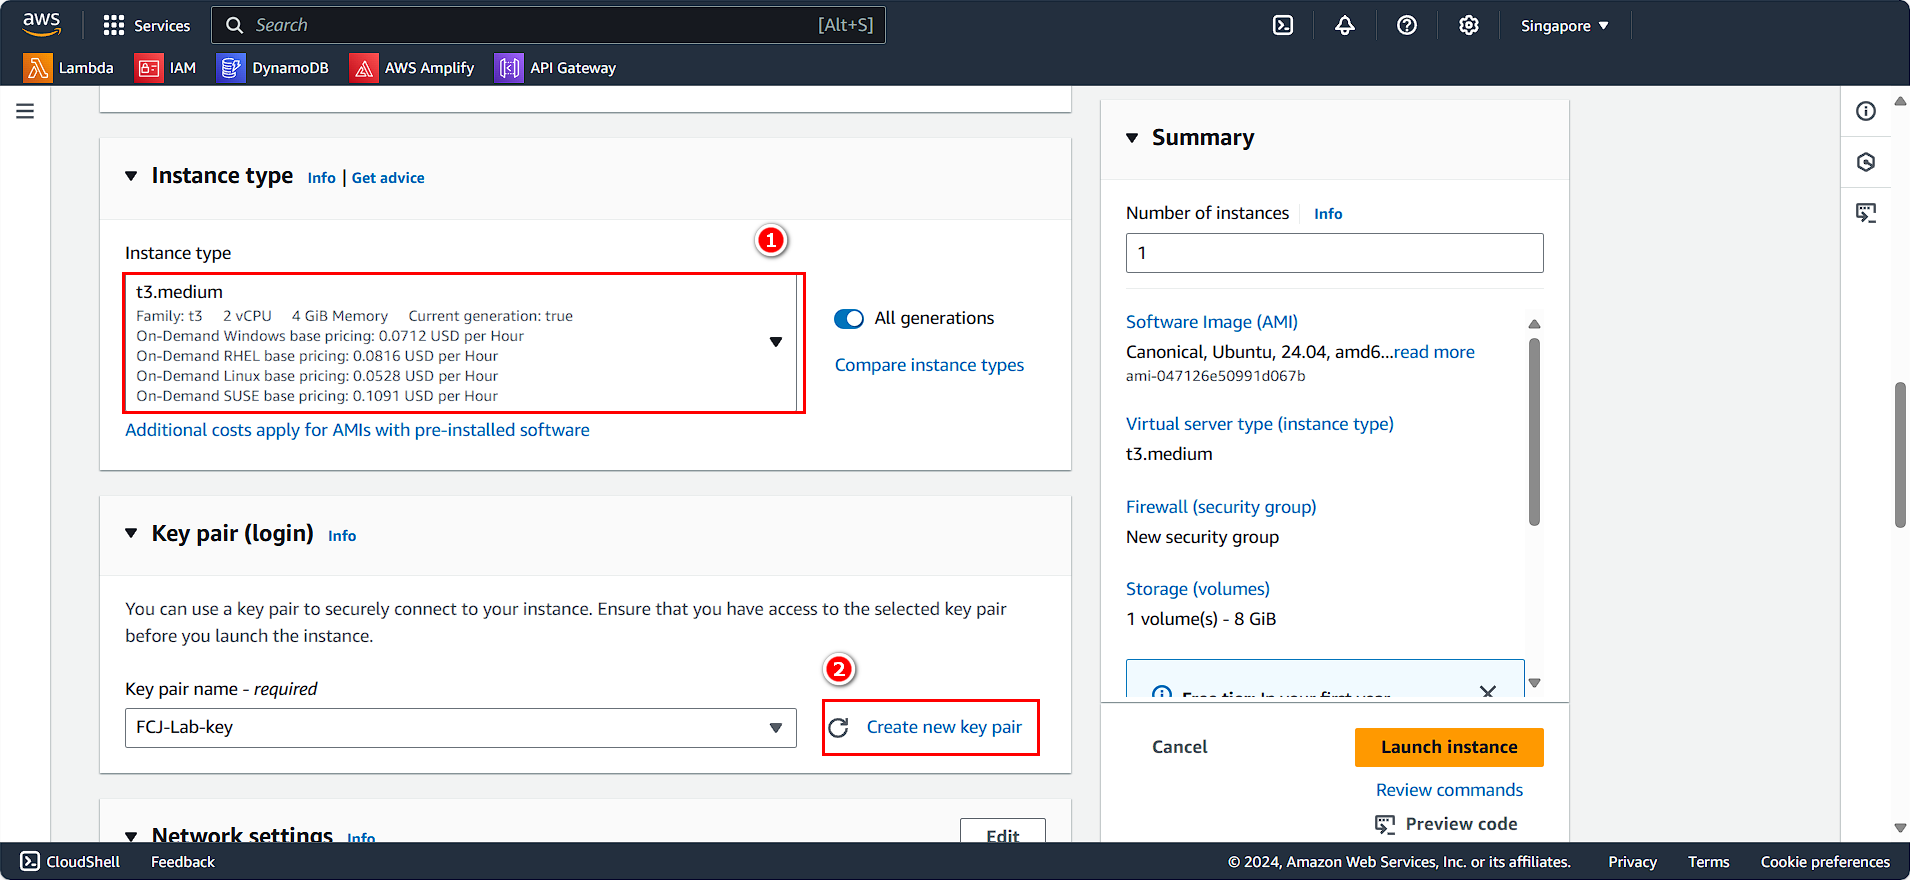
Selecting Instance Type and Authentication
- Instance type t3.medium (2 vCPU, 4 GiB memory)
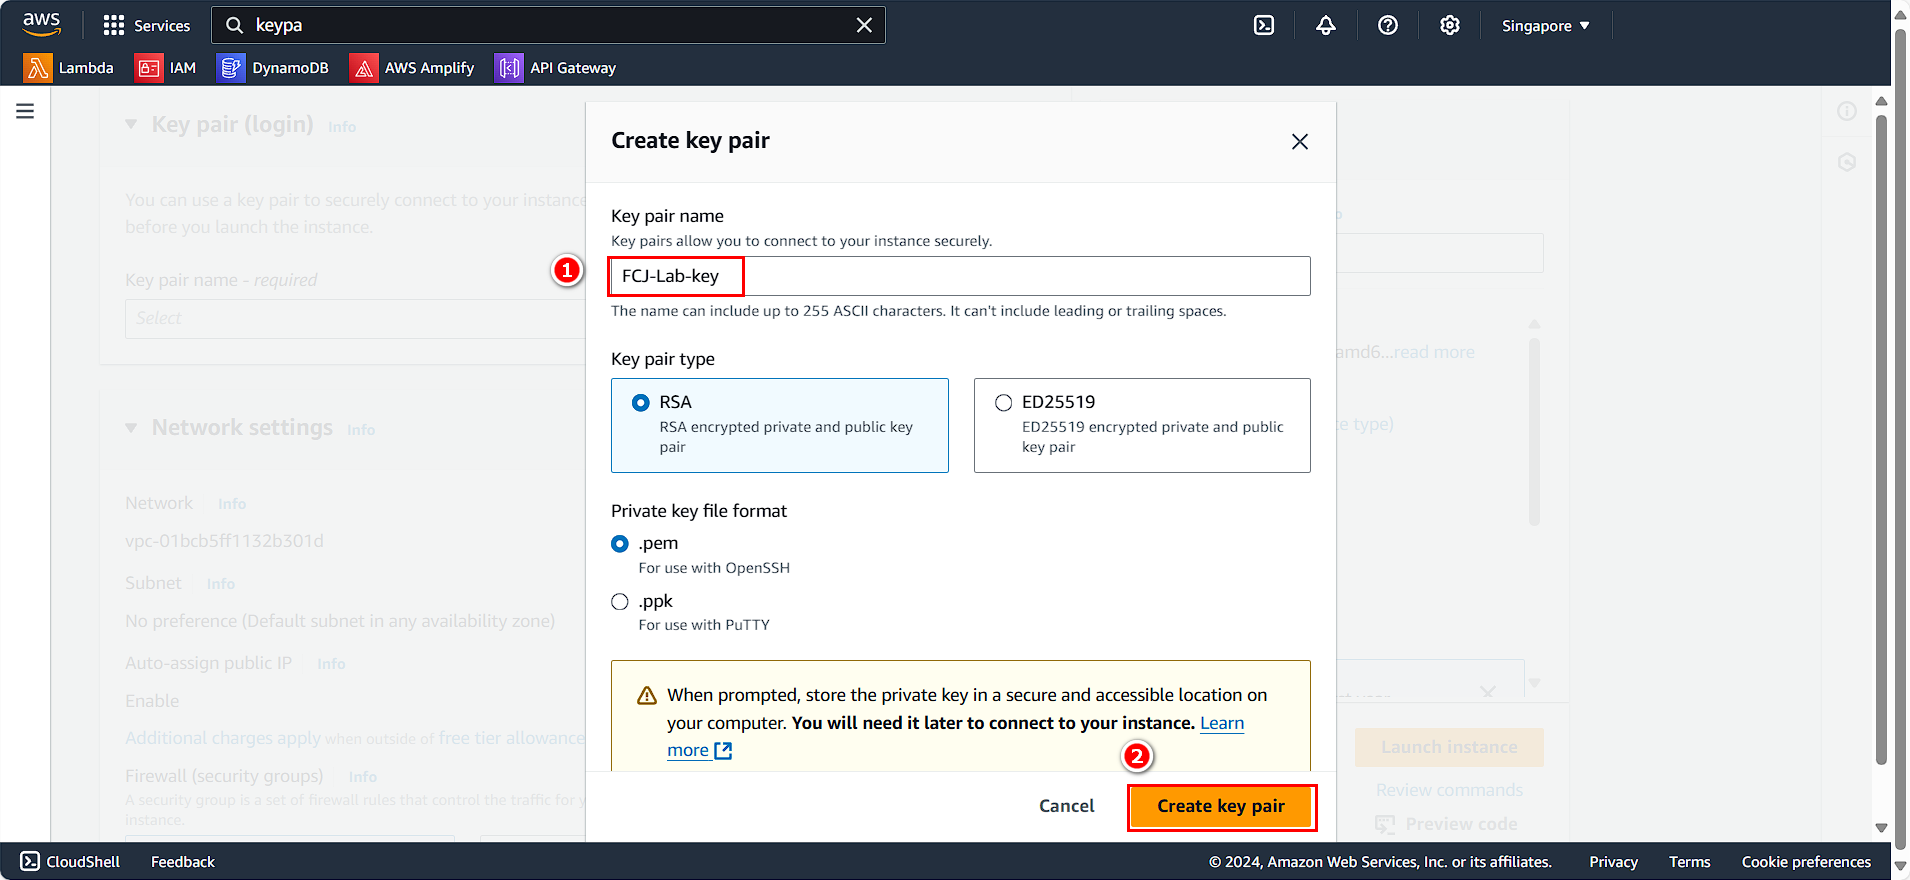
- Select Create new key pair
🔒 Security Note: Key pairs are essential for secure SSH access to your instance. Store the private key file securely and never share it. The private key cannot be recovered if lost.
- Key pair name
FCJ-Lab-key - Select Create key pair
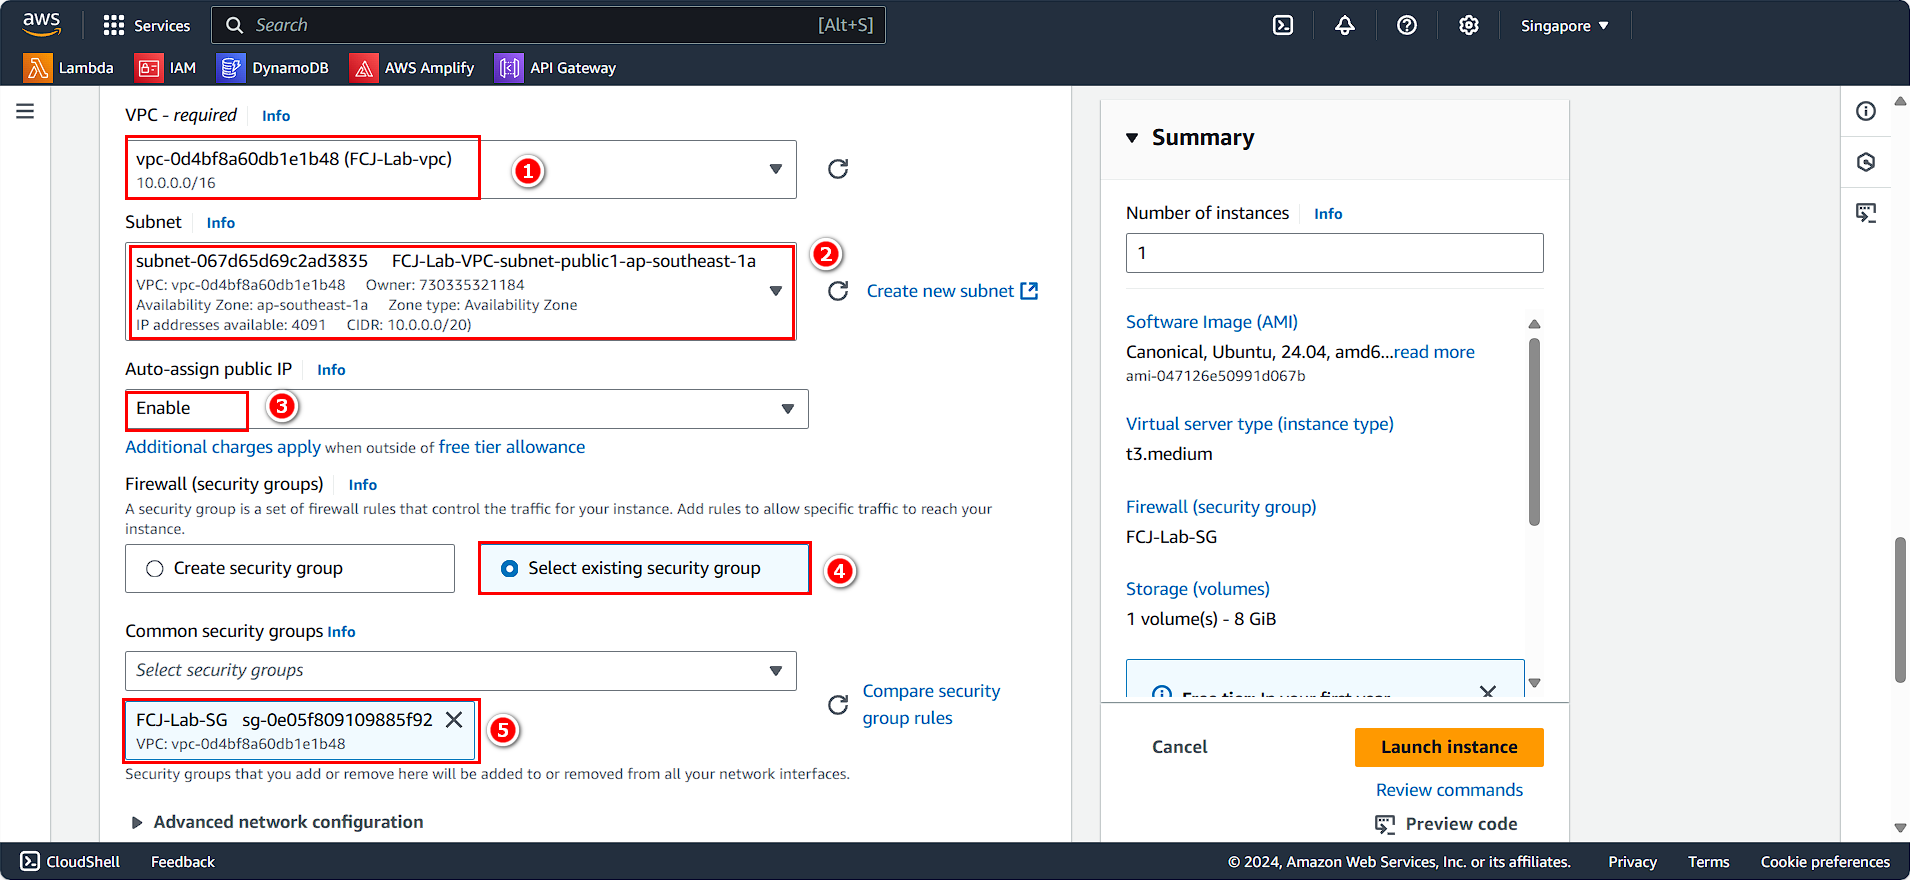
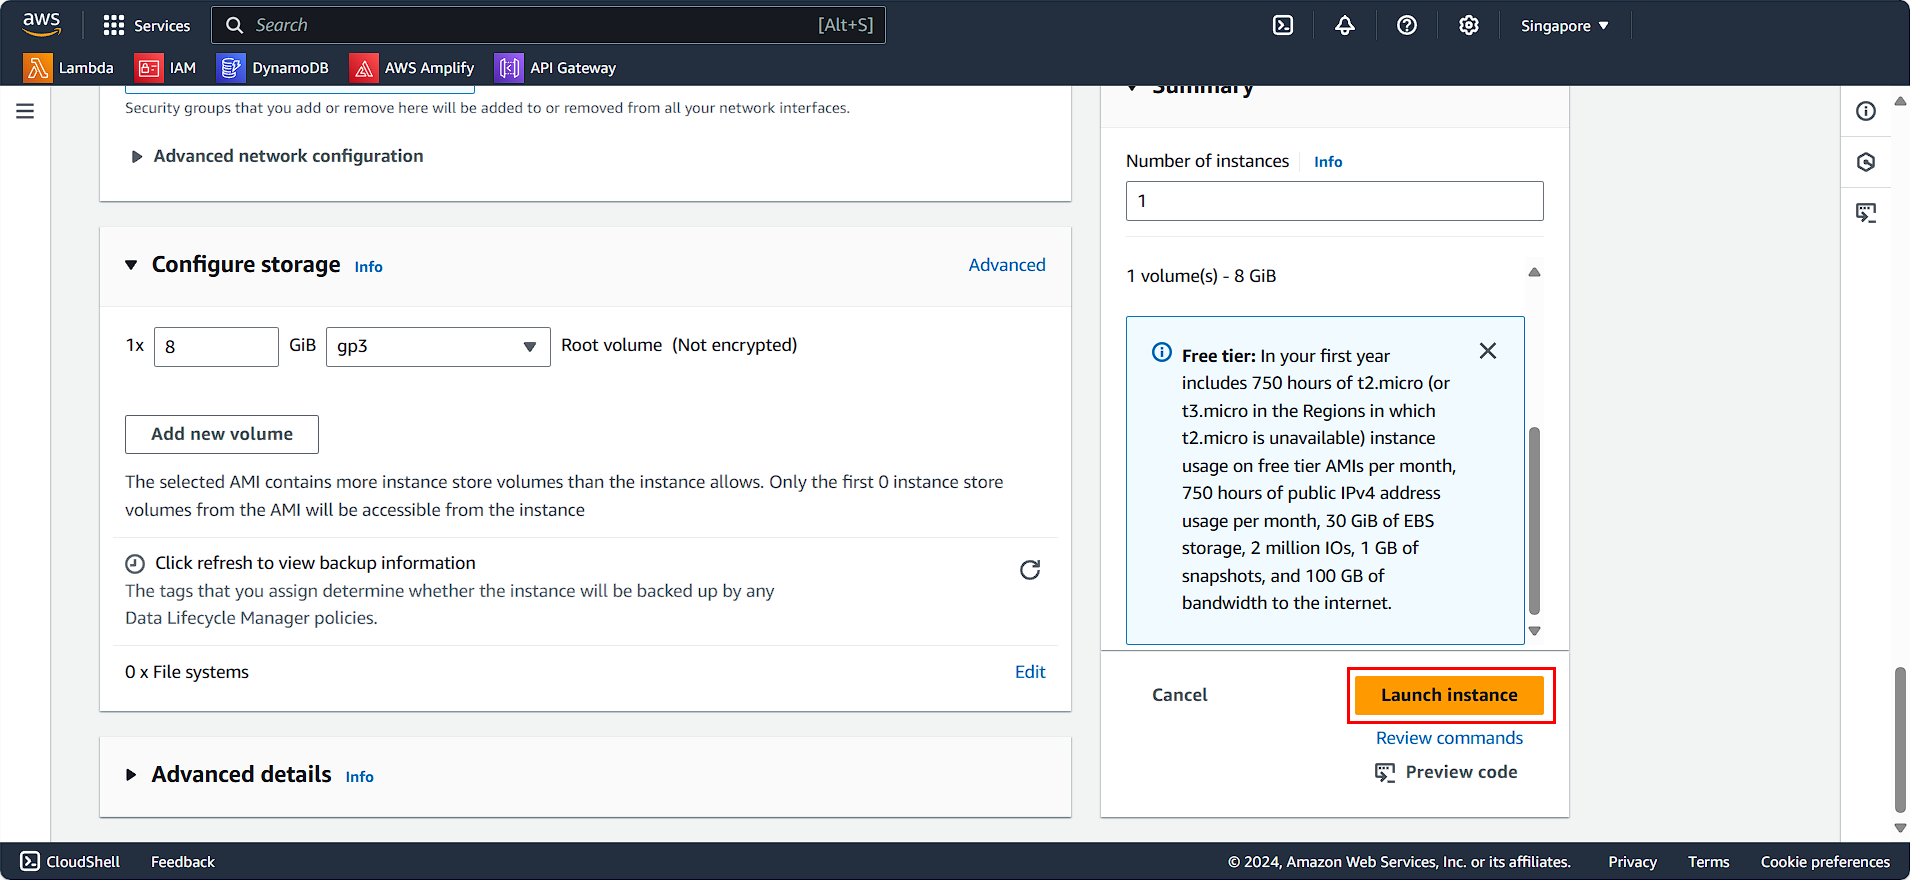
Network and Security Configuration
Scroll down to the network settings section:
- VPC: FCJ-Lab-vpc
- Subnet: Select the public subnet
- Auto-assign public IP: Enable
- Select Select existing security group
- Choose FCJ-Lab-SG
⚠️ Warning: Placing EC2 instances in public subnets exposes them directly to the internet. Ensure your security group rules are properly configured to allow only necessary traffic.
- Click Launch Instance
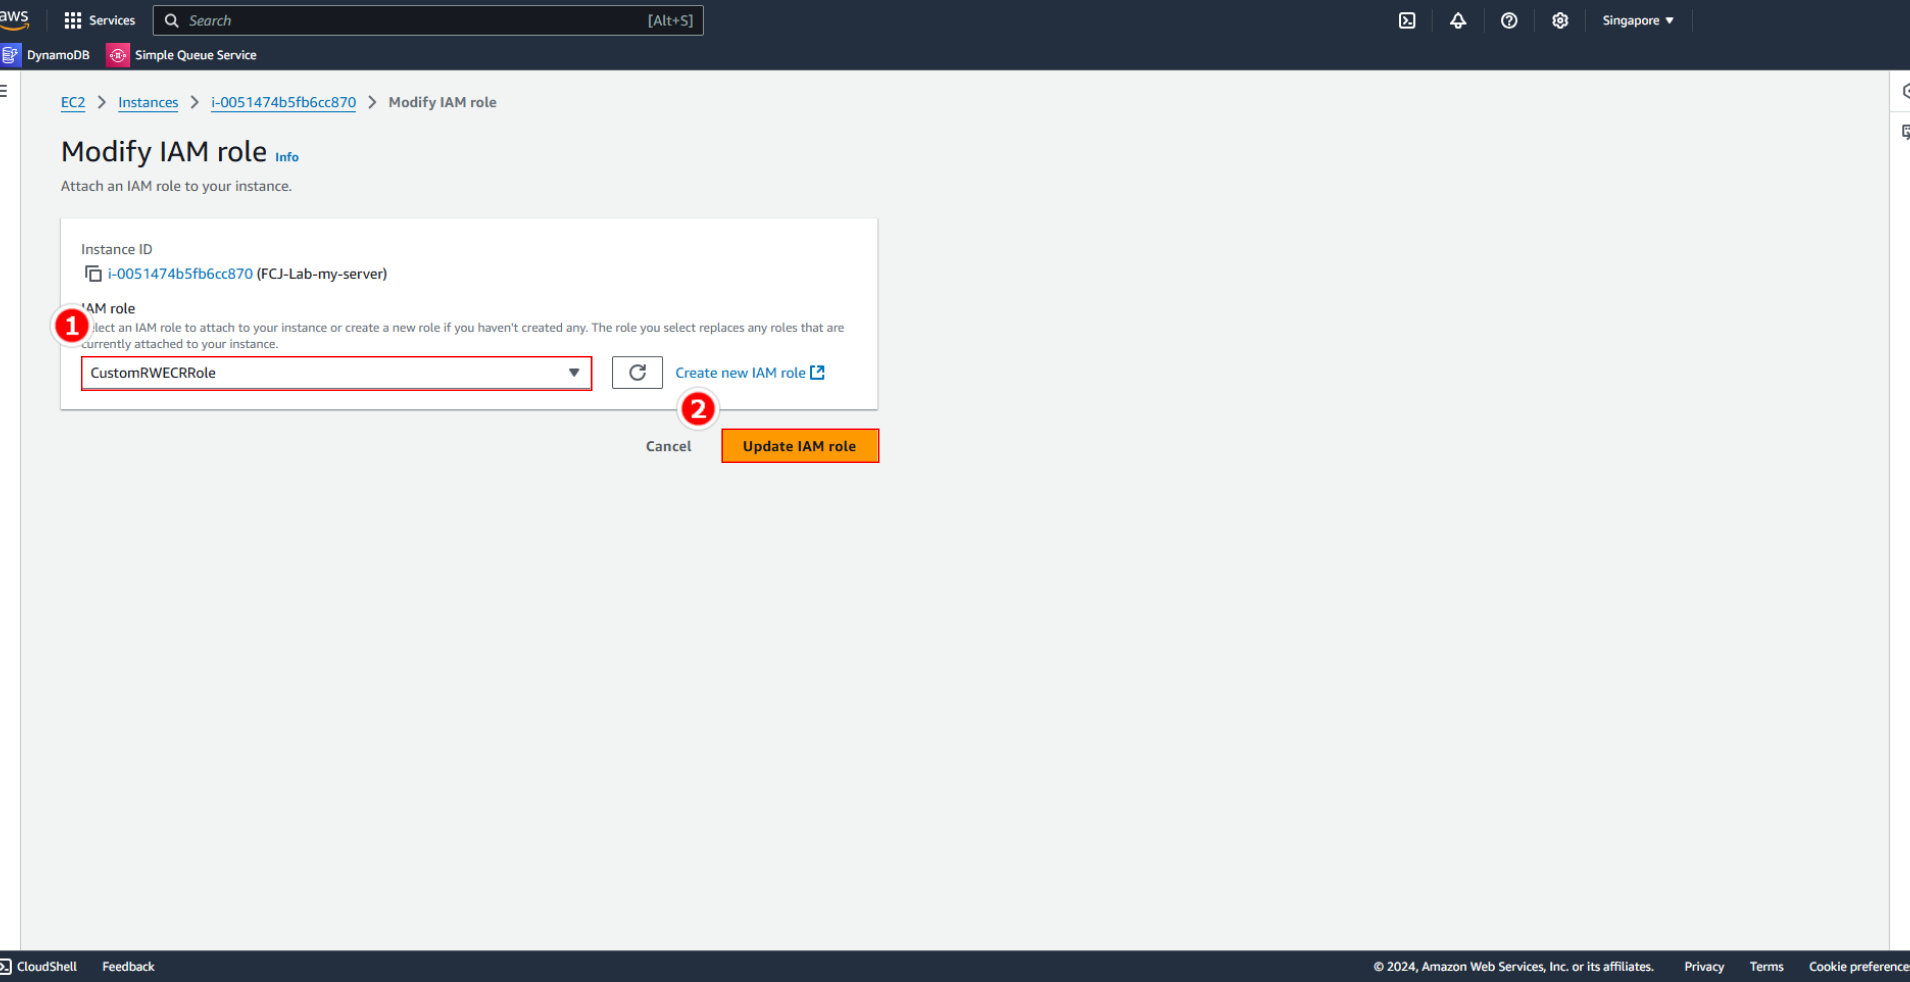
Attaching IAM Role for Amazon ECR Access
ℹ️ Information: Identity and Access Management (IAM) roles allow your EC2 instance to securely access other AWS services without embedding credentials in your application code.
In the EC2 instance details page:
- Select your EC2 instance FCJ-Lab-my-server
- Click Actions
- Navigate to Security
- Select Modify IAM role
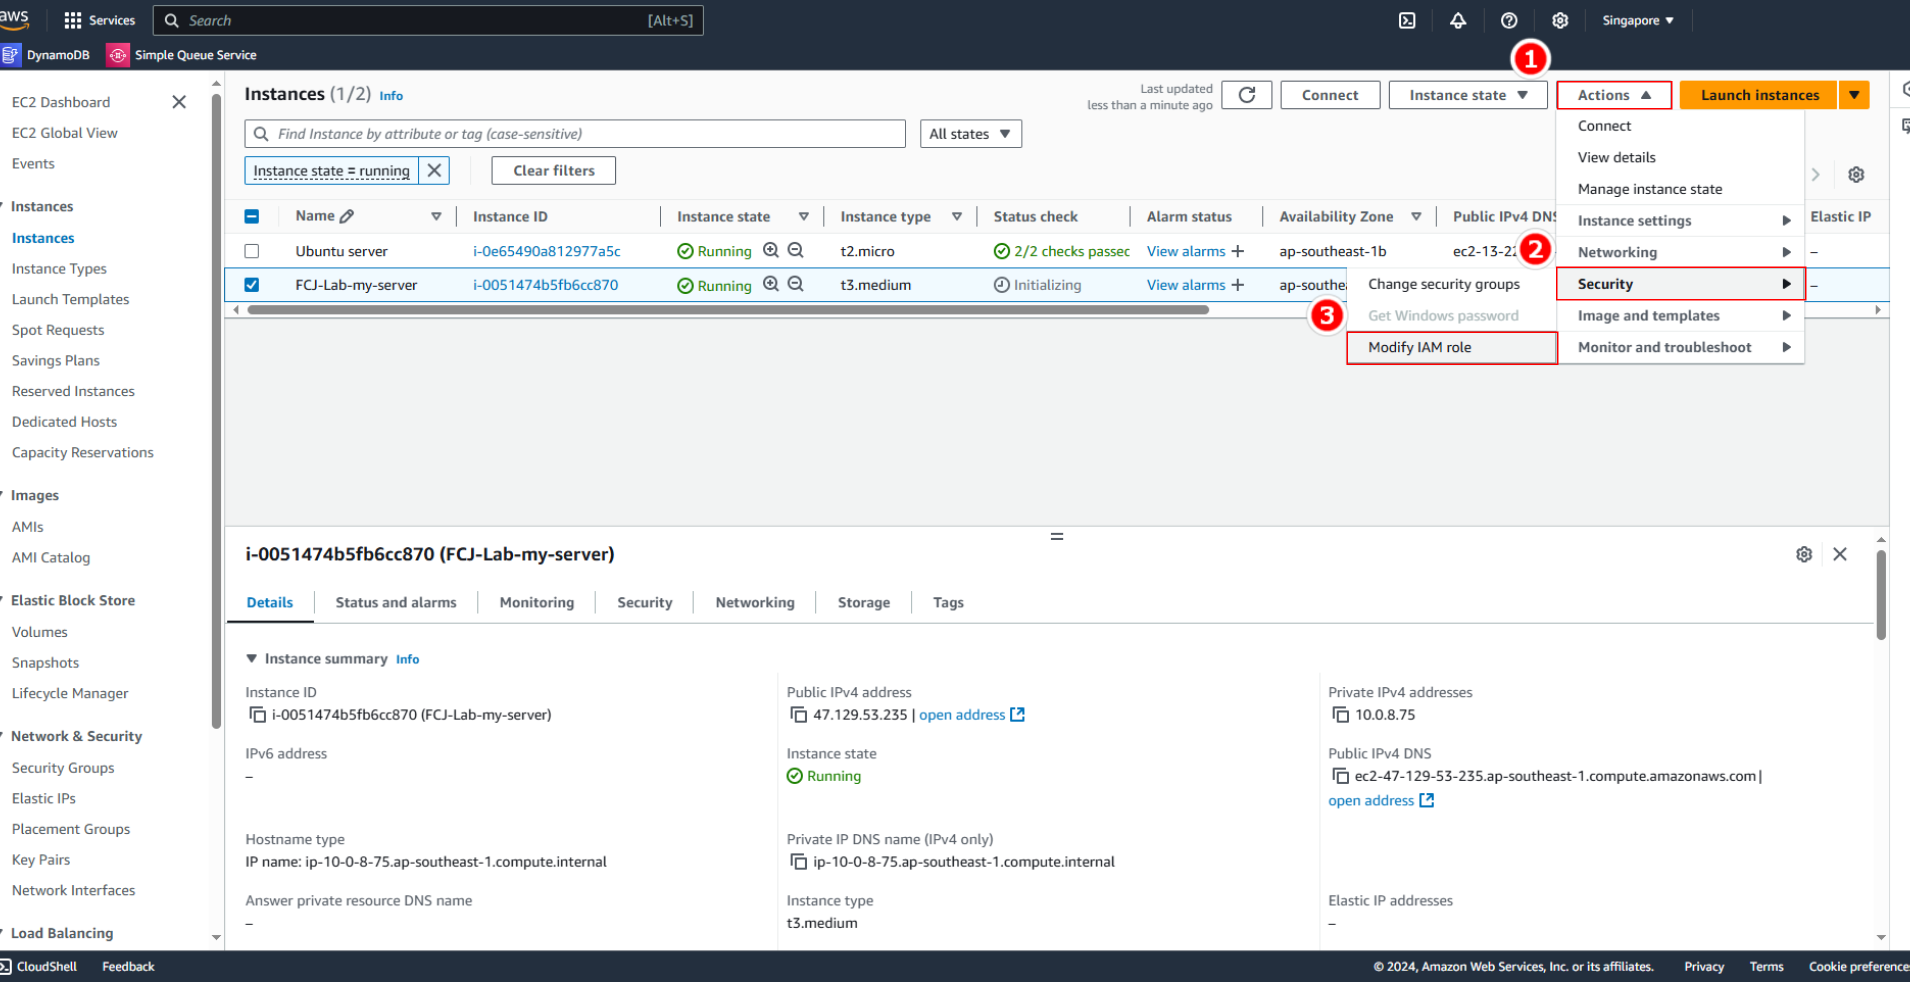
- Choose the IAM role CustomeRWECRRole
- Click Update IAM role
💡 Pro Tip: The CustomeRWECRRole provides read and write access to Amazon Elastic Container Registry (ECR), enabling your instance to pull and push container images without configuring explicit credentials.