Clean Up Resources
Resource Cleanup Overview
ℹ️ Information: Proper resource cleanup in AWS is critical for cost management and security. This section guides you through terminating all resources created during this workshop.
⚠️ Warning: Failure to properly clean up resources may result in unexpected charges to your AWS account.
💡 Pro Tip: Consider using AWS Resource Groups or AWS CloudFormation for easier resource management and cleanup in future projects.
Note: In the next section, we will explore Amazon Elastic Container Service (Amazon ECS) and implement a CI/CD Pipeline, so we can skip some parts in the resource cleanup.
Clean Up Amazon Elastic Container Registry (ECR)
ℹ️ Information: Amazon ECR is a fully managed container registry service that makes it easy to store, manage, and deploy container images.
Follow these steps to remove your ECR repositories:
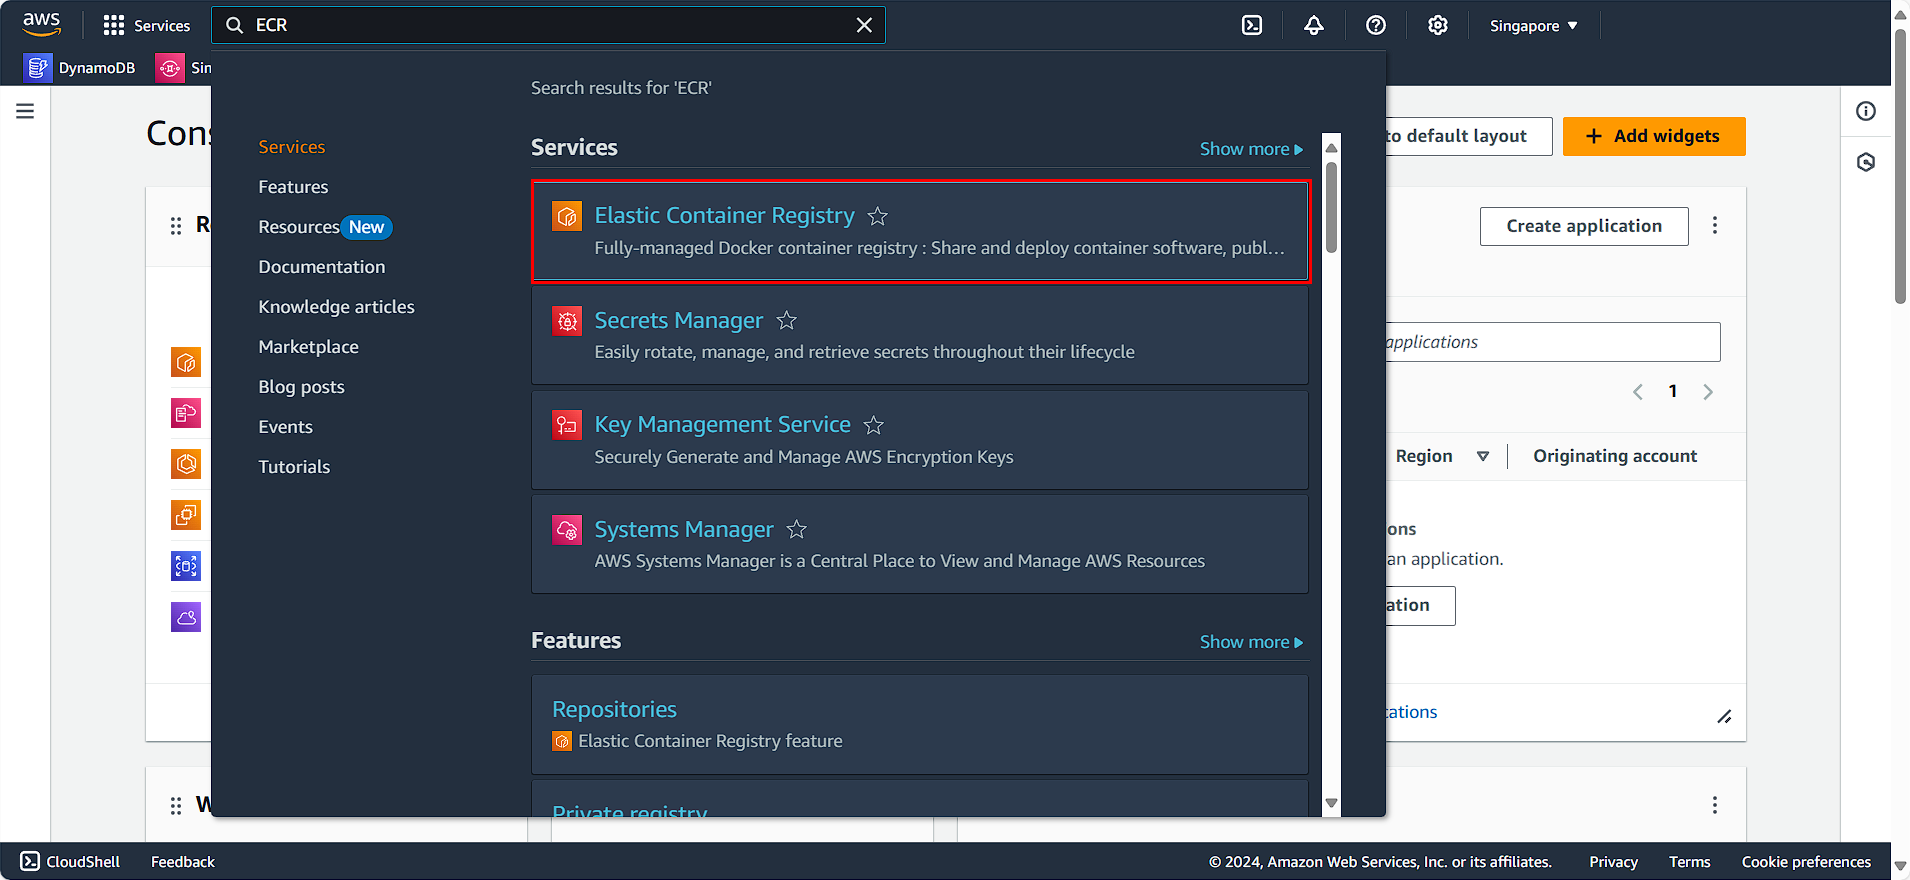
- Navigate to the AWS Management Console
- Search for and select Elastic Container Registry
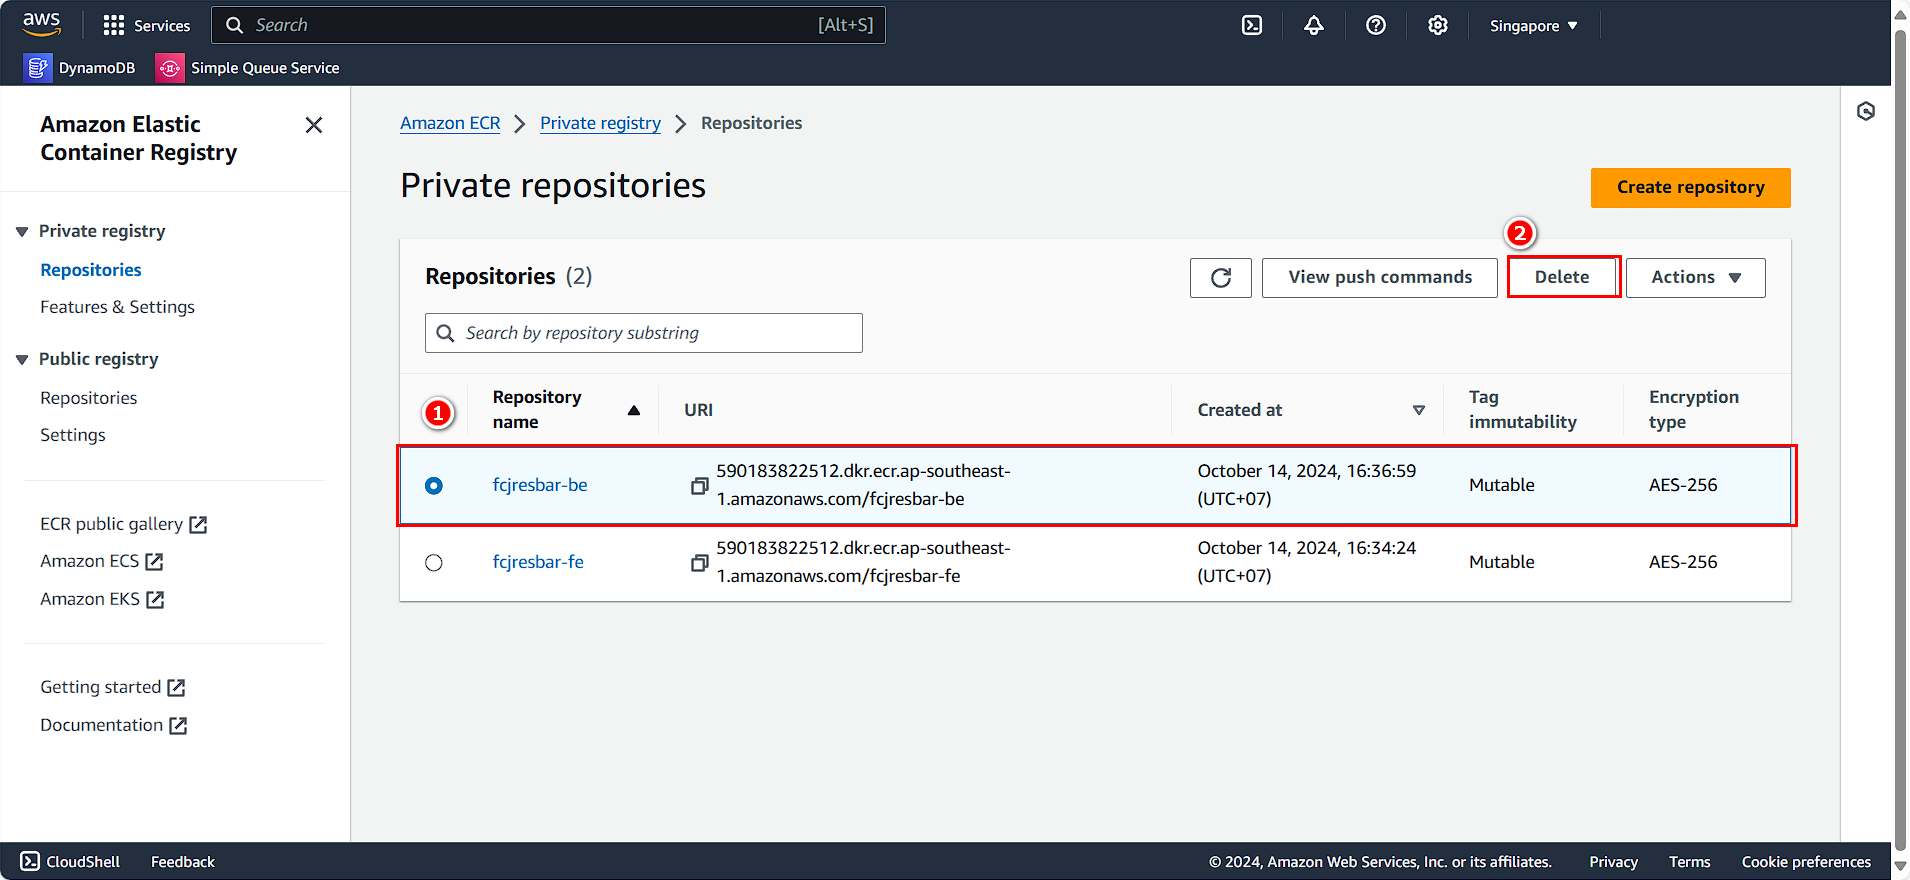
- Locate the repositories created during this workshop:
- Select fcjresbar-be
- Click Delete
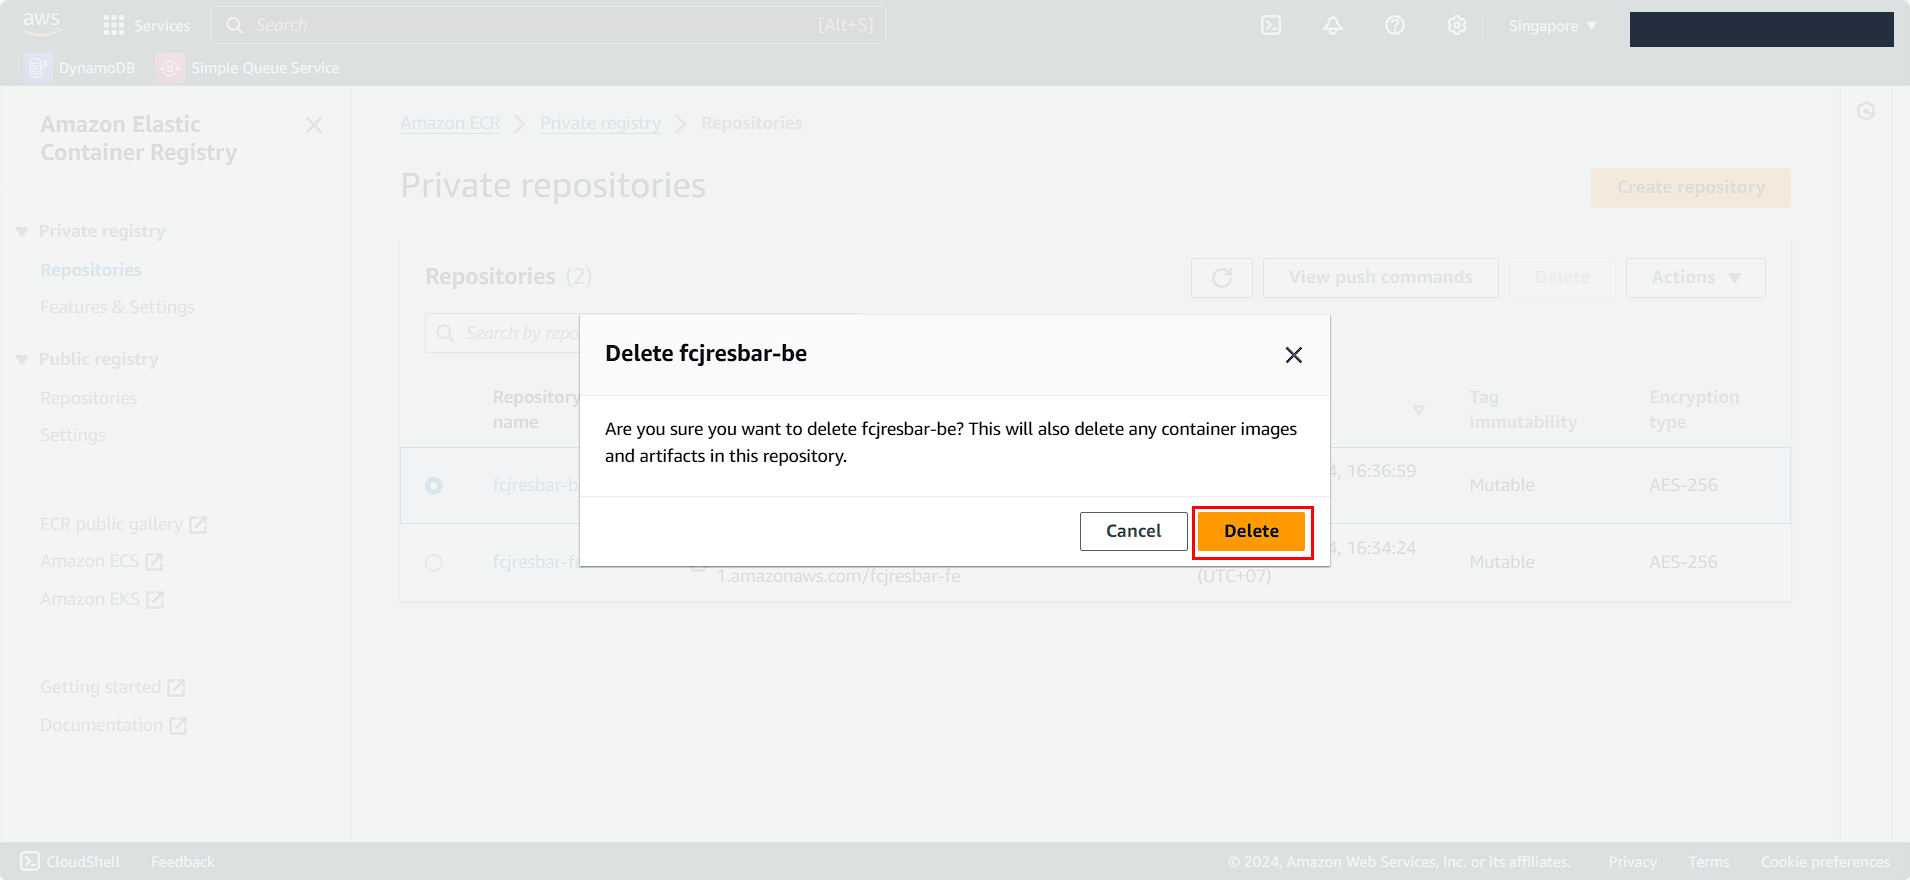
- Confirm the deletion when prompted
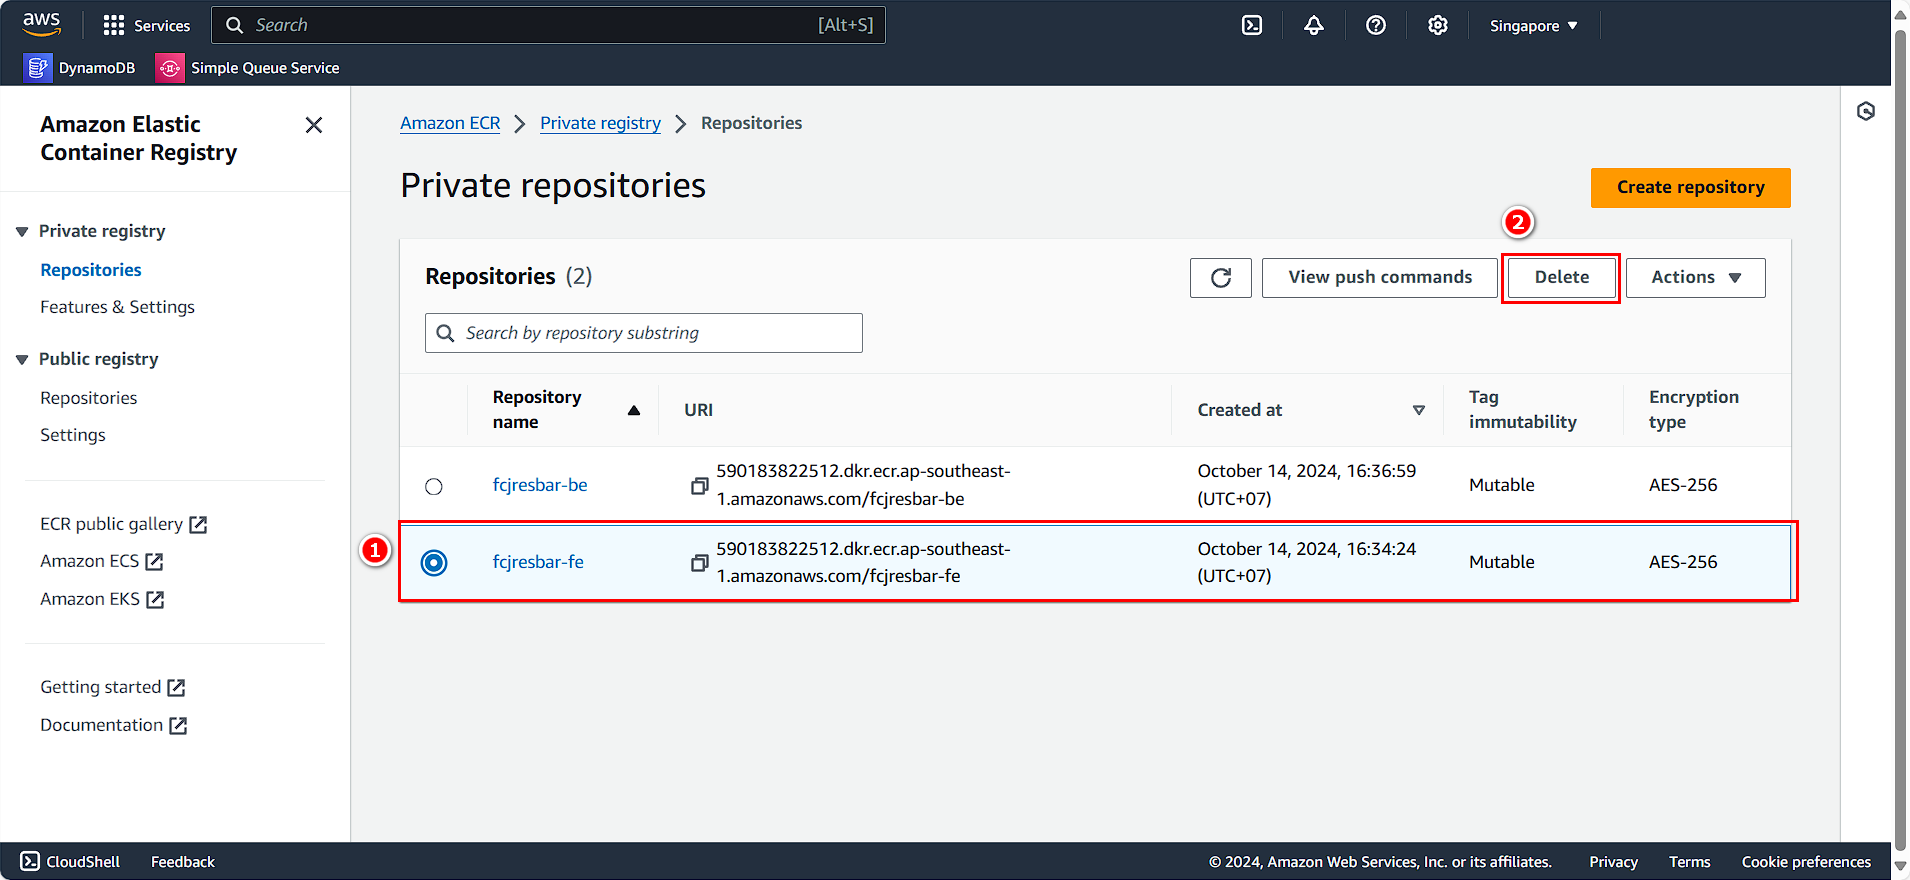
- Repeat the process for the frontend repository:
- Select fcjresbar-fe
- Click Delete
- Confirm the deletion when prompted

Clean Up Amazon EC2 Resources
ℹ️ Information: Amazon EC2 provides resizable compute capacity in the AWS Cloud. Terminating unused instances prevents unnecessary charges.
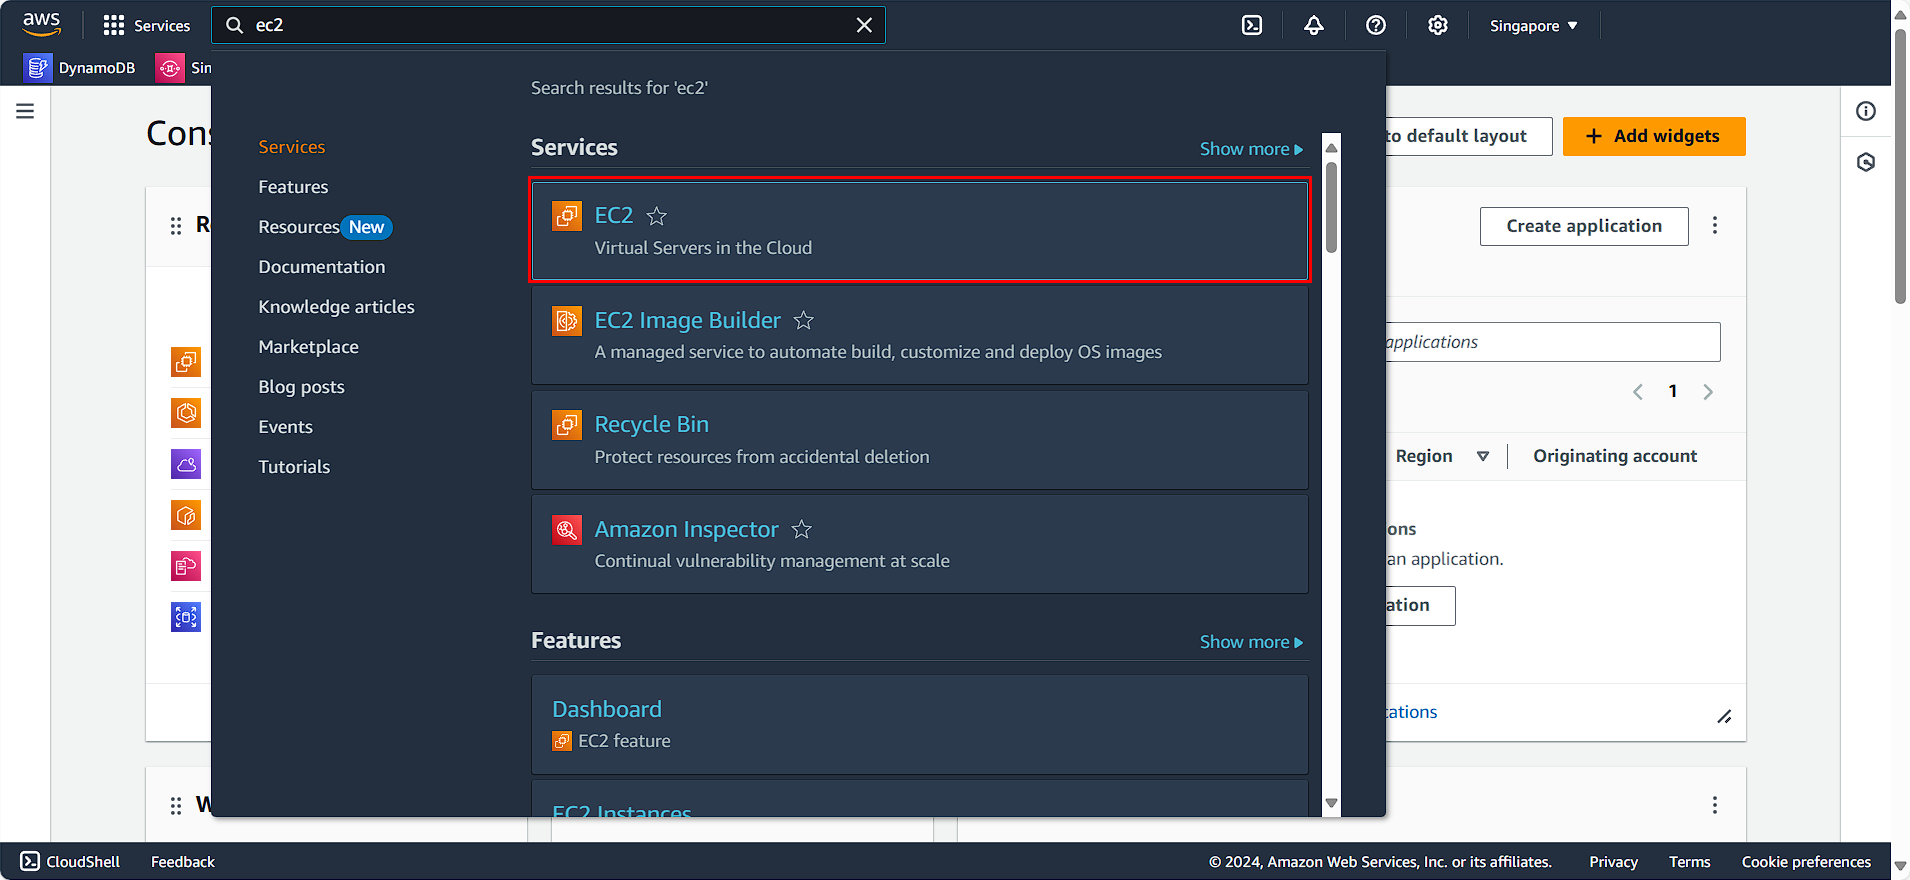
- Navigate to the Amazon EC2 console
- Search for and select EC2
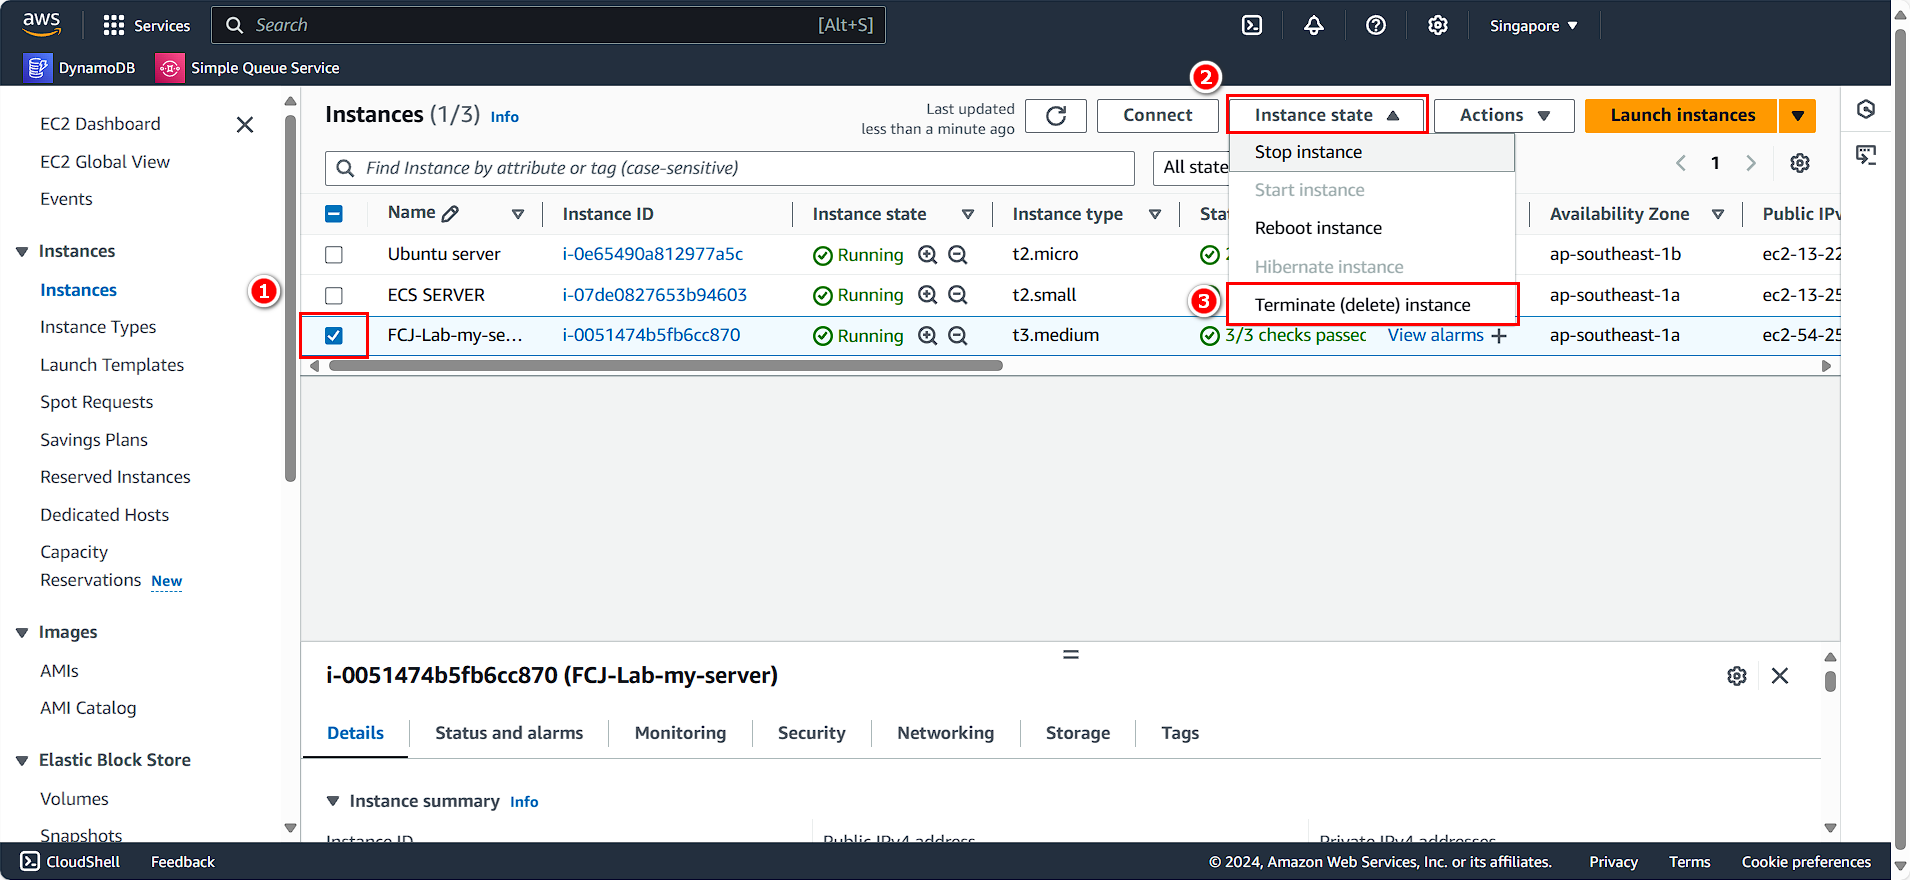
- Select the EC2 instance created during this workshop (FCJ-Lab-my-server)
- From the Instance state menu, select Terminate instance
Delete Security Groups
🔒 Security Note: Security groups act as virtual firewalls to control inbound and outbound traffic. Always clean up unused security groups to maintain a secure environment.
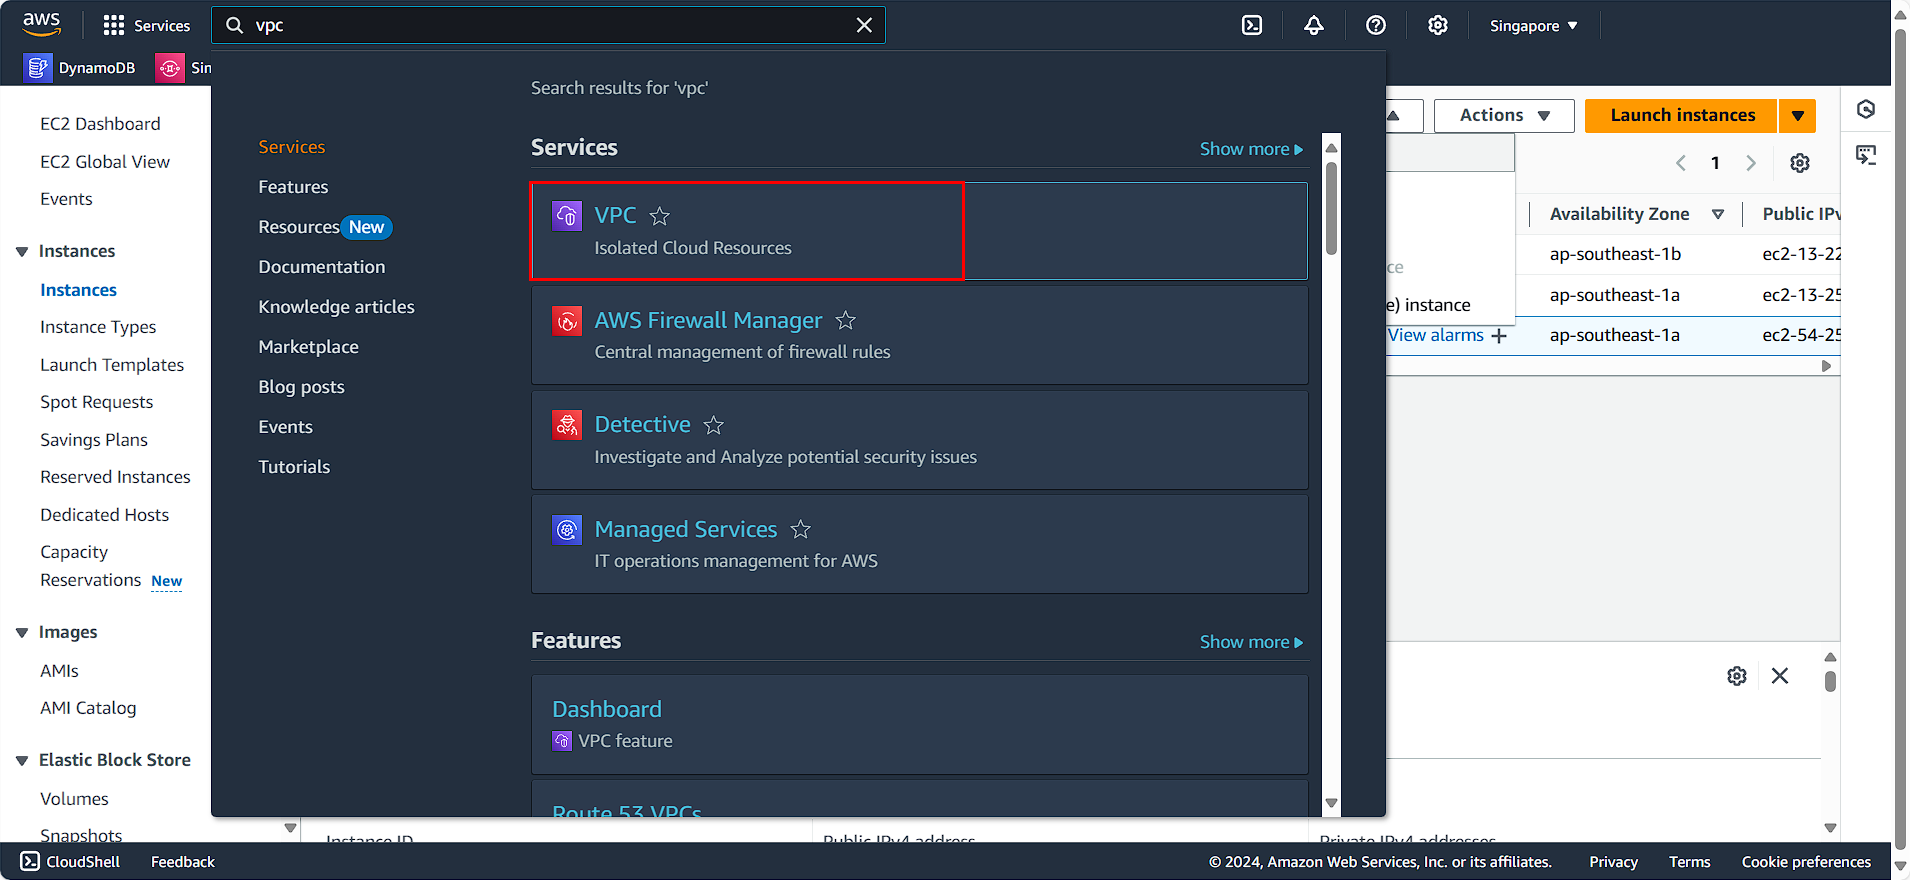
- Navigate to the Amazon VPC console
- Search for and select VPC
- In the left navigation panel:
- Select Security Groups
- Choose FCJ-Lab-sg-private
- Click Actions
- Select Delete security groups

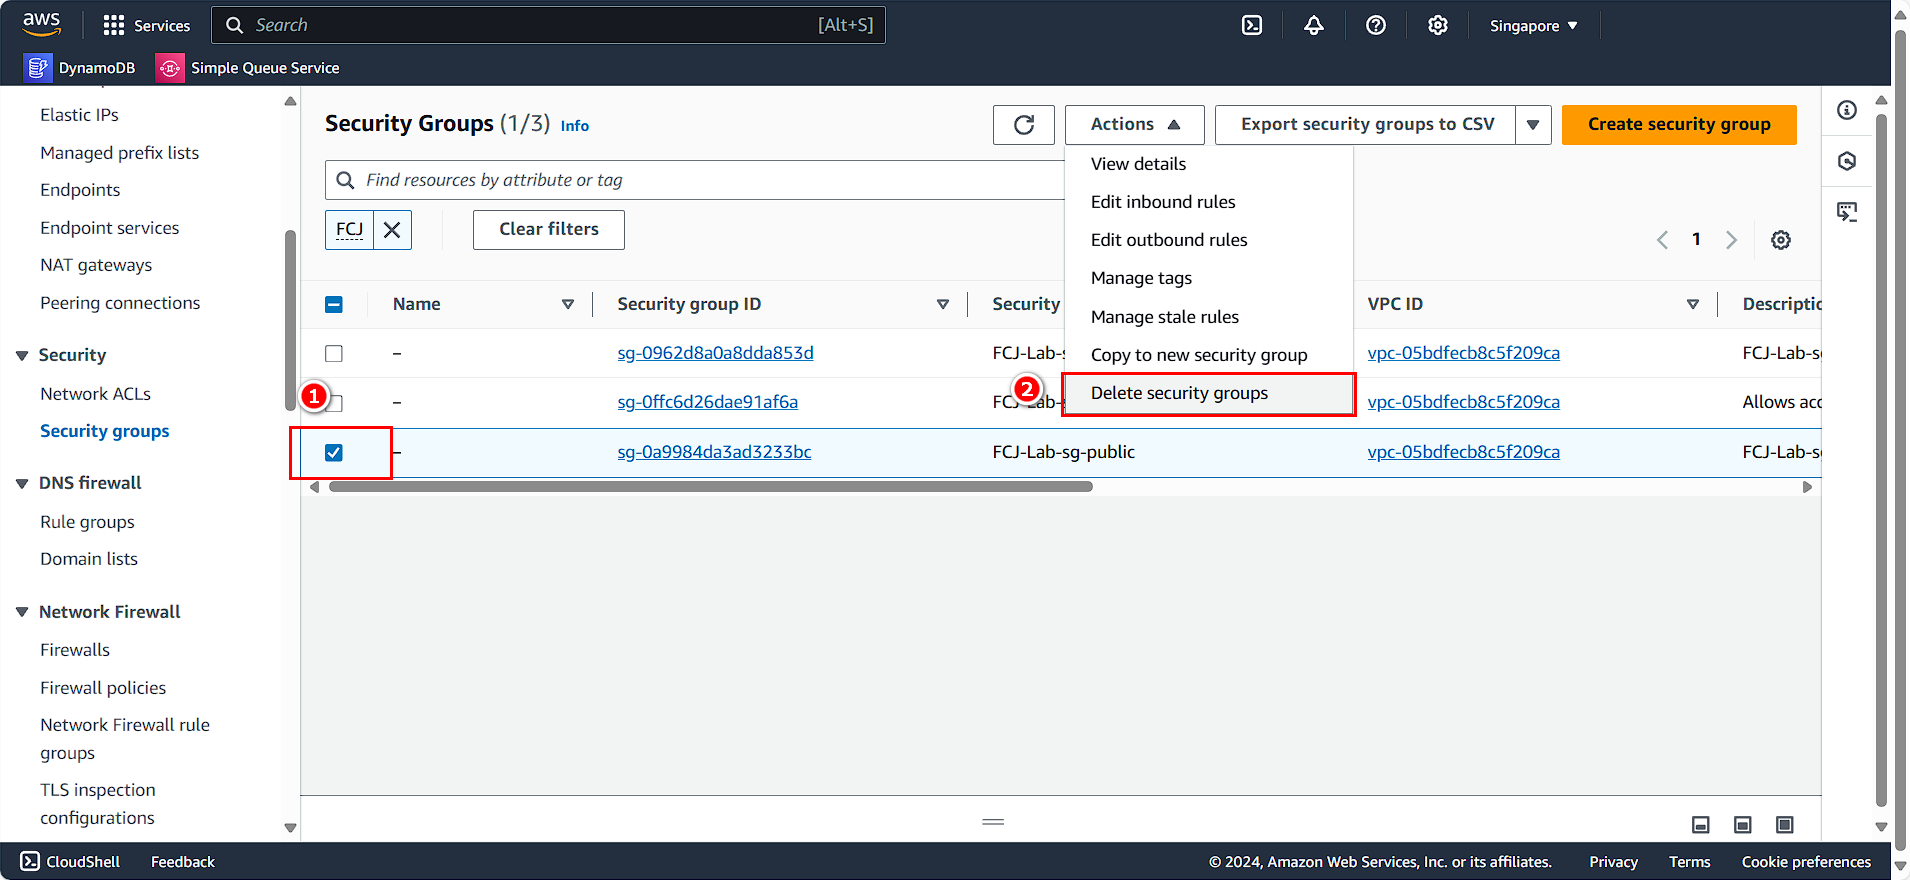
- Similarly, for the public security group:
- Select Security Groups
- Choose FCJ-Lab-sg-public
- Click Actions
- Select Delete security groups
Delete IAM Role
🔒 Security Note: IAM roles provide permissions to AWS services and should be cleaned up when no longer needed to follow the principle of least privilege.
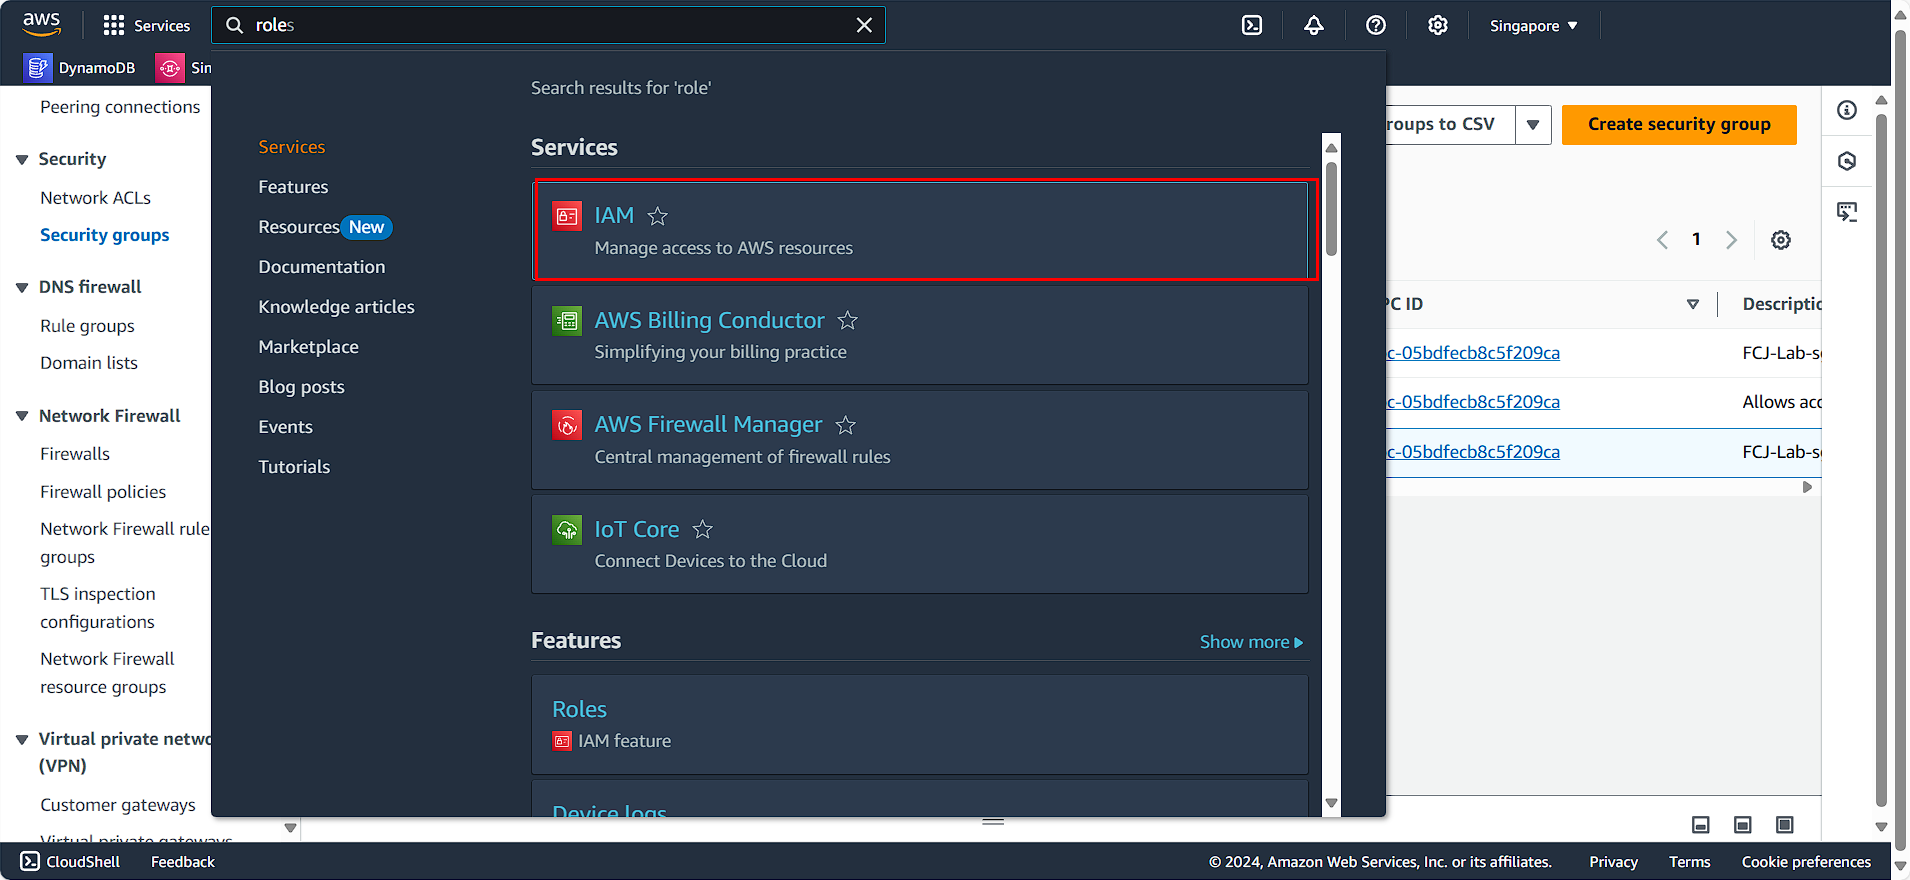
- Navigate to the AWS Identity and Access Management (IAM) console
- Search for and select IAM
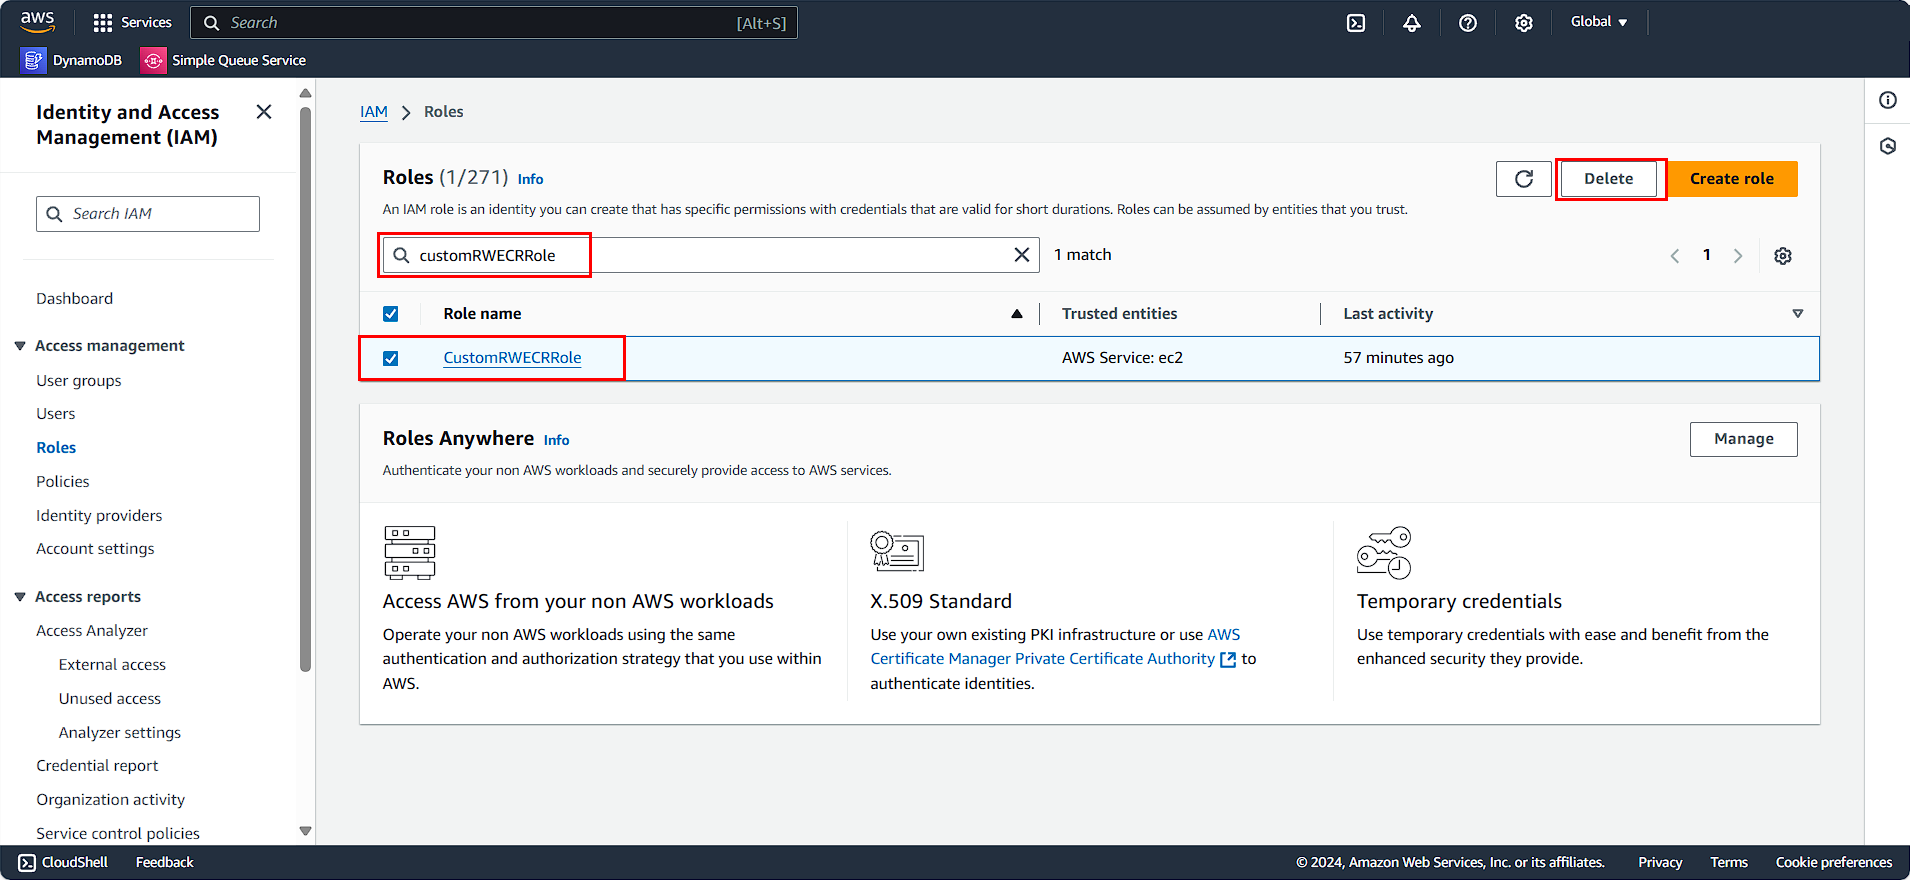
- In the left navigation panel:
- Select Roles
- Search for customRWECRRole
- Select the role
- Click Delete
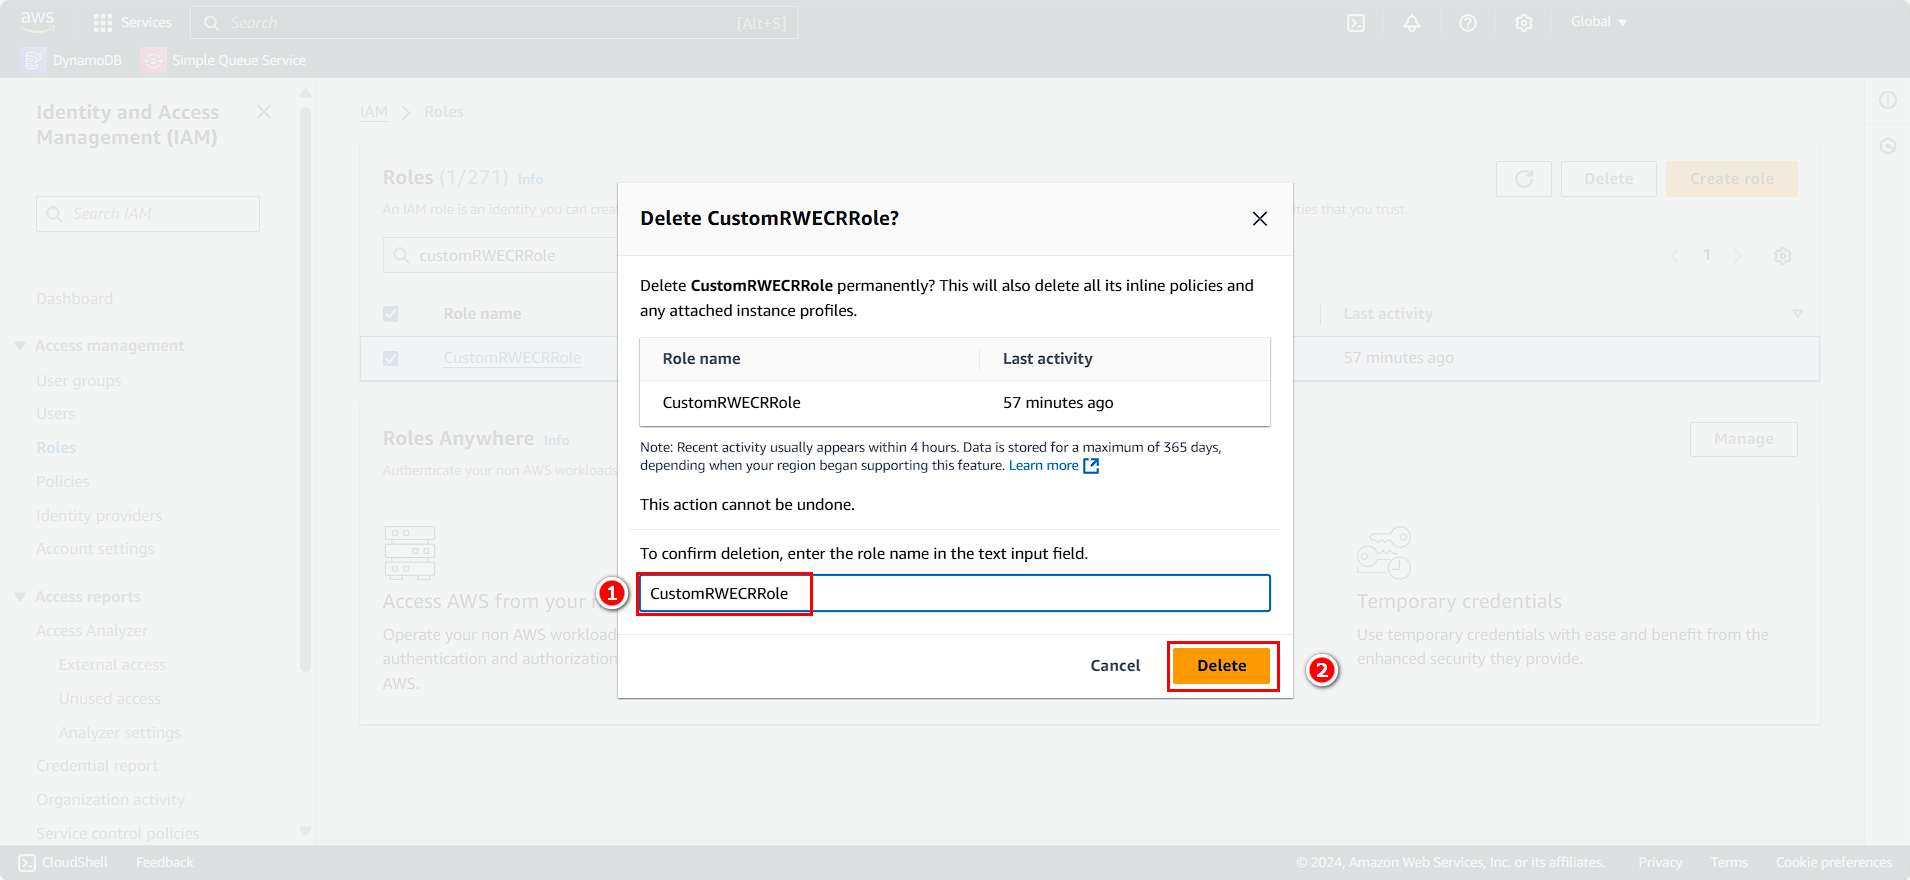
- Confirm by entering the role name
customRWECRRole - Click Delete
Clean Up Amazon VPC
ℹ️ Information: Amazon VPC is the networking layer for your AWS resources. Deleting a VPC also removes its associated subnets, route tables, and gateway attachments.
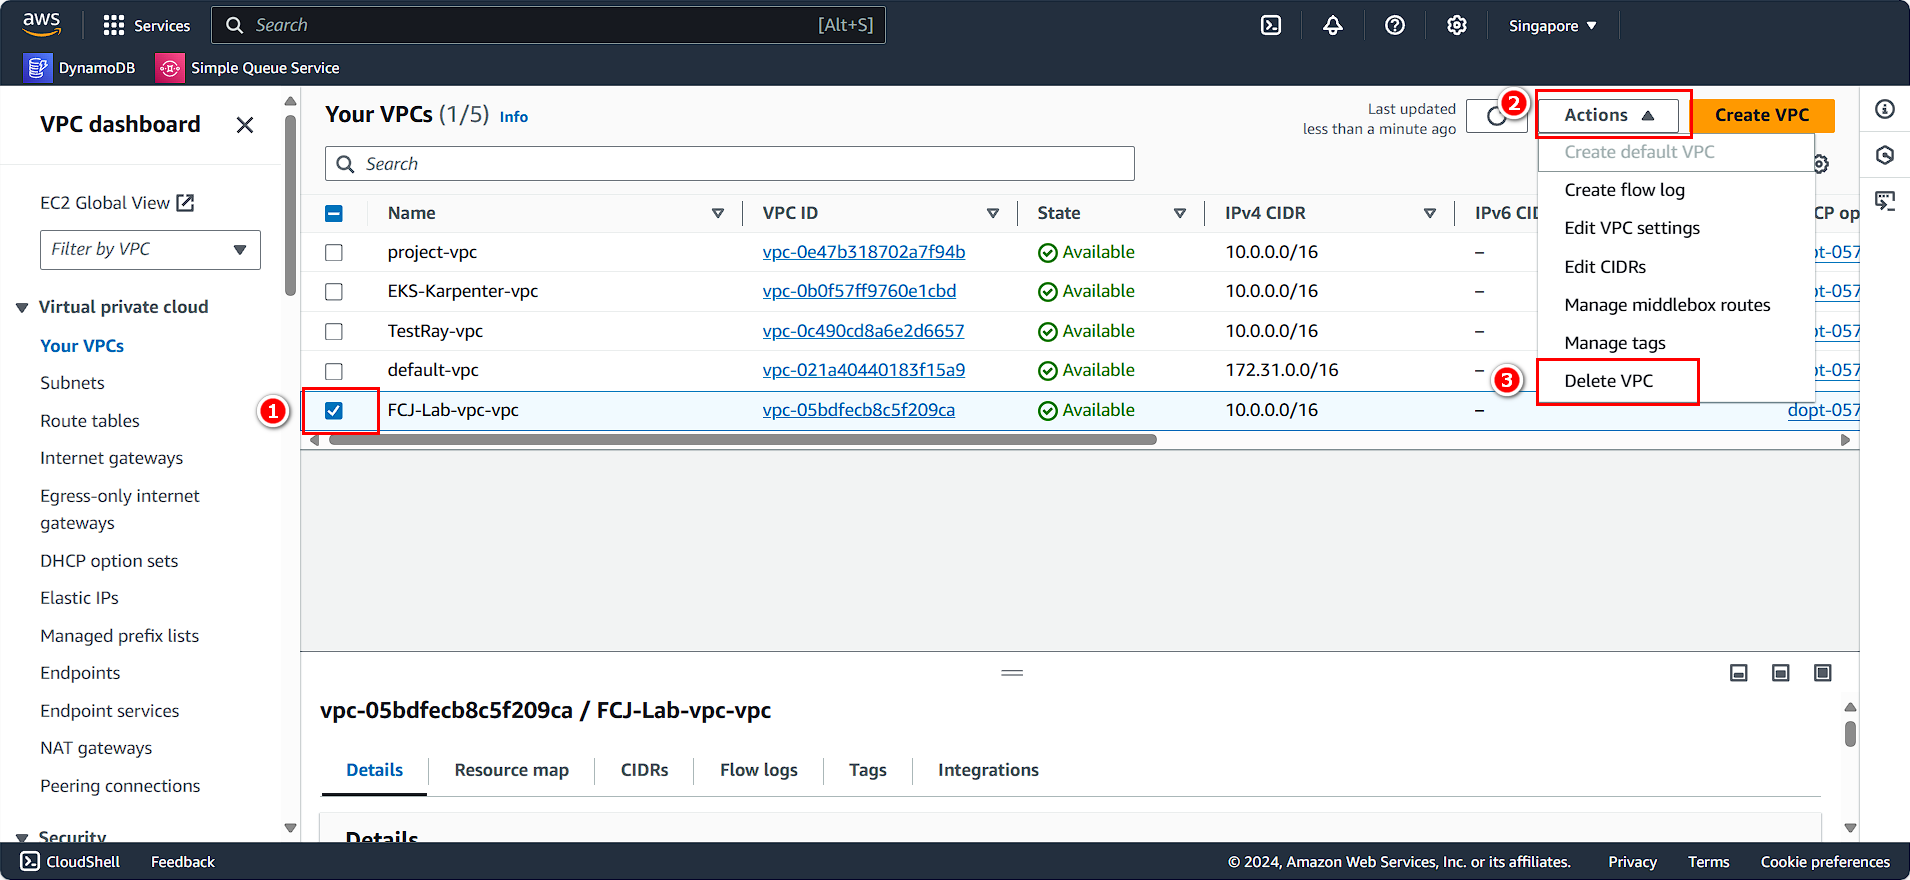
- Navigate to the VPC console
- Search for and select VPC
- Select VPC-Lab-vpc
- Click Actions
- Select Delete VPC
💡 Pro Tip: Before deleting a VPC, ensure all resources within it have been terminated, including EC2 instances, RDS databases, and load balancers.
Clean Up Amazon RDS
ℹ️ Information: Amazon RDS makes it easy to set up, operate, and scale relational databases in the cloud. Properly terminating RDS instances is important to avoid ongoing charges.
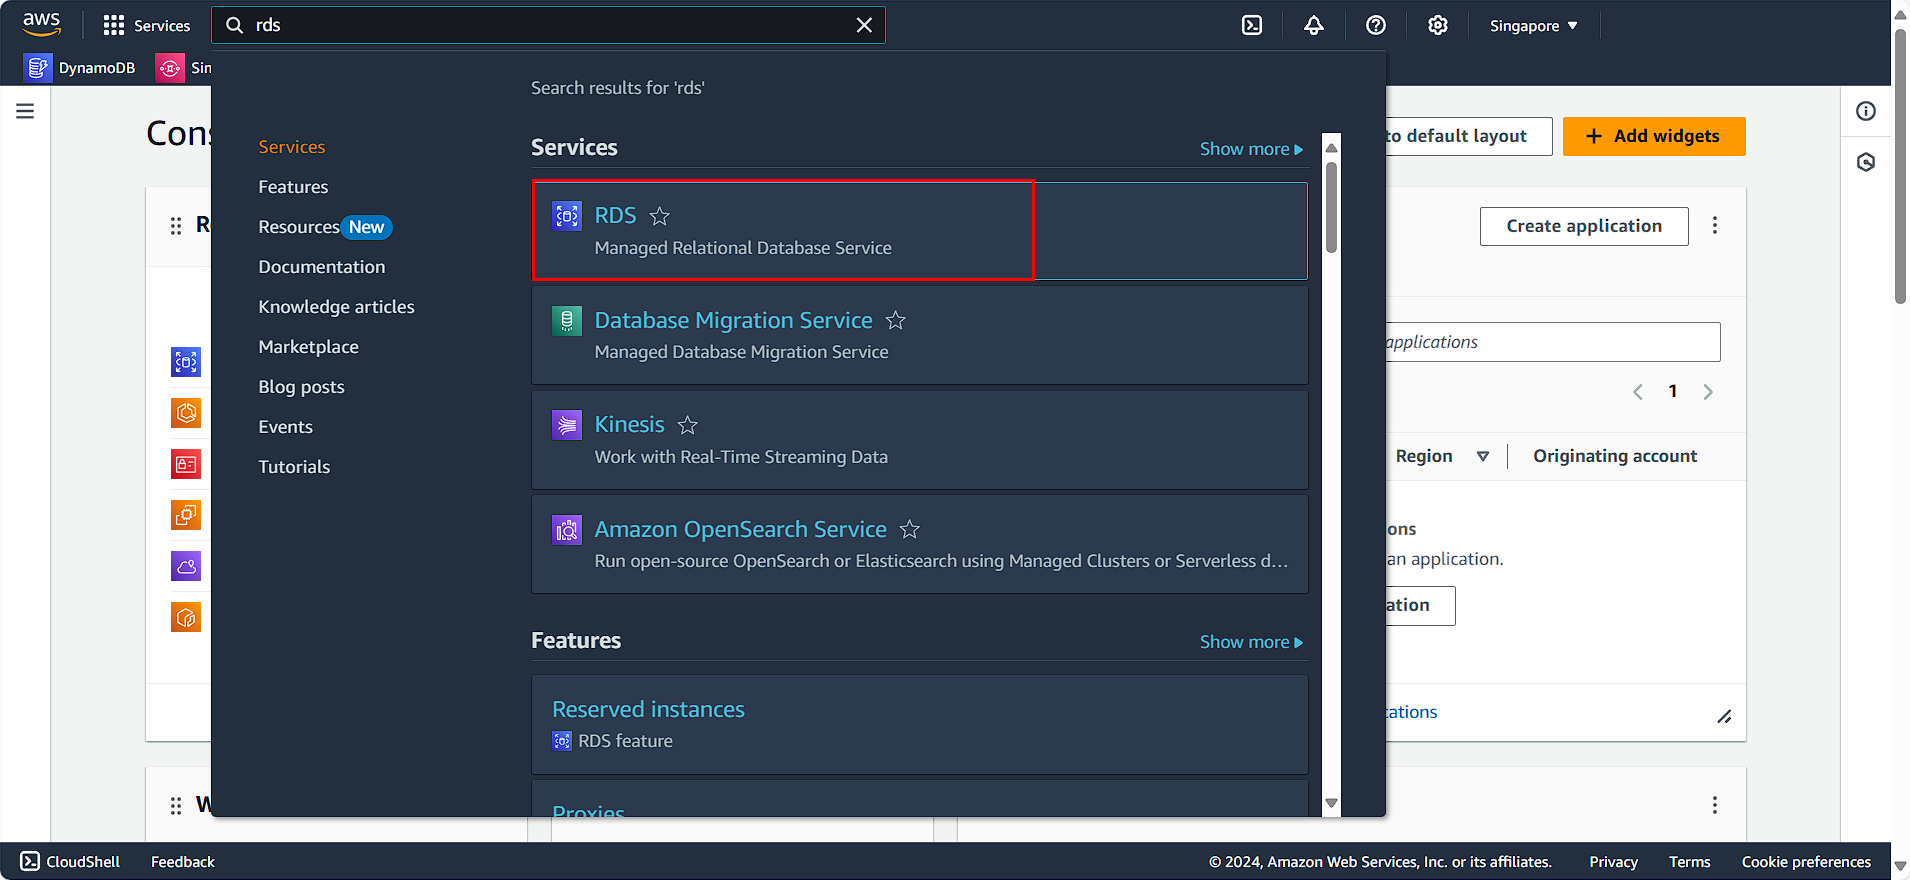
- Navigate to the Amazon RDS console
- Search for and select RDS
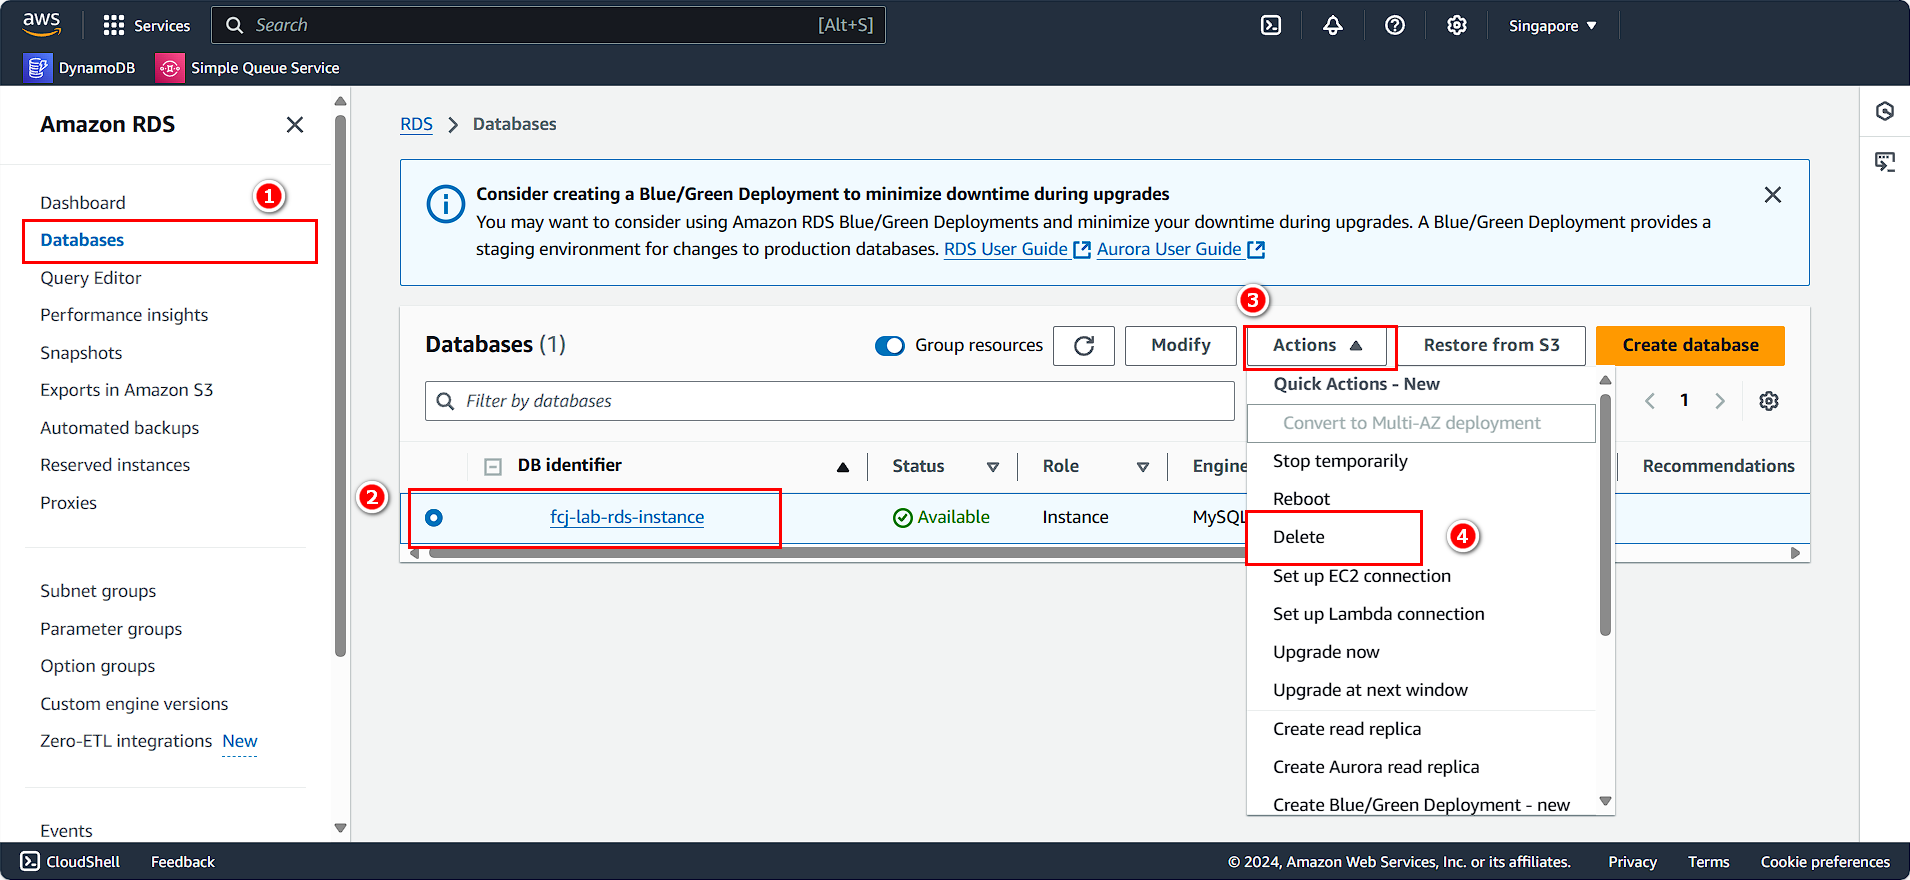
- Select Databases
- Choose the RDS instance created during this workshop
- Click Actions
- Select Delete
- In the confirmation dialog:
- Check the acknowledgment box regarding automated backups and snapshots
- Enter
delete mein the field - Click Delete
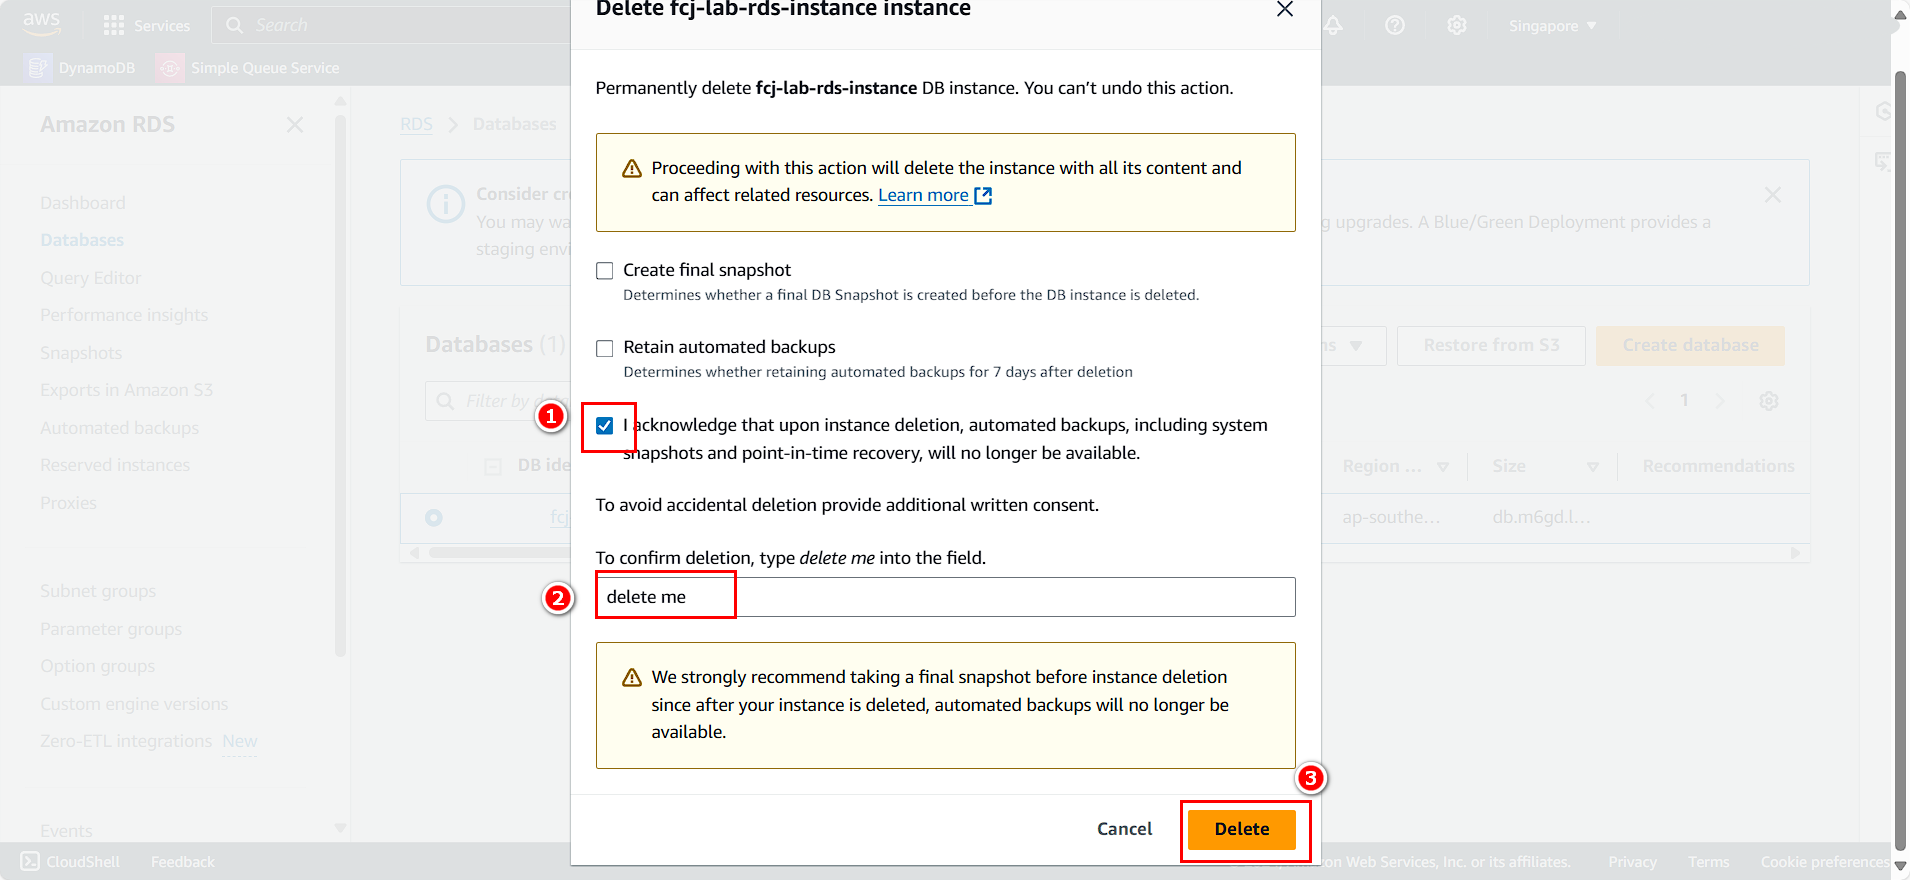
⚠️ Warning: Deleting an RDS instance is permanent. Ensure you’ve created any necessary final snapshots if you need to preserve your data.